
Most kitchen renovation ideas you’ll find online look great in photos but ignore the two things that actually matter once you’re living with the result: storage that works and style that lasts. A kitchen can be gorgeous on day one and feel cramped and cluttered within a year if the design doesn’t account for how you actually cook, eat, and move through the space.
At Suman Custom Carpentry, we design and hand-build custom kitchens at our shop in Hyannis, Cape Cod, so we see firsthand what homeowners regret and what they love years after a renovation. That experience shapes every recommendation in this guide. These aren’t just pretty pictures. They’re practical ideas backed by real build experience, with a focus on solutions that add both function and value to your home.
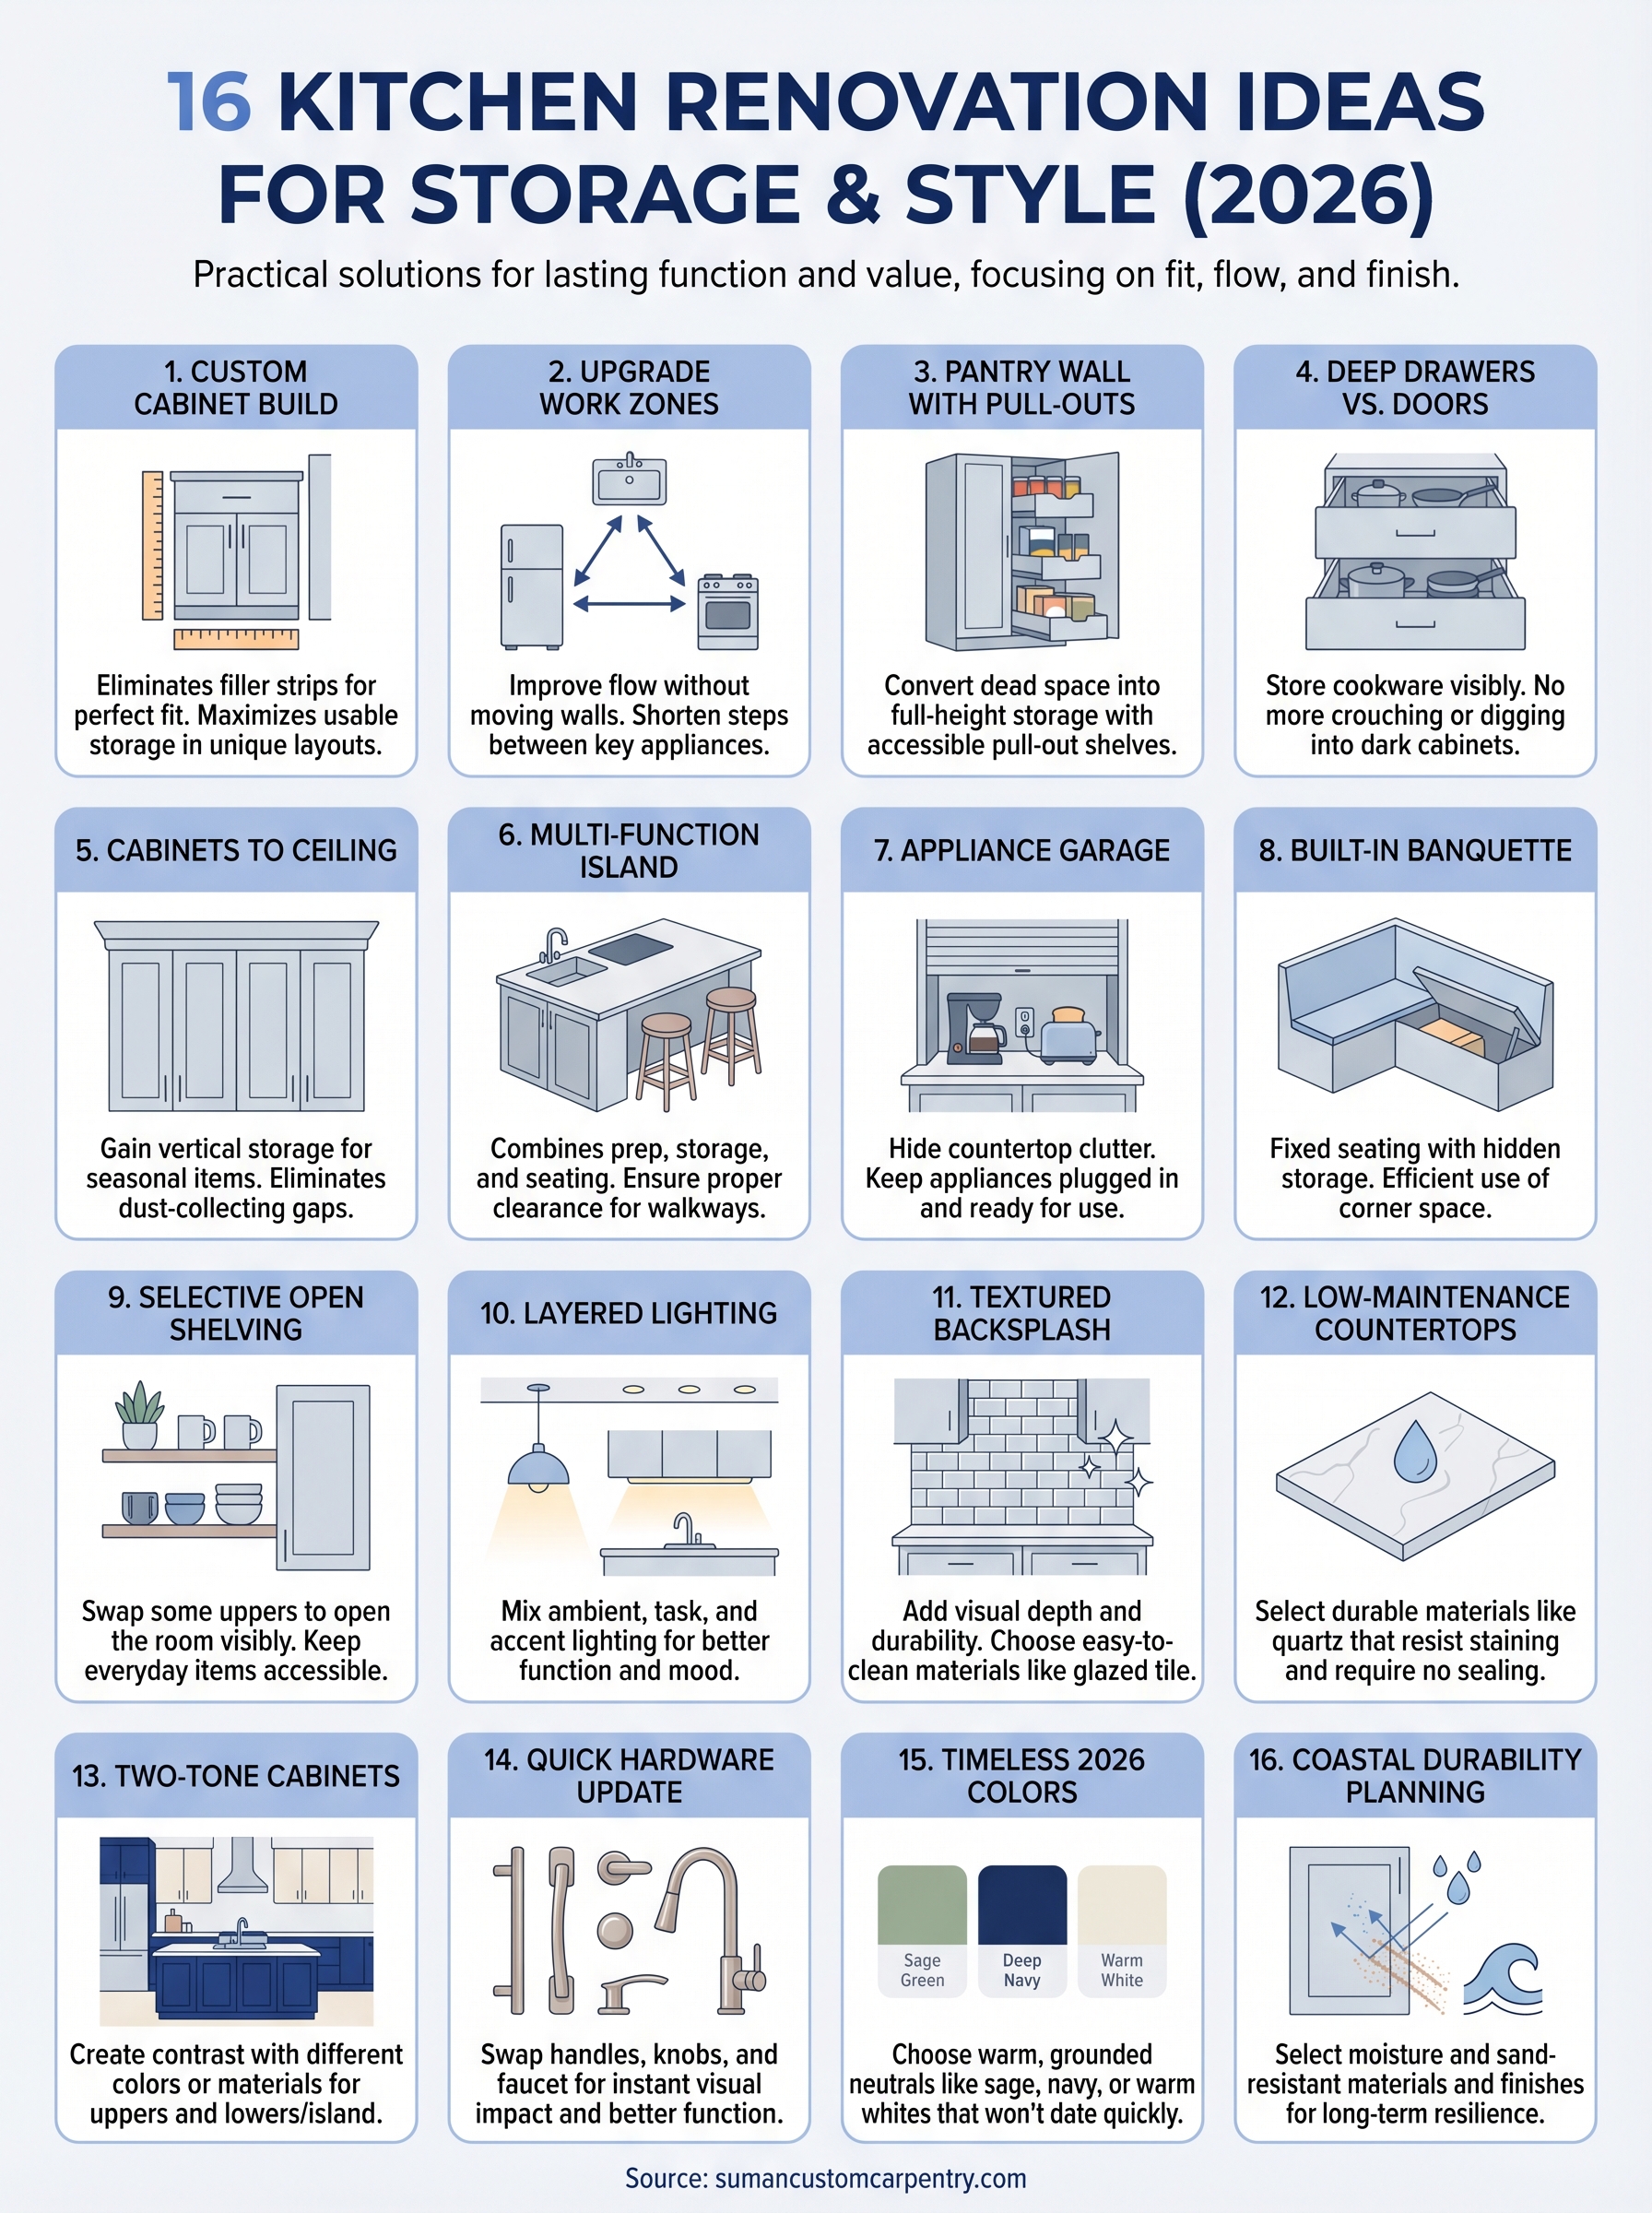
Below, you’ll find 16 renovation ideas organized by what they actually solve, from maximizing storage in tight layouts to upgrading finishes that shift the entire feel of a room. Whether you’re planning a full kitchen remodel or looking for targeted upgrades that make a noticeable difference, this list will help you figure out where your money and effort go the furthest.
1. Choose a custom cabinet build for a perfect fit
Off-the-shelf cabinets ship in fixed increments, usually every three inches, which means filler strips and awkward gaps become part of your kitchen whether you want them or not. A custom cabinet build eliminates that problem entirely. Every box is sized to fit your exact walls, ceiling height, and layout, so you get more usable storage space and a cleaner finished look without compromise.
Where custom cabinetry adds the most value
Custom cabinetry delivers the biggest return in kitchens with non-standard dimensions or unusual angles, which describes a large share of Cape Cod homes built decades ago. If your kitchen has a sloped ceiling, a bump-out, or a layout that stock cabinets simply can’t fill cleanly, custom gives you a solution that fits rather than a workaround that just looks like one. Beyond fit, custom also means you choose every material, interior finish, and organizational feature from the start, so nothing needs to be retrofitted later.
A custom build isn’t just about aesthetics. It’s the most efficient way to capture every cubic inch of storage your kitchen footprint allows.
Design choices that improve daily workflow
When you plan a custom build, you make decisions that directly affect how easy the kitchen is to use every single day. Drawer bank placement, door swing direction, and interior cabinet accessories like pull-outs, roll-trays, and lazy Susans all get resolved before a single box is built. You can also size specific cabinets around the items you actually own, such as a tall cabinet built to hold your sheet pans upright, or a lower cabinet with custom drawer depths sized for your exact cookware. These choices feel minor during planning but add up to a kitchen that works with you instead of against you.
Timeline and budget range to expect
A full custom kitchen at Suman Custom Carpentry runs on a 40 to 60 day build and installation timeline from the point your design is finalized. That window covers fabrication at our Hyannis shop and full installation at your home. Budget-wise, custom work costs more upfront than stock or semi-custom options, but it comes with a lifetime warranty on cabinet boxes and doors, which changes the long-term value calculation significantly. When you factor in durability and fit, custom is often the more practical choice among kitchen renovation ideas for homeowners who plan to stay in their home for years.
2. Keep the layout and upgrade the work zones
Moving walls and plumbing adds serious cost to a renovation. One of the smartest kitchen renovation ideas is to keep your existing footprint and focus your budget on how each zone within that footprint performs. You often get more usable space by improving what’s already there than by tearing it apart.
Use the kitchen triangle to reduce steps
The kitchen triangle connects your refrigerator, sink, and range in a path that determines how many steps you take during every meal. If any leg of that triangle is blocked by an island, a door swing, or a tight corner, your kitchen feels harder to use than it should. Rearranging cabinets or appliances within your existing layout can shorten that path significantly without a full gut renovation.
A well-planned triangle cuts unnecessary movement during cooking, which matters every single day you use the kitchen.
Your range and sink placement matter most because those two points see the heaviest daily traffic. Even shifting a cabinet run to open up the path between them can remove the frustration of a layout that constantly forces you to backtrack.
Fix pinch points with clearances and landing space
Most kitchens have at least one pinch point where two people can’t pass each other or where there’s nowhere to set a hot pan. Standard clearance between facing counters should be 42 to 48 inches at minimum. Adding a landing zone next to the oven or refrigerator costs little but eliminates a recurring daily frustration.
Your contractor can often resolve a pinch point by adjusting an island position or swapping a door swing without touching plumbing or load-bearing walls.
Costs you avoid by not moving plumbing and walls
Relocating a sink or range adds plumbing and electrical work that drives your budget up quickly. Keeping those fixed points lets you direct more money into materials and finishes where the impact is visible every day.
Running new electrical for an island or adding a gas line for a range relocation can add thousands of dollars to a project that didn’t need to go there. Treating your plumbing as a fixed point is one of the most effective ways to protect your renovation budget from unexpected overruns.
3. Add a pantry wall with pull-outs
A dedicated pantry wall is one of the most practical kitchen renovation ideas for homes without a separate pantry room. Full-height cabinetry with pull-out shelves stores dry goods, appliances, and supplies in one organized run without expanding your floor plan.
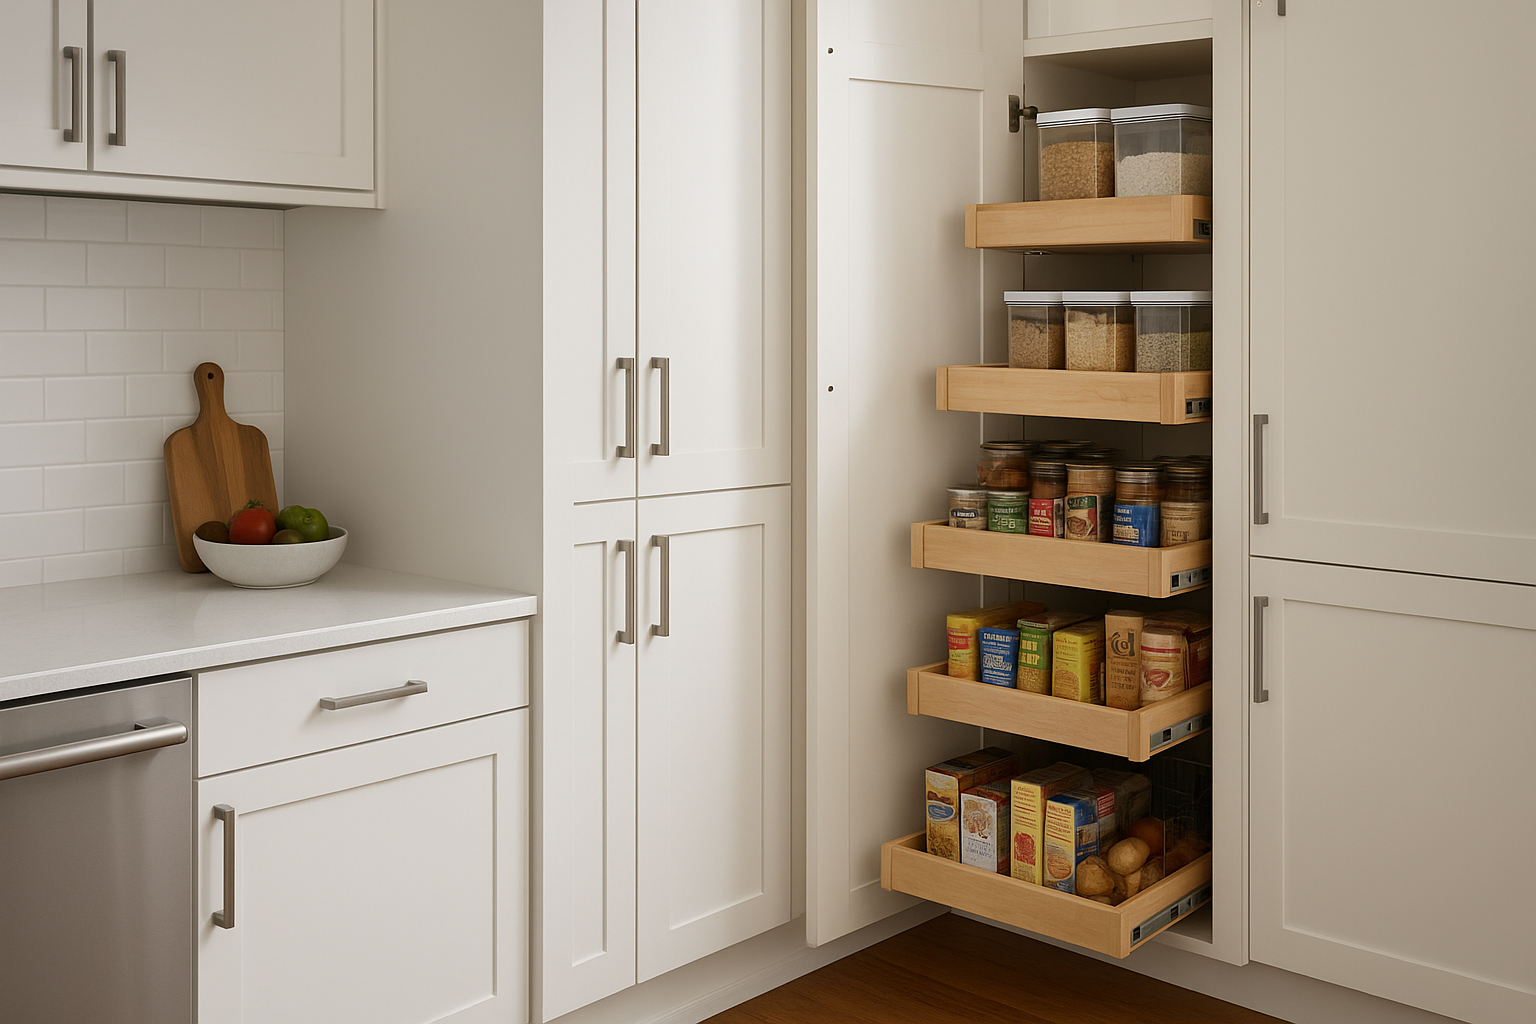
Turn dead space into a full pantry run
Most kitchens have at least one wall that functions as dead space rather than useful storage. Converting that area into a floor-to-ceiling pantry run captures square footage that a standard layout ignores. Pull-outs bring items at the back of deep cabinets forward, so nothing stays buried.
A pantry wall built to your ceiling height captures storage space that standard-height cabinets simply leave unused.
Even a 36-inch cabinet run with interior pull-outs holds significantly more than a standard upper-and-lower pairing over the same footprint.
Pull-out pantry vs. tall cabinet vs. walk-in
Each pantry format suits a different kitchen layout. A pull-out pantry column fits narrow gaps beside a refrigerator or range. Tall pantry cabinets with interior roll-trays work better for wider wall runs. Walk-ins require floor space that most kitchens simply can’t give up.
Knowing which format works for your kitchen comes down to available wall width and how much depth you can spare on each side of the room.
Common dimensions and must-have organizers
Standard pantry cabinet depth is 24 inches, matching base cabinet depth and keeping your run flush. The most useful interior organizers are:
- Pull-out wood or wire shelves for dry goods and canned items
- Door-mounted racks for spices and small bottles
- Roll-out bins for produce or recycling
Adjustable shelf spacing lets you reconfigure the interior as your storage needs change over time.
4. Use deep drawers instead of lower cabinets
Replacing standard lower cabinet doors with deep drawer banks is one of the most overlooked kitchen renovation ideas for improving daily usability. Instead of crouching down and reaching into a dark cabinet to find the right pan, you pull a drawer open and see everything at once from above.
Store pots, pans, and dishes in one reach
Deep drawers typically run 10 to 12 inches tall, which gives you enough clearance to stack pots, lids, and even dinner plates without forcing them to lean or stack inefficiently. A single three-drawer base cabinet can hold everything you’d normally spread across three door cabinets, with the added benefit that nothing gets pushed to the back and forgotten.
Deep drawers beat door cabinets for cookware storage because the contents are always visible and always accessible without kneeling.
Add peg systems and dividers that stay flexible
A bare drawer leaves items sliding around every time you open or close it. Peg board inserts let you configure zones for plates, bowls, and serving pieces so each item stays upright and separated. For pots and pans, adjustable dividers keep lids organized alongside the cookware they belong to, which cuts the time you spend searching every time you cook.
Where drawers beat doors in small kitchens
In a tight kitchen, door swing clearance eats into the workspace you need most. Drawers pull straight out and don’t require you to step back or redirect traffic around an open door. Replacing even two or three lower door cabinets with drawer banks frees up movement space and makes the whole kitchen feel more open during prep.
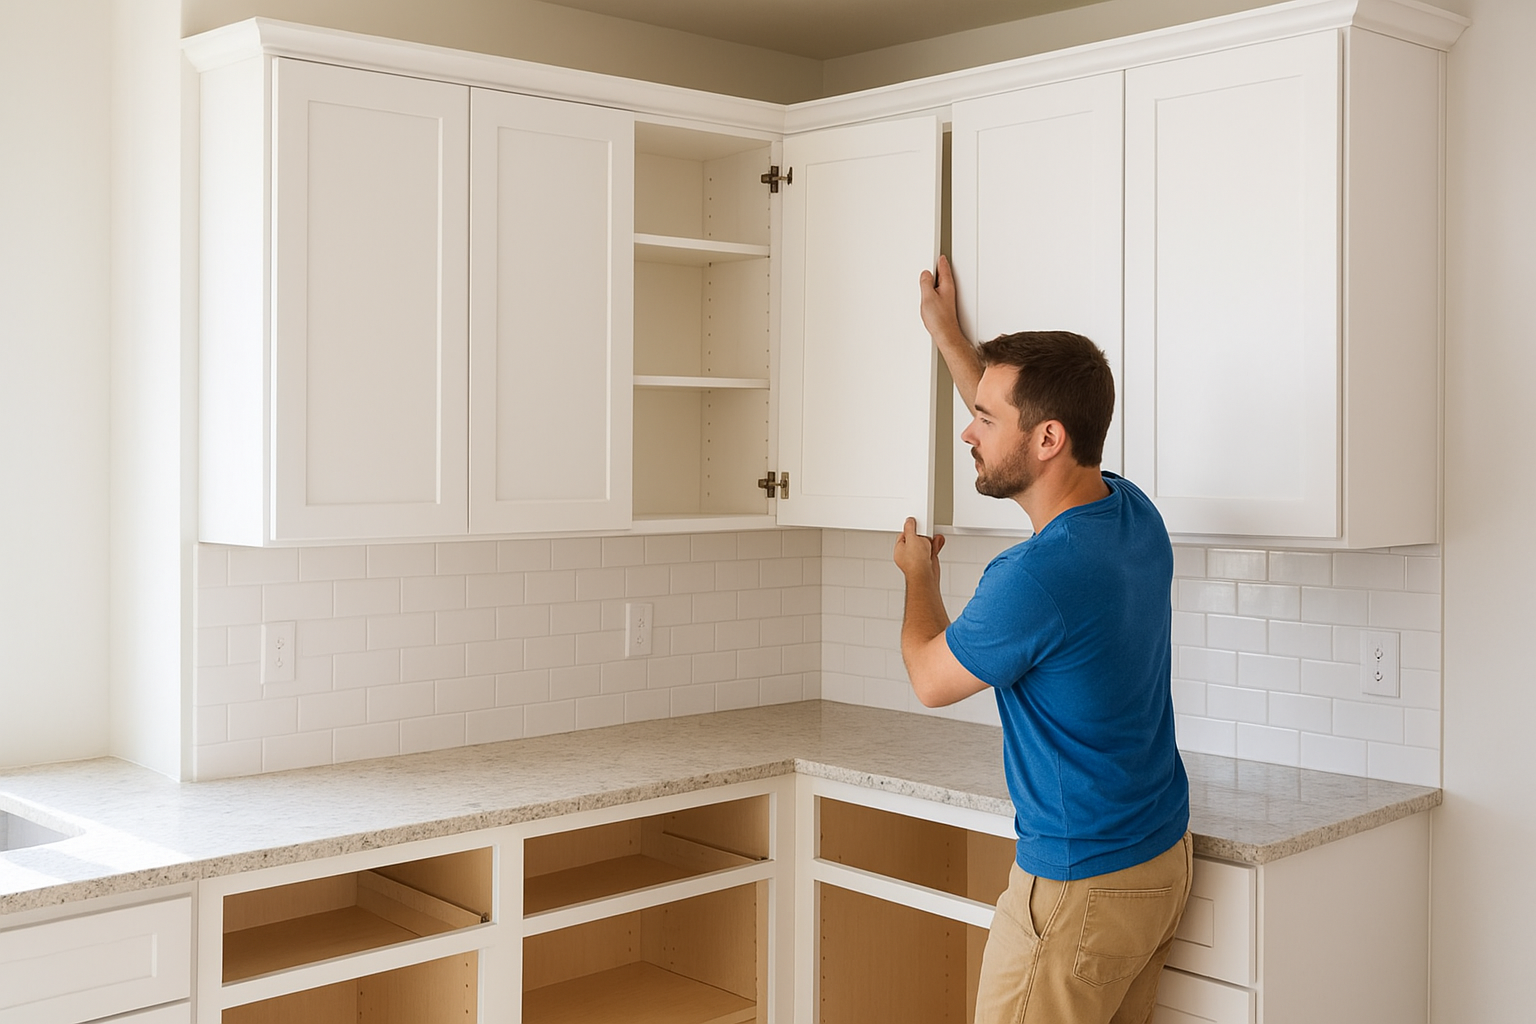
5. Run cabinets to the ceiling for more storage
Standard upper cabinets typically stop at 84 inches, which leaves a gap of six inches or more between the top of your cabinets and the ceiling. That space collects dust and adds nothing to your kitchen. Extending your uppers all the way to the ceiling is one of the simplest kitchen renovation ideas for adding storage without touching your floor plan.
Gain vertical space without expanding the footprint
Running cabinets to the ceiling adds an entire additional row of storage without changing anything about your layout. That top row handles seasonal items, entertaining pieces, and bulk pantry overflow that you don’t reach for daily. In a kitchen where every square foot counts, capturing vertical height is often the fastest way to recover meaningful storage capacity.
Ceiling-height cabinets make a room feel taller and more finished, not just more functional.
Avoid dust shelves with simple trim solutions
When cabinets stop short of the ceiling, the gap above becomes a ledge that collects grease and dust. Running your cabinets flush to the ceiling removes that problem entirely. Where a small gap is unavoidable due to an uneven ceiling, these two options close it cleanly:
- Crown molding for a traditional or transitional look
- Scribe molding for a flat, built-in appearance with minimal profile
Choose door styles that keep tall cabinets balanced
Tall cabinet runs can feel heavy if the door proportions and panel profiles don’t suit the kitchen’s overall scale. Simpler styles with flat or shaker panels keep ceiling-height cabinets from dominating the room. Pairing tall uppers with a contrasting lower cabinet color also breaks up the visual weight and keeps the design grounded.
6. Build an island that works harder
A kitchen island is one of the most versatile kitchen renovation ideas you can act on, but only if it’s designed to do more than take up floor space. A well-planned island combines prep surface, storage, and seating into a single element that makes your whole kitchen more functional from morning to dinner.
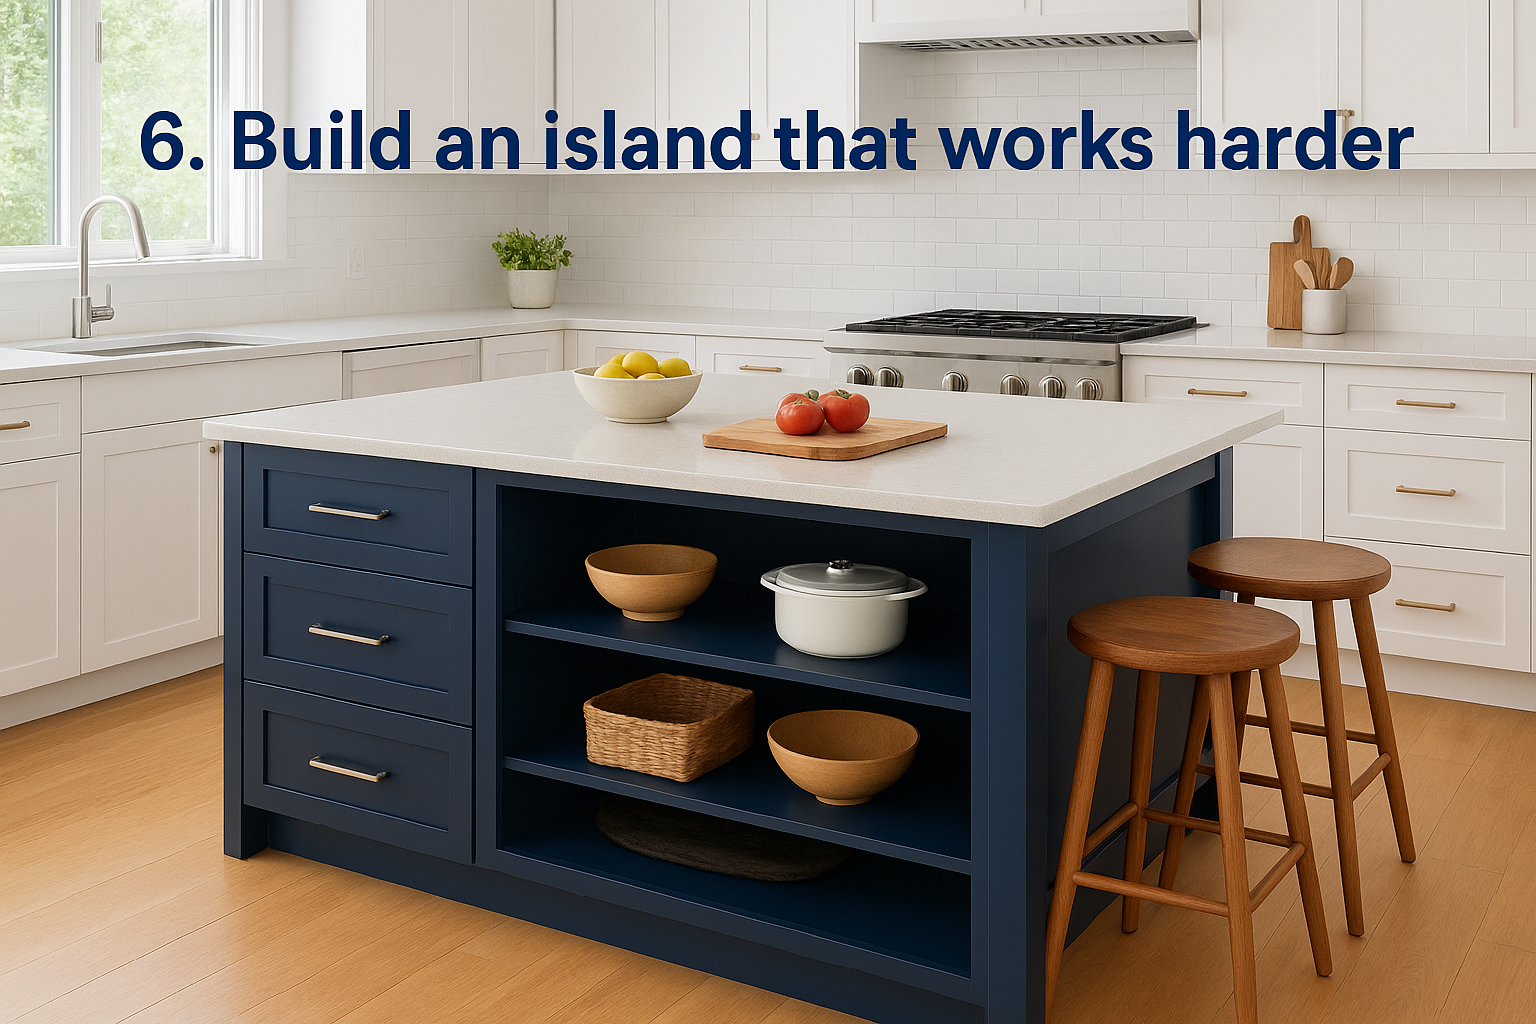
Add storage, seating, and prep space in one piece
Your island can carry a lot of weight if you plan its interior from the start. Base drawers, open shelving, and cabinet doors on the non-seating sides turn the island into a major storage zone for cookware, serving pieces, and pantry overflow. On the seating side, a 10 to 12-inch overhang gives you enough clearance for counter-height stools without cutting into the prep surface above.
A custom-built island designed around your specific needs delivers far more daily value than a stock piece dropped into the center of the room.
Pick the right island size for safe walkways
An island that’s too large creates the same problem as a bad layout: traffic jams and blocked pathways. You need a minimum of 42 inches of clearance on all working sides, and 48 inches if two people cook at the same time. Measure your available floor space before committing to any dimensions.
Decide between fixed, furniture-style, and rolling
Each island type fits a different situation. A fixed, built-in island maximizes storage and integrates cleanly with your cabinetry. A furniture-style piece adds warmth and contrast with open legs and a different finish. A rolling cart works for smaller kitchens where you need flexibility. For permanent installations, a built-in island almost always outperforms the alternatives on both storage capacity and finish quality.
7. Create an appliance garage and hidden charging
Countertop appliances take up more visual space than almost anything else in a kitchen, and they rarely look good doing it. An appliance garage is a cabinet section built into your upper or base cabinetry with a door that conceals everything inside when it’s not in use. This is one of the most underused kitchen renovation ideas for keeping a kitchen looking clean without hiding things you use every day.
Hide countertop clutter without losing access
An appliance garage sits at counter height with a dedicated opening that lets you use your appliances in place without pulling them out and finding somewhere to set them. Tambour doors, lift-up panels, or bi-fold doors all work depending on your cabinet depth and style. The key is that access stays instant while the visual clutter disappears the moment the door closes.
A well-placed appliance garage removes the need to choose between keeping appliances accessible and keeping counters clear.
Add outlets, USB, and task lighting the right way
Every appliance garage needs dedicated electrical outlets built into the interior, which means planning this during the cabinet design phase, not after installation. Adding a USB-A or USB-C outlet inside the garage creates a clean charging zone for devices that would otherwise occupy a counter outlet. Hardwired task lighting inside the cabinet makes it easy to see what you’re reaching for without leaning in.
Plan for coffee, toaster, mixer, and air fryer zones
Different appliances need different clearances. An air fryer or toaster oven requires ventilation space above it, so cabinet depth and door material both matter. A stand mixer or espresso machine needs enough vertical clearance to open and operate fully without pulling it forward each time. Measure each appliance before you finalize interior dimensions.
8. Add a banquette or built-in breakfast nook
A built-in banquette turns a corner or wall section into a custom seating zone that doubles as a storage structure. Instead of freestanding chairs that get pulled out and pushed back constantly, a banquette gives you fixed seating with a smaller footprint, which frees up floor space and makes the eating area feel like it was designed for the room rather than placed in it as an afterthought.
Turn a corner into seating with extra storage
Corner spaces near dining areas are often wasted in standard kitchen layouts. A built-in L-shaped or straight bench fills that corner with seating sized to your exact dimensions, and the bench frame itself becomes additional storage without adding anything extra to your floor plan. This is one of the more practical kitchen renovation ideas for homes where the kitchen and dining area share a single open space.
A banquette built into a corner recovers square footage that a standard table-and-chair setup can never use efficiently.
Use lift-up lids, drawers, or cubbies under the bench
The bench seat can open to reveal deep storage for bulky or seasonal items like extra linens, board games, or kitchen overflow. Lift-up lid mechanisms work best for wider bench sections, while pull-out drawers under the seat face suit tighter spaces where lifting a full lid is not practical.
Choose fabrics and finishes that clean easily
Seat cushions and the bench frame both take daily wear from meals, spills, and general use, so material choices matter more here than almost anywhere else in the kitchen. Stain-resistant or outdoor-grade fabric holds up far better than standard upholstery, and a painted or sealed wood finish on the frame wipes down quickly without absorbing moisture or grease.
9. Swap some uppers for open shelving
Replacing a few upper cabinets with open shelves is one of the most effective kitchen renovation ideas for making a room feel larger without changing the layout. Removing cabinet doors on one or two sections opens the wall visually and gives frequently used items a home that’s immediately accessible.
Open the room without giving up storage
Open shelving works best when you install it in high-traffic zones where you reach for the same items daily, like glasses, mugs, or bowls. Keeping those items visible cuts the time you spend opening and closing cabinet doors, and the absence of door frames makes the wall section feel taller and more open.
Replacing just two upper cabinet sections with open shelves can shift the entire feel of a kitchen from closed and heavy to open and functional.
Style shelves so they look intentional, not messy
The biggest mistake with open shelves is treating them like extra storage without thinking about what goes on them. Group similar items by height and use, and limit decorative objects to a few pieces that complement your kitchen’s color palette. Shelves that look curated rather than cluttered depend less on how many items you own and more on how consistently you edit and reset them after daily use.
Combine shelves with closed storage for balance
Open shelves work better alongside closed cabinets than on their own. Keep everyday items on open shelves and move bulky, mismatched, or less attractive items behind doors. This split approach gives you the visual benefit of open shelving without forcing every item in your kitchen to be display-worthy.
10. Light the kitchen in layers
Lighting is one of the most impactful kitchen renovation ideas that most homeowners treat as an afterthought. Getting it right means planning three distinct layers before you finalize your cabinet layout, because where your cabinets land determines where your light fixtures can go.
Mix ambient, task, and accent lighting
Ambient lighting handles general illumination for the whole room, typically through recessed ceiling fixtures or a central pendant. Task lighting targets specific work surfaces where you prep, cook, and clean. Accent lighting adds depth by highlighting shelves, toe kicks, or the interior of glass-front cabinets.
Treating each lighting layer as a separate decision gives you far more control over how the kitchen feels at different times of day.
Place pendants and recessed lights to avoid shadows
Pendants work best over an island or peninsula where they hang 24 to 30 inches above the counter surface without blocking sightlines across the room. Recessed lights need to sit 18 to 24 inches from cabinet faces so the beam hits the counter rather than casting a shadow off the cabinet edge.
Your electrician and cabinet designer need to coordinate on this before either rough-in or installation begins, or you risk fixtures ending up in the wrong position.
Add under-cabinet lighting for prep and safety
Hardwired LED strips mounted under upper cabinets eliminate the shadow your body casts when you stand at the counter. This matters most at the range and primary prep area, where poor visibility creates both frustration and real safety risk. Puck lights work in a pinch, but a continuous LED strip covers the full counter run without dark spots between fixtures.
11. Pick a backsplash that adds texture and durability
The backsplash covers some of the most visible wall space in your kitchen and takes daily exposure to splatter, steam, and grease. Treating it as just a protective layer misses a real opportunity to add texture, depth, and visual weight to your renovation without major construction.
Choose materials that wipe clean fast
Not every attractive backsplash material handles daily kitchen mess equally well. Glazed ceramic, porcelain, and glass tile all clean quickly with a damp cloth and resist staining without regular sealing. Natural stone like marble adds texture and warmth but requires periodic sealing to prevent grease from absorbing into the surface over time.
Your backsplash material choice affects how much time you spend cleaning after every meal, not just how the kitchen looks on day one.
Use full-height backsplash for a taller look
Running tile from the counter all the way to the bottom of your upper cabinets is one of the more overlooked kitchen renovation ideas for adding visual height. A full-height backsplash eliminates the painted drywall band that interrupts the wall and makes the space between counters and cabinets feel shorter than it actually is.
Extending tile to the ceiling behind an open shelf run or range hood takes this further and makes the wall feel continuous rather than broken into sections.
Match grout and tile size to your maintenance style
Smaller tiles mean more grout lines, which collect grease and require more frequent scrubbing. Larger format tiles or slab backsplashes reduce grout joints significantly and cut cleaning time in half. If you prefer a traditional subway tile pattern, use epoxy grout over standard cement grout for better long-term stain resistance.
12. Choose durable, low-maintenance countertops
Countertops take more daily abuse than almost any other surface in your kitchen, and the material you choose affects both your cleaning routine and your long-term renovation budget. Among the most practical kitchen renovation ideas, selecting the right countertop material upfront saves you from costly repairs or replacements down the road.
Compare quartz, granite, and other top choices
Quartz countertops are engineered from natural stone and resin, which makes them non-porous and resistant to staining without any sealing. Granite offers natural variation and heat resistance but requires periodic sealing to prevent absorption. Butcher block adds warmth and works well for a prep zone, though it needs regular oiling and careful management around water.
Quartz edges out most competitors for low-maintenance performance because it handles daily spills and heat without requiring any ongoing treatment.
Use waterfall edges and thick profiles strategically
A waterfall edge, where the countertop material runs vertically down the side of an island, adds visual weight and a high-end finish to a single focal point. Thick profiles of two to three inches on perimeter counters read as substantial and custom without increasing material costs dramatically if you use a mitered build-up rather than solid slab thickness.
Plan seams, overhangs, and sink cutouts early
Seam placement affects both appearance and structural integrity, so your fabricator needs your cabinet layout finalized before templating begins. Standard overhangs run one and a half inches on perimeter counters and up to twelve inches on seating sides of islands. Sink cutouts and faucet holes need to be marked before fabrication, not after the slab is cut.
13. Refresh with two-tone or mixed-material cabinets
Two-tone and mixed-material cabinets are among the most effective kitchen renovation ideas for updating a kitchen’s look without a full rebuild. By using two distinct finishes or materials across your cabinetry, you create visual contrast that makes the space feel intentional and layered rather than flat.
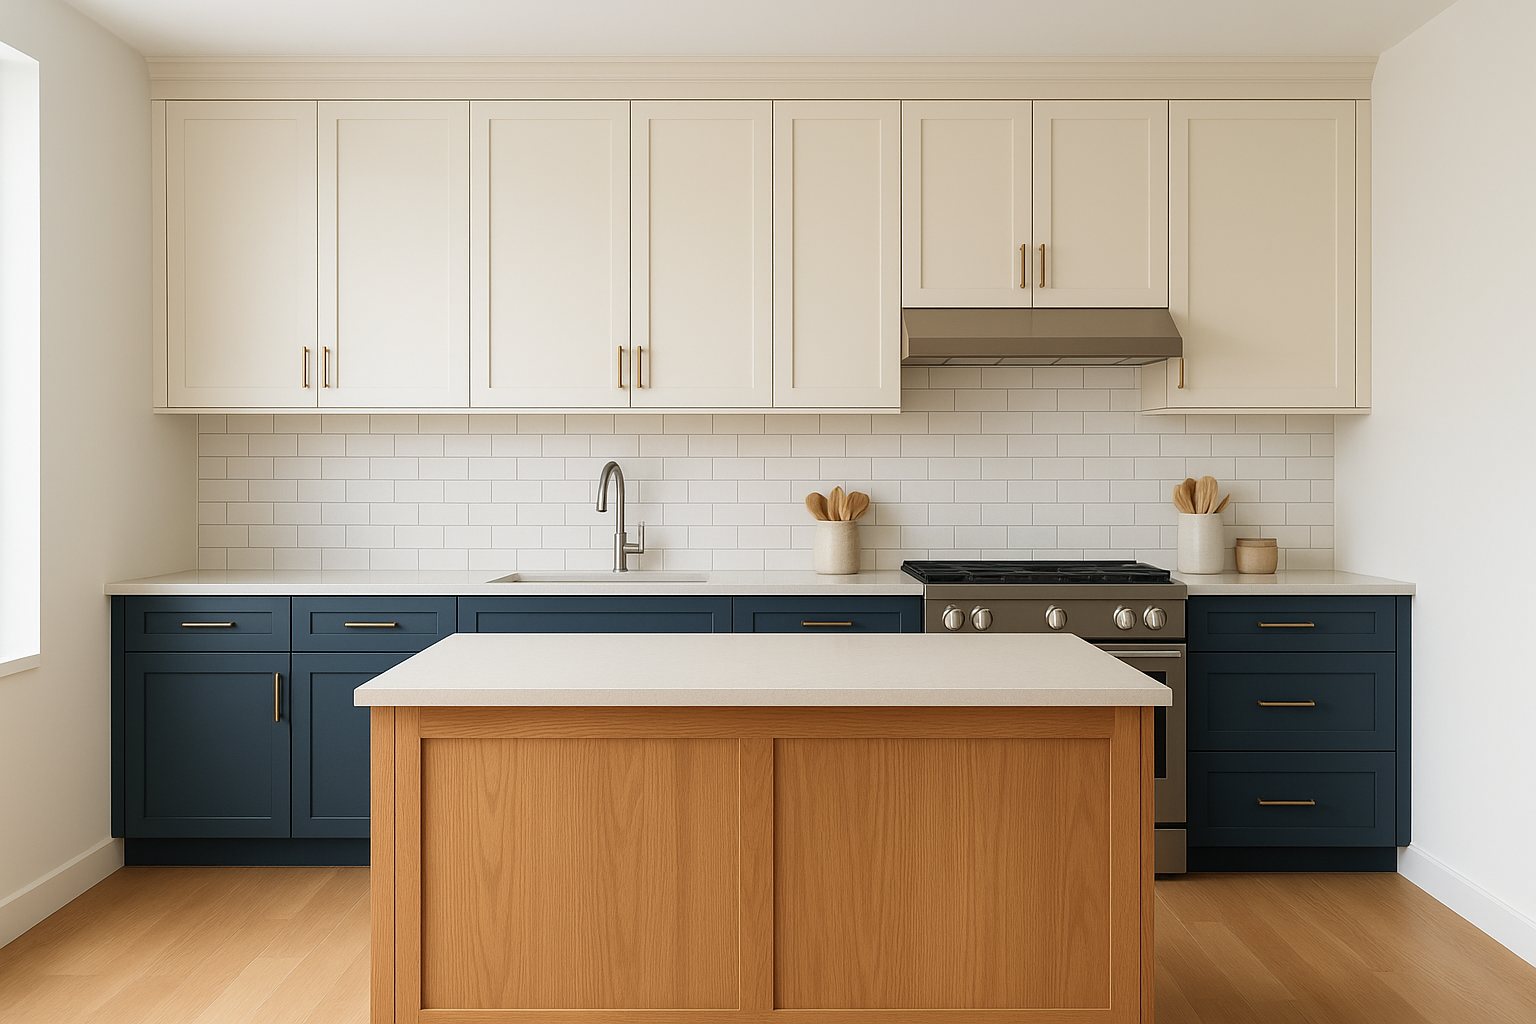
Use contrast to add depth without feeling busy
The key to contrast that works is keeping one element dominant and the other secondary. Upper cabinets in a lighter tone with darker lowers grounds the room and draws the eye downward, which makes ceiling height feel more generous. Pairing two colors works best when they share a similar undertone, such as a warm white upper with a warm sage or taupe lower.
Contrast built on undertone harmony reads as designed, while contrast built on random color selection often feels disconnected.
Combine painted finishes with wood tones
Mixing a painted finish with a natural wood tone adds warmth that an all-painted kitchen can lack. A painted perimeter in a soft neutral paired with a wood-tone island creates a focal point that breaks up the space without adding visual noise. Lighter wood tones like white oak work across a wide range of paint colors and age well over time.
Balance bold choices with simple lines
When you use bold color or strong material contrast, cabinet door profiles need to stay simple. A flat or basic shaker profile lets the color carry the design without competing with it. Complex raised panels paired with strong color contrast tend to overwhelm a space, while clean lines let both elements read clearly.
14. Update hardware and fixtures for quick impact
Swapping cabinet hardware and fixtures is one of the fastest kitchen renovation ideas you can execute without touching a single cabinet box or countertop. New pulls, knobs, and a faucet cost a fraction of structural changes but shift the visual tone of the entire room in a weekend.
Pick finishes that work with existing appliances
Your hardware finish needs to coordinate with your appliances, not fight them. Stainless steel appliances pair cleanly with brushed nickel or matte black pulls. Brass or unlacquered bronze reads warmer and works better alongside panel-ready or integrated appliances that don’t expose a metal face. The rule is simple: stick to one or two metal finishes across the entire kitchen to keep the space looking deliberate rather than assembled from different renovation phases.
Mixing three or more metal finishes in a kitchen rarely looks intentional, regardless of how well each individual piece looks on its own.
Upgrade the faucet for function, not just looks
Your faucet handles more contact than almost any other fixture in the kitchen. A pull-down sprayer with a high-arc spout gives you clearance to fill tall pots and rinse the full sink basin without fighting the fixture. Look for models with ceramic disc valves rather than rubber washers, which wear out faster and require more maintenance over time.
Fix the small details that make kitchens feel dated
Outdated light switch plates, outlet covers, and cabinet hinges undermine an otherwise updated kitchen. Replacing exposed hinges with soft-close concealed hardware removes visual clutter from door faces and eliminates the noise of cabinets slamming shut. Matching your outlet covers to your backsplash or wall color is a small step that makes the whole room feel more finished.
15. Choose 2026-friendly colors that feel timeless
Color is one of the most personal decisions in any kitchen renovation, and in 2026 the strongest kitchen renovation ideas around color share a common thread: they lean warm, grounded, and livable rather than stark or trendy. The colors getting the most traction right now are ones that work across multiple design styles and won’t feel dated in five years.
Use new neutrals like sage, navy, and warm whites
The shift away from cool gray and bright white has been underway for a few years, and it’s now fully settled. Sage green, deep navy, and warm off-whites are the neutrals driving kitchen renovations this year. These tones read as calm and considered rather than safe, and they work equally well in traditional, transitional, and more contemporary spaces.
A color that photographs well but feels cold in daily life is never the right choice for a room you use multiple times every day.
Add color on the island or lowers to stay flexible
Using a bold or darker color on your island or lower cabinets while keeping uppers in a lighter neutral gives you a two-tone look that’s easy to update later. Your uppers are harder to repaint without disrupting the whole kitchen, so keeping them in a timeless warm white or soft linen protects your flexibility. The island or lowers become the statement, and you can shift them over time without a full renovation.
Test undertones against floors, counters, and light
Paint chips look completely different under store lighting than they do in your actual kitchen. Undertones in your flooring and countertops pull color in directions you won’t anticipate until a sample is on the wall. Apply large test patches and live with them through morning and evening light before you commit.
16. Plan for coastal durability in Cape Cod homes
Cape Cod kitchens face conditions that inland homes simply don’t. Salt air, humidity, and wind-driven sand work into every surface over time, and materials that perform well elsewhere can fail faster than you’d expect in a coastal environment. Adding durability planning to your kitchen renovation ideas from the start protects your investment and keeps repair costs down for years.
Choose materials that handle humidity and sand
Moisture-resistant cabinet boxes built from solid wood or marine-grade plywood outlast particleboard significantly in high-humidity conditions, where cheaper materials swell and lose structural integrity. For countertops, quartz outperforms most natural stone because its non-porous surface resists the moisture that coastal air delivers year-round. Porcelain tile is your strongest flooring option because it handles sand abrasion and standing water without requiring a sealant to stay protected.
Choosing materials rated for high-humidity conditions from the start costs far less than replacing swollen cabinet boxes within the first five years.
Protect high-use areas with the right finishes
Catalyzed or conversion varnish finishes on your cabinet exteriors resist moisture penetration and wipe clean faster than standard paint when sand and salt residue settle on the surface. Focus extra attention on door edges and drawer faces, where daily contact and coastal conditions combine to wear down a softer finish well ahead of schedule.
Add smart storage for beach gear and bulky items
Your kitchen layout should include dedicated zones for items that arrive from the beach without a set place to land. Planning specific storage near your kitchen entry keeps wet towels, bags, and sandy gear away from your prep surfaces:
- Wide lower drawers for towels and small gear
- Pull-out bins near the entry for wet or sandy items
- Tall cabinet space for beach bags and bulky seasonal equipment
Next steps
These 16 kitchen renovation ideas cover the full range of what a thoughtful renovation can accomplish, from storage upgrades that change how you move through the room to finish choices that shape how the space feels every day. The ideas that deliver the most value share a common thread: they solve a real problem in your specific kitchen rather than copy a trend that works somewhere else.
Your next step is figuring out which of these ideas fit your layout, your budget, and how you actually use your kitchen. Some upgrades, like hardware and lighting, move fast. Others, like a full custom cabinet build, take planning time that pays off in a result built exactly around your home. If you’re ready to talk through your project with a builder who works in Cape Cod homes every day, contact Suman Custom Carpentry to start the conversation.