
Crown molding looks simple until you make your first cut and the corner gapes open like a bad joke. Learning how to cut crown molding corners means understanding two different animals: inside corners and outside corners, each with their own angle math and their own way of punishing guesswork. Most gaps and caulk-filled disasters trace back to one mistake, cutting the molding flat on the saw table instead of accounting for the spring angle it actually sits at on the wall.
This guide walks you through the exact steps for both cuts, no shortcuts, no vague "just eyeball it" advice. You’ll learn how to set your miter saw for standard 45-degree corners, how to read a coped joint for inside corners that never crack open, and how to handle the outside corners that trip up even experienced trim carpenters when walls aren’t square.
We build custom cabinetry and trim work every week in our Hyannis shop, and crown molding corners are where DIY projects usually stall out. Follow these steps in order, measure twice, and you’ll get tight, professional-looking joints on your first real attempt.
What you need before cutting crown molding corners
Gather everything before you make a single cut. Nothing kills momentum on a crown molding job faster than realizing halfway through that you’re missing a compound miter saw or the right blade, then driving to the hardware store with a half-finished piece of molding sitting in the truck bed. Set up a proper cutting station near the room you’re trimming, with enough clear space to handle full-length boards without bumping into furniture or walls.
Tools that make the cut
A compound miter saw is non-negotiable for this job. You need a saw that tilts and pivots, because standard crown corners require a miter angle and a bevel angle cut at the same time. A basic miter saw without bevel capability will leave you stuck on the very first cut.
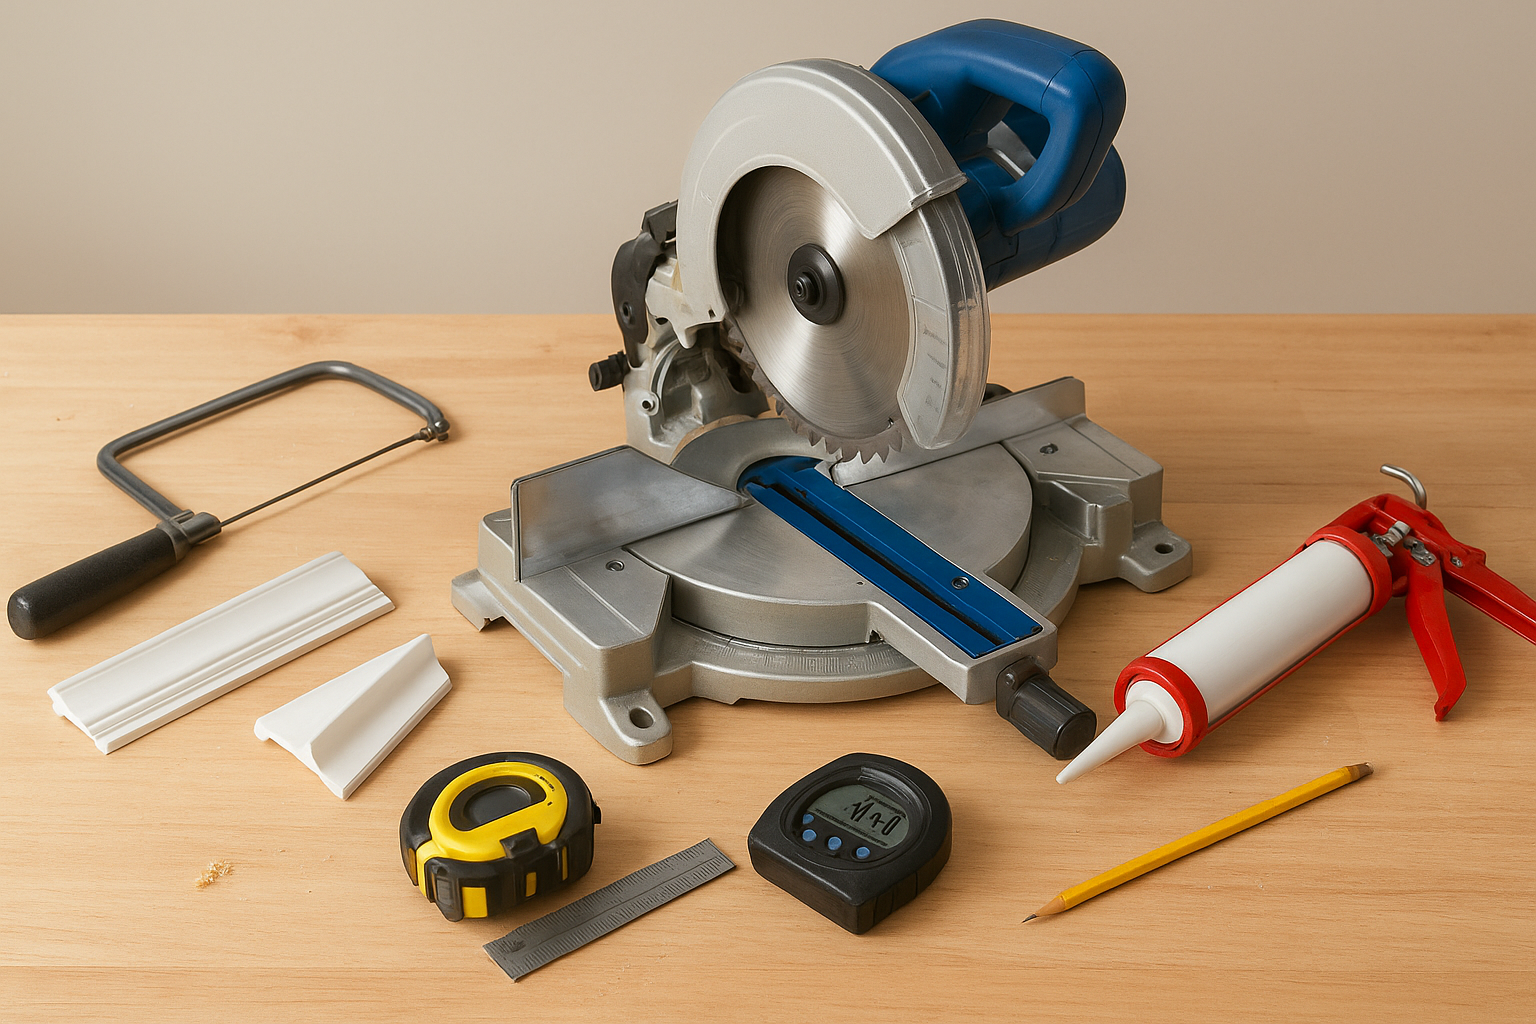
| Tool | Purpose | Notes |
|---|---|---|
| Compound miter saw | Cuts miter and bevel angles together | 10" or 12" blade, 60+ teeth for clean cuts |
| Coping saw | Shapes inside corner joints | Fine-tooth blade, curved handle for control |
| Crown molding stops or jig | Holds molding at the correct spring angle | Some saws include built-in stops |
| Tape measure | Measures wall runs and corner distances | 25-foot minimum, metal case |
| Combination square | Checks whether corners are true | Confirms 90-degree corners before you cut |
| Digital angle finder | Measures the actual wall corner angle | Essential for older or out-of-square homes |
| Sharp pencil | Marks cut lines | Fine point, never a marker |
| Caulk gun and paintable caulk | Fills hairline gaps after installation | A backup, not a substitute for good cuts |
Molding and material prep
Order roughly 10 percent more molding than your measured wall lengths. Crown molding punishes mistakes, and a botched cut on your only piece of stock means waiting days for a replacement order to arrive. Buy from a single batch or lot when you can, since color and profile depth sometimes vary slightly between production runs, and that difference shows up fast once the pieces are hanging side by side.
Know your spring angle before you cut
Every crown molding profile sits against the wall and ceiling at a specific spring angle, most commonly 38 or 45 degrees. This angle determines how you position the molding on your saw table for every cut, and getting it wrong throws off the whole run before you’ve cut a single corner.
Get the spring angle wrong once, and every corner cut after it will be wrong too.
Check the molding packaging or ask your supplier for the spring angle spec before you touch the saw. If nobody can tell you, hold a short scrap piece against a framing square set up to mimic a wall-ceiling corner, then measure where the molding actually contacts both surfaces. That quick check saves you from cutting an entire room’s worth of molding at the wrong tilt.
Safety gear you shouldn’t skip
Wear safety glasses every time you run the saw, since crown molding throws off fine dust and the occasional splinter when it’s being cut against the grain. Keep a dust mask close by too, especially if you’re working with stain-grade wood in a closed room with poor ventilation. Hearing protection matters just as much, particularly once you start making test cuts to dial in your angles, because that saw will be running a lot more than you expect on your first attempt.
Step 1. Set up your miter saw for crown molding
Getting your saw dialed in correctly is the single biggest factor in whether your corners fit tight or leave you reaching for the caulk gun. Crown molding never lies flat on the saw table the way baseboard or door casing does, so you need to recreate the exact angle it sits at on the wall before you make any cut.
Position the molding upside down and backward
Most trim carpenters use the nested method, which means flipping the molding upside down and backward against the saw fence so the flat back edges rest against the table and fence just like they’d rest against the ceiling and wall. This is where a crown molding jig or a set of stops pays for itself, since they hold the molding at the correct spring angle without you fighting to keep it steady during the cut. If your saw doesn’t come with built-in stops, clamp a scrap block to the fence at the exact spring angle you confirmed earlier, then rest every piece against that block for consistency across the whole room.
Dial in the compound angle settings
For a standard 90-degree corner, you’ll set both a miter angle and a bevel angle together, and the exact numbers depend on your saw and your spring angle. Use this table as your starting reference:
| Spring Angle | Miter Angle | Bevel Angle |
|---|---|---|
| 38 degrees | 31.6 degrees | 33.9 degrees |
| 45 degrees | 35.3 degrees | 30 degrees |
A miter saw set to the wrong bevel angle will cut a clean, confident line that’s wrong every single time.
Some saws have dedicated crown molding stops that skip the math entirely and lock the saw into these positions automatically. Check your saw’s manual before you start guessing at settings, since manufacturers often print a compound miter chart right on the saw itself.
Test your setup before cutting real stock
Never trust a saw setting without proving it first. Cut two short scrap pieces at matching opposite angles, then hold them together in a corner shape on your workbench or against a spare framing square. If the joint sits flush with no gap, your setup is correct and you can move to your actual molding. If you see a gap at the top, bottom, or face of the joint, adjust the bevel angle slightly and test again rather than pushing forward and hoping the wall corner will somehow fix it for you.
Step 2. Measure and mark each corner
Once your saw is dialed in, resist the urge to jump straight to cutting. Accurate measurements at this stage decide whether your crown molding corners close up tight or leave you fighting gaps later. Measure every wall run at the point where the molding will actually sit, not along the floor, since crown sits high on the wall and ceilings aren’t always perfectly level with the floor below them.
Measure long point to long point
Crown molding corners get measured from the long point of one angled cut to the long point of the next, not from wall to wall like baseboard. Run your tape measure along the wall at ceiling height, then transfer that number to your molding by marking the long point on the back edge, the side that will face the wall once installed. Marking on the back edge matters here, because the front face of the molding sits at a different length than the back once you factor in the angle of the cut.
Mark which direction the angle needs to run
Before you touch the saw, write directly on the molding with your pencil. A quick note like "L" for left corner or "O" for outside corner saves you from cutting a mirror image of the angle you actually need. This sounds obvious until you’re standing at the saw holding a ten-foot board and can’t remember which way the room turns.
A five-second pencil mark now beats a wasted eight-foot board later.
Double-check every corner before cutting
Walk the room and confirm each corner’s type using this quick checklist:
- Inside corner: the corner points into the room, like where two walls meet in a standard rectangular room
- Outside corner: the corner points out toward you, common on fireplace surrounds, columns, or bump-outs
- Corner angle: use your combination square or digital angle finder to confirm it’s actually 90 degrees before assuming it is
Older Cape Cod homes settle over the decades, and a corner that looks square to the eye can be off by two or three degrees. Catching that now, with a pencil and a square, costs you nothing. Catching it after you’ve cut and installed a piece costs you a full-length board and an afternoon.
Cut a hair long, not short
When in doubt about a measurement, cut your piece slightly longer than your mark and test-fit it against the wall before committing. You can always trim a stubborn eighth of an inch off a piece that’s too long, but there’s no fixing a board that came off the saw too short.
Step 3. Cut and fit inside corners
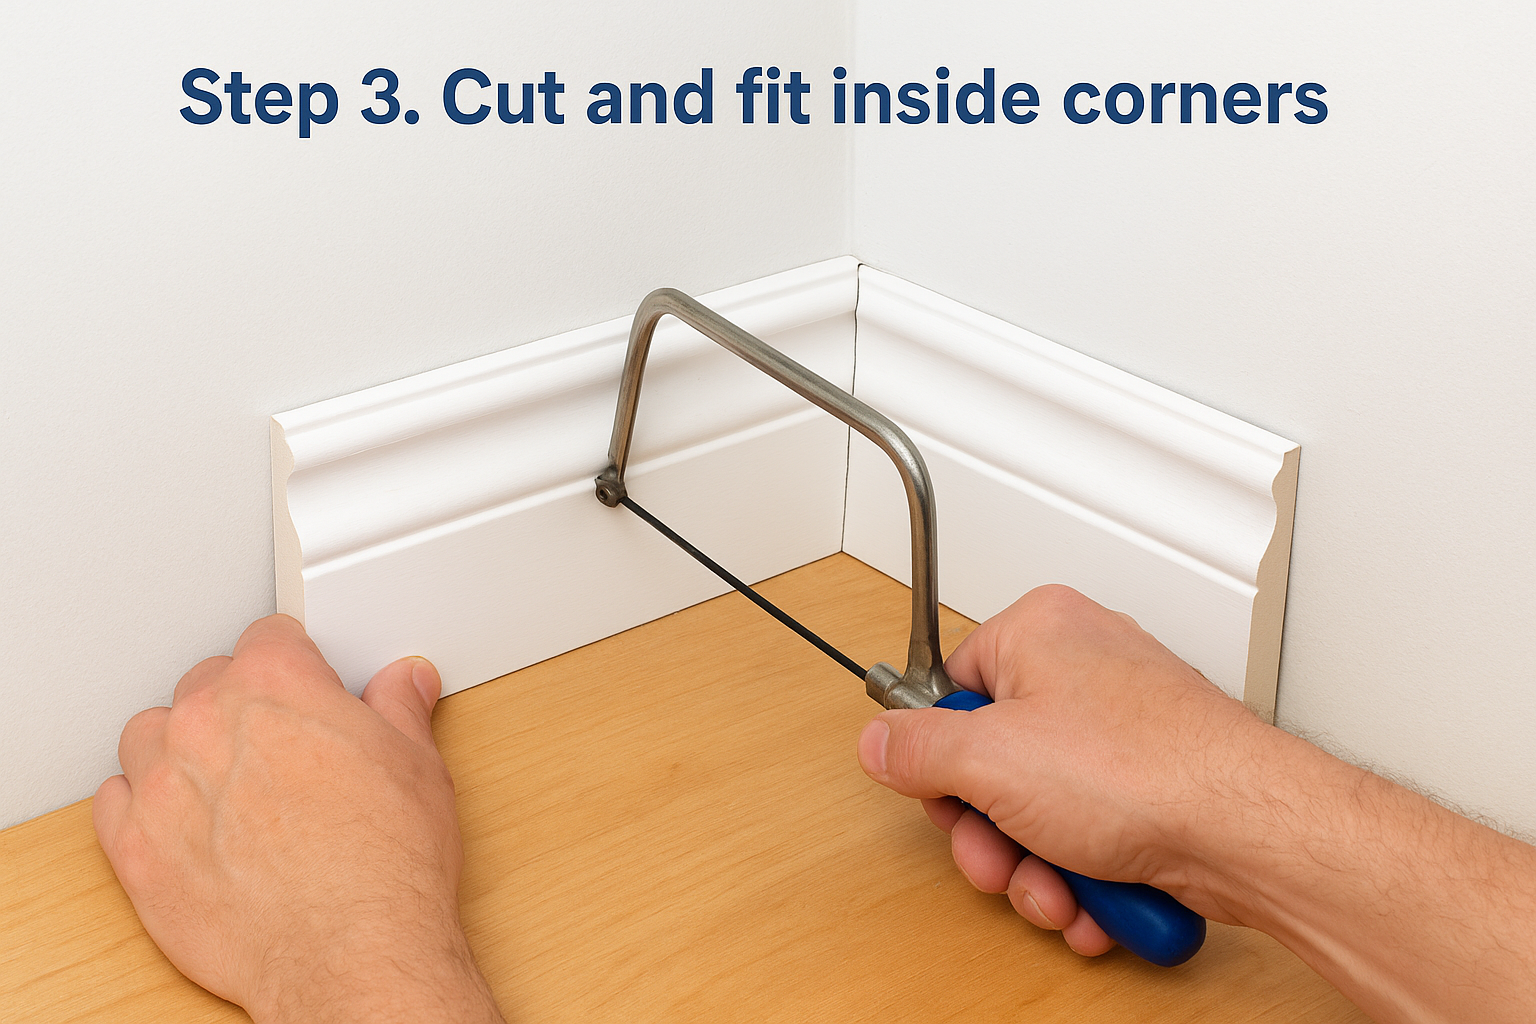
Inside corners are where coping beats mitering every time, even though a straight 45-degree miter looks like the faster route. Wood movement and slightly out-of-square walls cause mitered inside corners to open up within a year, while a coped joint stays tight because one piece actually overlaps the profile of the other instead of relying on two angled faces meeting perfectly.
Cut the first piece square
Start with the piece that runs into the corner first. Cut this end at a straight 90-degree cut, no miter, no bevel, so it sits flat against the adjoining wall exactly like baseboard would. This piece becomes your reference edge, and the second piece gets shaped to match its profile.
Cut the coping piece at an inside miter
For the second piece, set your saw to cut an inside miter angle, the same compound settings you dialed in during Step 1, but cut with the molding oriented so the cut leaves a visible profile line on the face. This line traces the exact shape of the molding’s front profile, and that outline becomes your guide for the coping saw.
Follow the profile line with the coping saw
Clamp the piece to your workbench, then run the coping saw along that profile line, angling the blade back slightly as you cut so you’re removing a little extra material behind the visible edge. This back-cut matters because it lets the front edge sit tight against the mating piece without the bulk of the wood behind it getting in the way.
A coped joint hides small wall imperfections that a mitered inside corner never forgives.
Test-fit before final installation
Hold the coped piece up against the square-cut piece on your bench, checking that the profile nests together with no visible gap along the face. Sand lightly with 220-grit paper if you see rough spots along the coped edge, since a coping saw rarely leaves a perfectly smooth cut on the first pass.
Quick coping checklist
- Cut the first piece with a plain 90-degree square cut
- Cut the second piece at the inside miter angle to expose the profile line
- Coping saw along that line with a slight back-angle
- Dry-fit both pieces on the bench, not on the wall, before nailing anything up
- Touch up rough edges with sandpaper or a utility knife until the joint closes without force
Don’t force a loose-fitting coped joint into place with extra nails. Recut or re-file the profile until it seats naturally, since forcing it usually telegraphs a hairline gap once the caulk dries and shrinks.
Step 4. Cut and fit outside corners
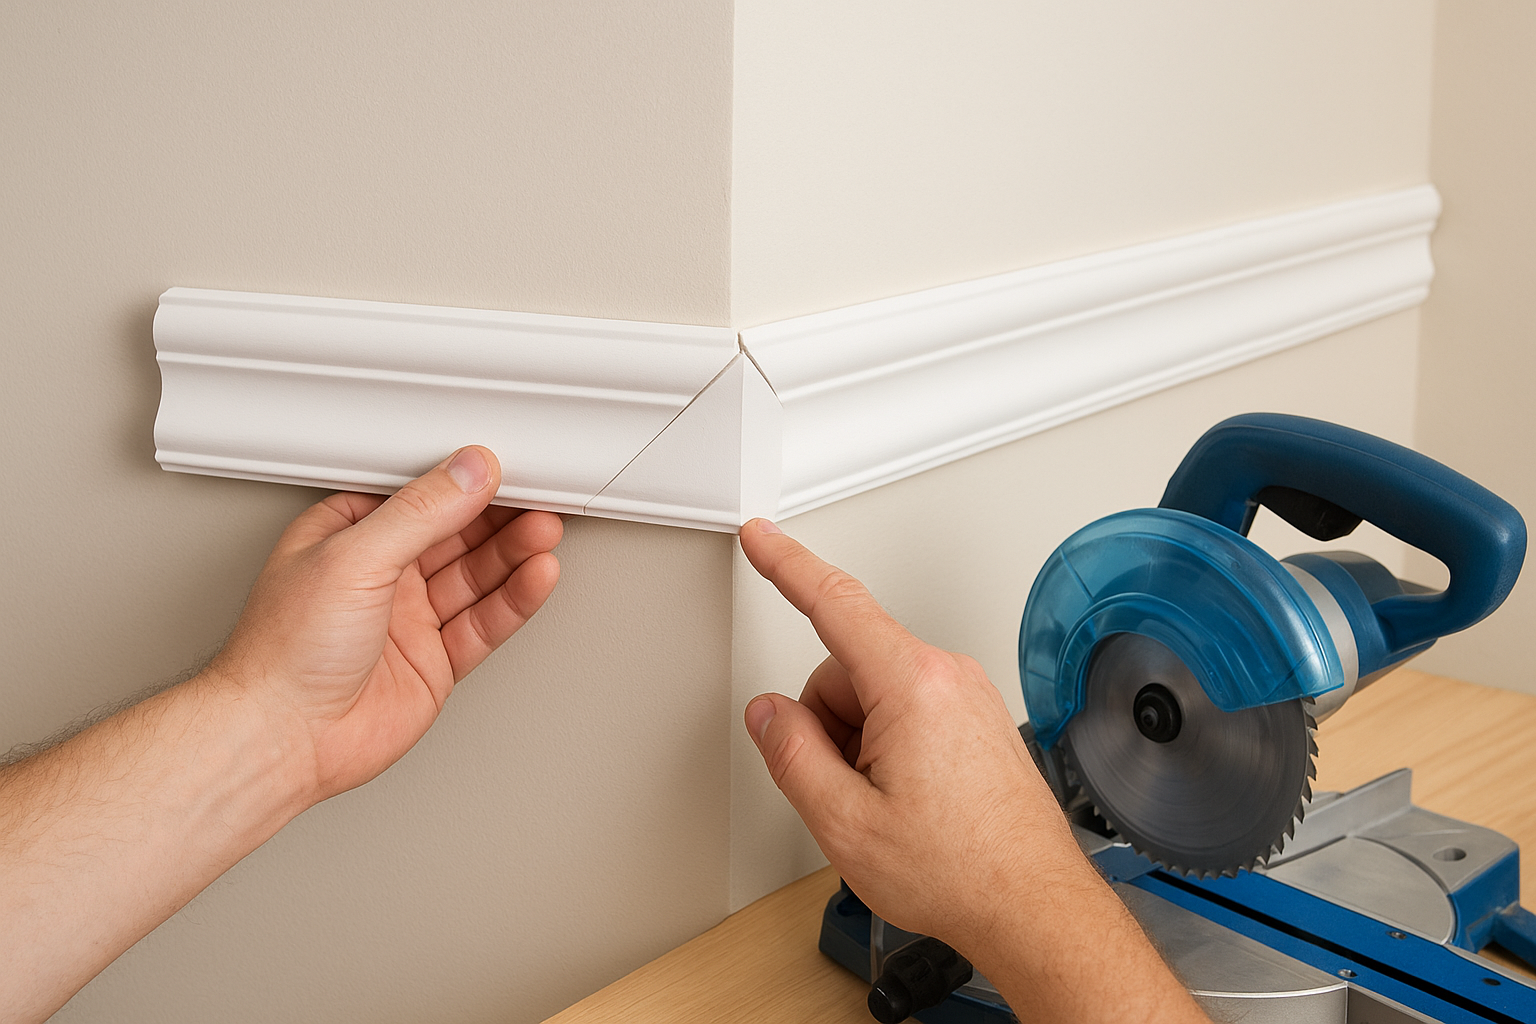
Outside corners get a straight miter, no coping saw required, but they demand more precision because there’s no overlapping profile to hide a sloppy angle. Both pieces meet face to face at the corner, so outside corner cuts need to match perfectly on the first try or you’ll see a visible gap right at eye level, exactly where guests notice it first.
Set the miter direction correctly
Each piece gets cut at a 45-degree miter angle, but the direction matters. Picture standing at the corner looking at the wall: the piece on your left gets mitered so the long point sits at the bottom of the board, and the piece on your right gets mitered so the long point sits at the top. Getting this backward is the single most common mistake on outside corners, and it wastes a full board every time.
Cut both pieces using your compound settings
Use the same miter and bevel angles from your saw setup in Step 1, just flip the miter direction between the two pieces. Cut one piece at a time, rotating the molding position on the saw rather than guessing at a mirrored setting from memory.
Outside corners forgive nothing, since there’s no coping saw to bail you out afterward.
Dry-fit before you nail anything
Hold both mitered pieces together on your workbench, checking the face of the joint for any daylight showing through. A tight outside corner should close with just light hand pressure, not brute force. If you see a gap:
- Check that your bevel angle matches the number from your setup table
- Confirm the molding sat at the correct spring angle against the fence during the cut
- Look for a stray sliver of sawdust wedged between the molding and the fence, which throws off the angle by a degree or two
- Re-verify the corner itself is actually 90 degrees with your combination square
Nail from the outside in
Once the dry-fit looks tight, install both pieces starting from the corner and working outward along each wall. Nailing from the corner first locks the joint in place before you’re pulling and adjusting the rest of the run, which keeps the outside miter from creeping open while you finish nailing the board down. Add a small dab of wood glue at the joint face itself before the final nail, since outside corners see more impact and vibration over the years than inside corners tucked into a room’s interior.
Step 5. Adjust cuts for out-of-square corners
Older homes on Cape Cod rarely have perfectly square corners, and Hyannis is full of houses where the framing has shifted a few degrees over sixty or seventy years of coastal weather. Out-of-square corners throw off a standard 45-degree miter every time, so before you commit a full-length board to the saw, check the actual angle at every corner rather than assuming the textbook number will work.
Measure the real angle first
Use your digital angle finder to read the corner directly, then divide that number in half to get your new miter angle for each piece. A true 90-degree corner splits into two 45-degree cuts, but a corner reading 94 degrees needs two 47-degree cuts instead. Skipping this check is the most common reason DIY crown molding jobs end up with a visible sliver gap right at the seam.
A corner that’s off by even three degrees will show a gap you can’t hide with caulk alone.
Adjust one piece at a time
Don’t split the correction evenly across both pieces unless the wall is genuinely symmetrical on either side of the corner. Cut one piece first at your adjusted angle, hold it in place against the wall, then measure the remaining gap before cutting the second piece to match. This one-at-a-time approach catches uneven framing that a simple angle finder reading might miss, especially in corners near windows or where the ceiling itself has a slight dip.
Use a bevel gauge for tricky spots
For corners that feel unreliable even after measuring, a sliding bevel gauge gives you a physical template you can carry straight to the saw. Set the gauge against the actual wall corner, lock it in place, then transfer that exact angle to your miter saw’s protractor scale instead of trusting a rounded-off number.
When to split the difference
Sometimes the honest fix is a compromise cut rather than a mathematically perfect one:
- If the gap is under 1/16 inch, a mitered joint with a thin bead of caulk closes it fine
- If the gap runs 1/16 to 1/8 inch, recut one piece with a 1 to 2 degree adjustment and retest
- If the gap exceeds 1/8 inch, stop and remeasure the corner itself, since something in the framing is likely off beyond what a saw adjustment can fix
Test-fit again after every adjustment. Small corrections compound fast, and chasing a gap without remeasuring usually makes the joint worse instead of better.
Getting corners that close up tight
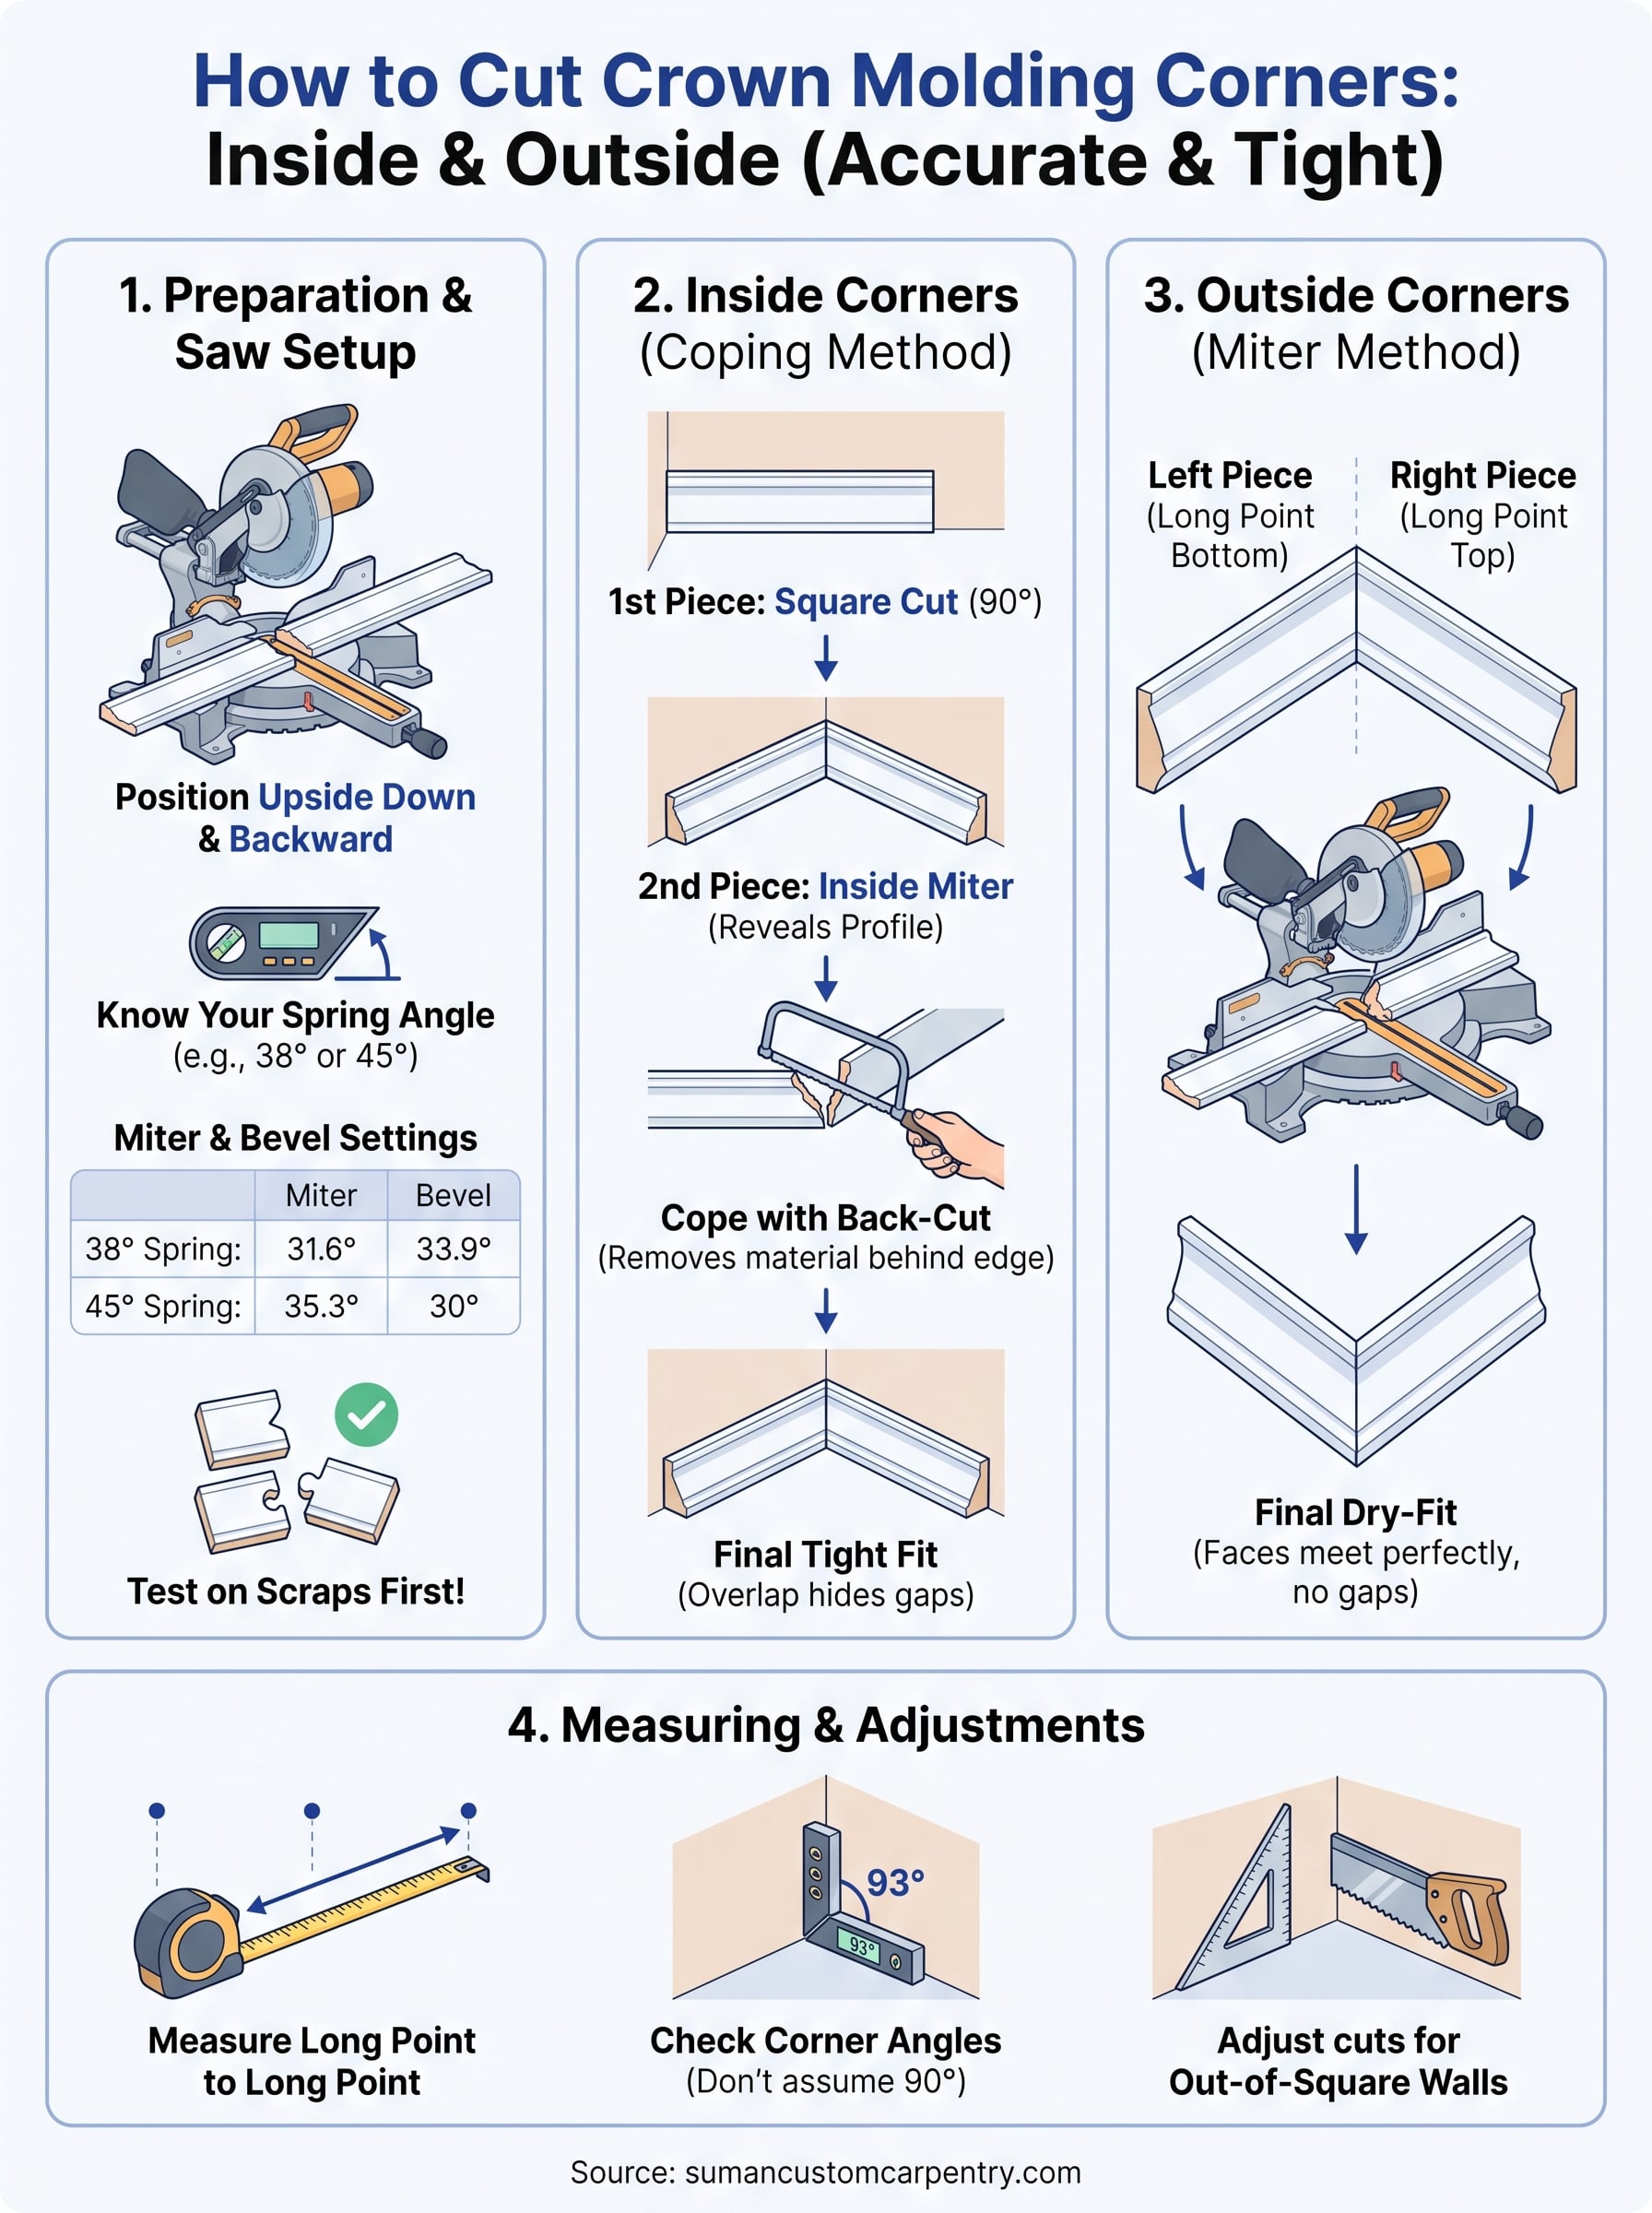
Cutting crown molding corners comes down to five habits: dial in your saw before you touch real stock, measure long point to long point, cope your inside corners instead of mitering them, keep outside corners tight with matched compound angles, and check every corner for square before you assume 45 degrees will work. Skip any one of these steps and you’ll be back at the hardware store buying more caulk than you planned for.
Practice on scrap until your test joints close without force, then move to your actual walls with confidence instead of guesswork. Crown molding rewards patience and punishes shortcuts, but once you’ve cut a handful of clean corners, the whole process starts to feel routine rather than intimidating.
If your project calls for a level of precision you’d rather leave to someone with a shop full of jigs and years of trim work behind them, reach out to Suman Custom Carpentry and we’ll handle the corners for you.