
You need more storage and you’re tired of tripping over shoes, backpacks, and beach gear by the back door. A built in bench seat with storage solves that problem while giving you a place to sit down and pull off your boots. It’s one of the most requested additions we build into Cape Cod entryways, mudrooms, and bay windows, because it does double duty in a house where square footage is tight and the coastal lifestyle brings in a lot of stuff.
Whether you’re comparing pre-made options against a weekend DIY project, this guide walks through what actually goes into building one that holds up. We cover the framing, the hinge mechanism, and the lid support details that separate a bench that lasts decades from one that sags after a year of use.
You’ll get a full breakdown of materials, dimensions, and build steps, plus honest guidance on when a DIY build makes sense and when it’s smarter to bring in a carpenter. If you’d rather skip the sawdust altogether, we’ll also point you toward what custom-built means when it’s done right the first time.
Planning your built-in bench seat with storage
Before you cut a single board, figure out how the bench will actually get used. A mudroom bench near a coastal entry needs to shrug off sand, salt, and wet boots, while a bay window bench in a living room is about comfortable seating and hiding blankets or toys. Nail down the daily function first, because that decision drives everything else: the depth of the seat, the type of lid, and the finish you put on it.
Choose the right location and footprint
Walk the space and think about traffic flow before you settle on dimensions. A bench that’s 18 inches deep works fine as a perch by a door, but you’ll want 20 to 24 inches if people are actually going to sit and put shoes on. Check these details on-site:
- Doorway clearance: leave at least 32 inches for the door swing and walking path
- Window height: if you’re building under a window, the seat top typically sits 16 to 18 inches off the floor
- Wall length: measure end to end and account for any baseboard or trim you’ll need to notch around
- Ceiling or soffit lines: note any HVAC returns or outlets hidden in the wall you’re building against
Decide how you’ll access the storage
This is the choice that trips up most first-time builders, and it’s worth thinking through before you start framing.
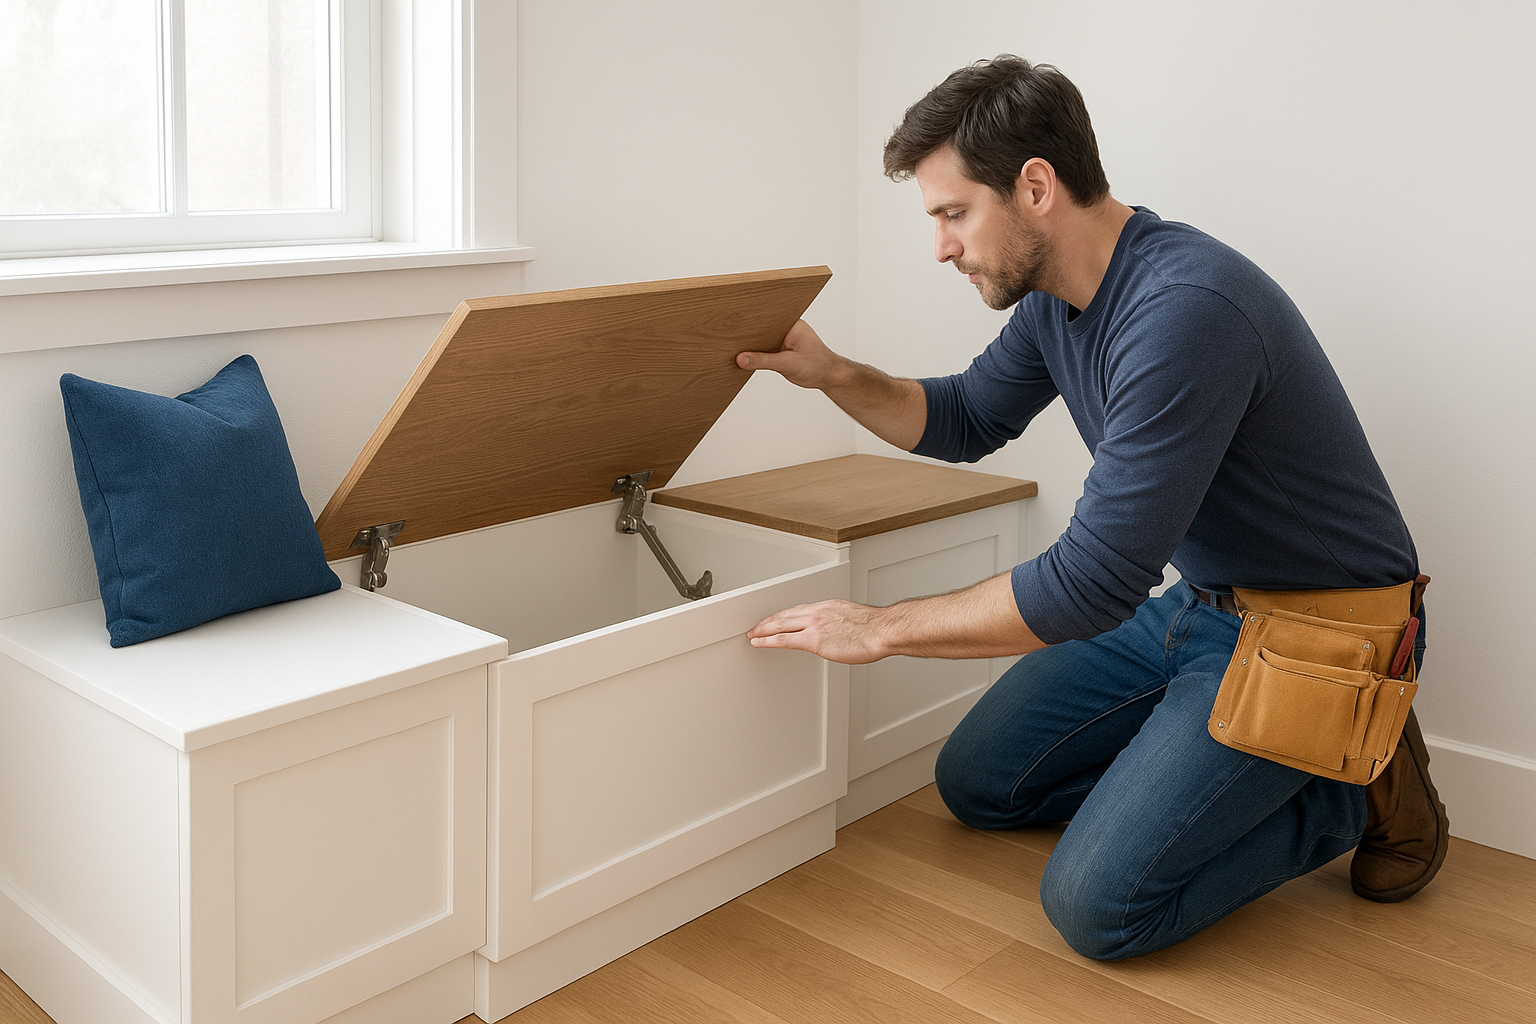
The lid mechanism you pick decides whether your bench feels like furniture or feels like a chore.
| Storage access type | Best for | Trade-off |
|---|---|---|
| Lift-top lid | Bulky items, blankets, seasonal gear | Requires clearing the seat cushion each time |
| Front-facing drawers | Frequently used items, shoes, mail | Less total volume than a lift-top |
| Removable seat panels | Simple builds, tight budgets | No hinge, but less convenient access |
For a Cape Cod mudroom, we almost always recommend a hinged lid with a soft-close lid support, since it handles heavy winter coats and beach bags without the lid slamming shut on someone’s fingers.
Sketch it out and set a budget
Draw the bench to scale, even a rough sketch on graph paper works, and mark where the hinges, cleats, and any dividers will sit. Setting a rough materials budget now, before you’re standing in the lumber aisle, keeps you from underbuying plywood or overspending on hardware you don’t need.
Step 1. Measure your space and design the bench
Grab a tape measure, a level, and graph paper before you touch a saw. Every built in bench seat with storage starts with accurate numbers, because a bench built off guesswork ends up crooked against the wall or too shallow to sit on comfortably. Measure the full width of the space at floor level and again at seat height, since baseboards, window trim, and old plaster walls are rarely perfectly straight.
Nail down your working dimensions
Standard bench dimensions give you a comfortable seat without eating up the room. Use these as your starting point and adjust for your specific wall:
- Seat height: 17 to 18 inches from finished floor, matching standard chair height
- Seat depth: 20 inches minimum for sitting, 16 to 18 inches for a shoe-removal perch
- Storage cavity depth: subtract 3 inches from seat depth for lid clearance and lid support hardware
- Bench length: measure wall to wall, then subtract 0.5 inches on each side for expansion gaps
A bench that’s off by even half an inch will fight you at every step, so measure twice and cut once still applies here more than anywhere.
Draw your cut list before you build
Translate your measurements into an actual cut list, listing every panel by name, dimension, and material. This step catches mistakes on paper instead of in plywood. Note which panels need a finished face, since those get the good side of the sheet, and which ones sit hidden inside the storage cavity where a rougher cut is fine. Having this list on hand before Step 2 keeps your shop time focused on cutting and assembling, not second-guessing dimensions mid-build.
Step 2. Build the bench frame and storage box
With your cut list in hand, start with the frame that carries the weight of the seat and everything stored inside it. Use 3/4-inch plywood for the sides, back, and base, since anything thinner flexes under a stack of winter boots or a kid jumping onto the seat. Pocket screws and wood glue at every joint give you a frame that won’t rack or wobble after a few seasons of use.
Build the base frame first
Stand the two side panels upright and connect them with a bottom stretcher and a back rail, checking square with a framing square before you drive a single screw. This base frame sets the footprint for the whole bench, so get it dead level against the floor, shimming under the feet if your subfloor dips.
A square frame at this stage saves you from a lid that binds or a bench that rocks for the life of the piece.
Assemble the storage box
Once the base frame is solid, build the storage box that sits inside it:
- Cut the box bottom to match your storage cavity dimensions from Step 1
- Attach the box sides with glue and 1-1/4-inch screws, keeping corners square
- Add a center divider if your bench spans more than 48 inches, both for rigidity and to split storage into two lids later
- Screw cleats along the inside top edge to support the seat panel or lid frame
Sand every interior edge now, before the box is closed in, since reaching inside a finished cavity with sandpaper is nearly impossible.
Step 3. Add the seat top and storage access
Now you’ll build the piece everyone actually sees and sits on. Cut your seat top from 3/4-inch plywood or a solid wood panel if you want a furniture-grade look, sizing it to overhang the frame by about half an inch on the front and sides for a finished edge. This overhang hides any small gaps between the box and the seat panel, which matters more than people expect once the bench is painted or stained.
Mount the hinges correctly
Piano hinges run the full length of the lid and spread the weight evenly, which is what you want on any built in bench seat with storage that’s wider than 30 inches. Screw the hinge to the back edge of the seat top first, then attach it to the cleat you installed in Step 2, keeping the lid flush with the front face when closed.
Install lid support hardware
A soft-close lid support arm stops the lid from slamming down on fingers or toys, and it’s cheap insurance against a callback.
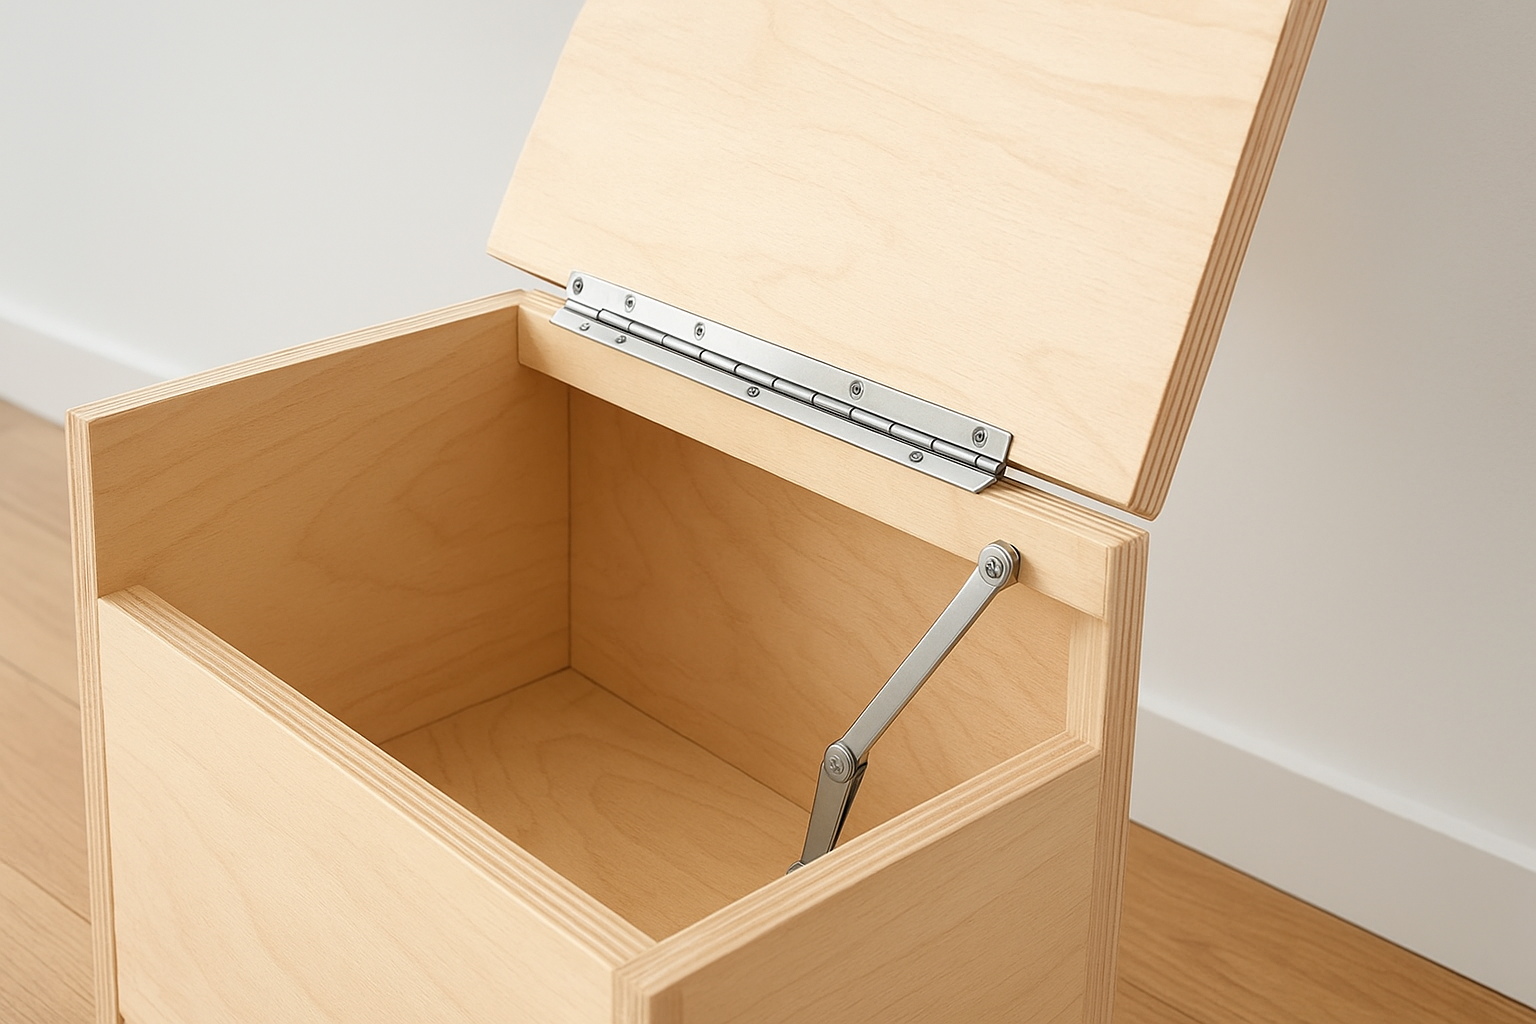
Skip the lid support and you’re building a bench that’ll eventually pinch someone, usually a kid, usually at the worst moment.
Install the arm on the inside wall of the box, angled so it engages once the lid passes about 45 degrees open. Test the action several times before moving on:
- Lid opens smoothly without catching on the box sides
- Lid stays open on its own past 90 degrees
- Lid closes slowly over the last few inches, not with a thud
Adjust the arm’s mounting screws if the motion feels stiff or too loose.
Step 4. Install, trim, and finish the bench
With the box and lid built, move the bench into its final spot and get it locked to the wall before you worry about looks. A bench that shifts when someone sits down feels cheap no matter how nice the joinery is, so this step matters as much as the framing did back in Step 2.
Anchor the bench to the wall and floor
Level the bench against the wall using shims under the base, then locate your studs with a stud finder and drive 3-inch screws through the back rail into at least two studs. If your subfloor is uneven, shim first and screw second, never the other way around, or you’ll twist the frame out of square. Toe-screw through the side panels into the floor for extra rigidity, especially on a bench that’s going to see kids climbing on and off it daily.
A bench that’s screwed into studs, not just glued to trim, is the difference between furniture and a fixture.
Trim out the edges
Run quarter-round or scribe molding along the base to hide any gap where the bench meets an uneven floor, and add a small return trim piece on any exposed end panel. This is also where you fit face frame trim around the lid opening if you want a furniture-grade edge instead of raw plywood.
Sand, prime, and paint
Fill screw holes and seams with wood filler, sand everything to 220 grit, then prime and paint with a durable semi-gloss enamel that stands up to shoes, spills, and repeated cleaning. Let each coat cure fully before you load the bench with cushions or storage bins.
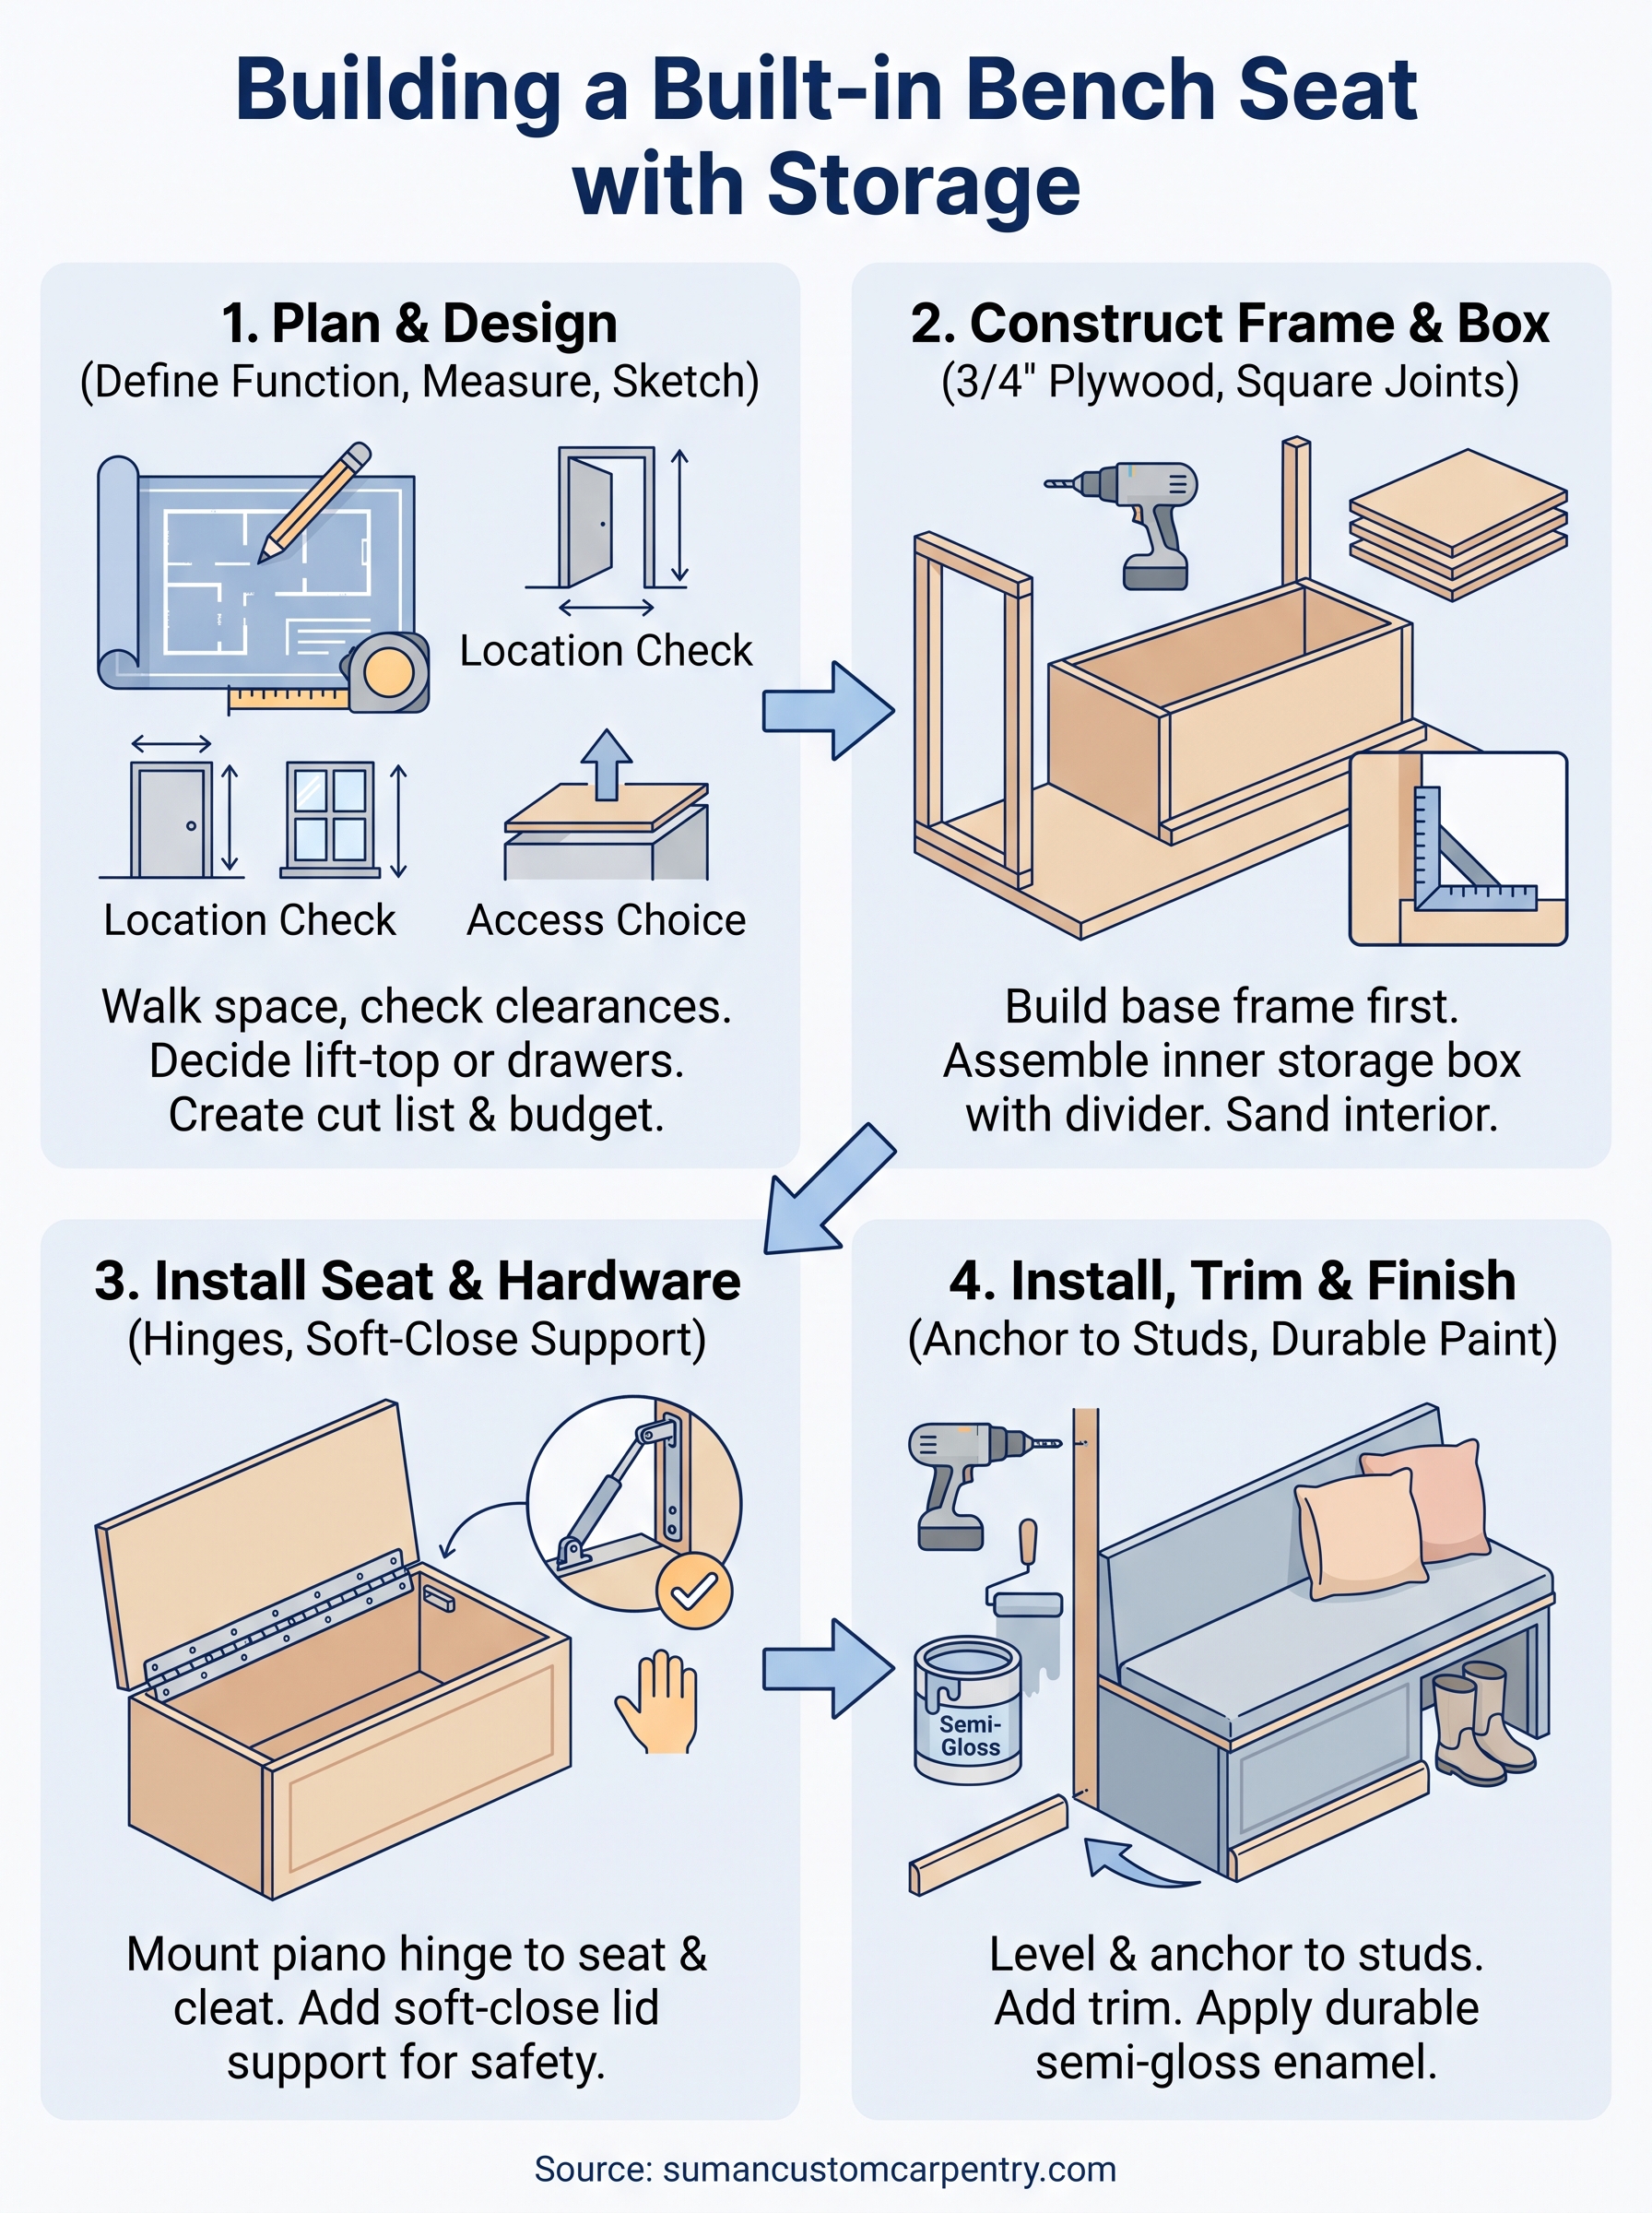
From plan to finished bench
A solid built in bench seat with storage comes down to the same fundamentals every time: accurate measurements, a square frame, hardware that won’t fail, and a finish that holds up to daily abuse. Skip any of those steps and you end up with a bench that wobbles, a lid that pinches fingers, or paint that chips within a season. Follow them, and you get a piece that outlasts the trends in your mudroom or living room.
Not everyone has a weekend free or the tools to cut plywood square, and that’s fine. Custom-built quality means someone with years of hands-on experience is handling the joinery, the hinge placement, and the finish, so you’re not troubleshooting a sagging lid two winters from now. If you’d rather hand this project to a shop that hand-builds every piece on Cape Cod, reach out to Suman Custom Carpentry and we’ll turn your sketch into a bench built to last.