
Vaulted ceilings make a room feel grand, but they also make trim work a lot more complicated. Standard crown molding with vaulted ceilings requires different angle cuts, custom transitions, and careful planning that flat ceilings simply don’t demand. Get it wrong, and you end up with gaps, misaligned joints, or a finished look that cheapens the room instead of elevating it.
The good news: it’s absolutely doable, and the results are worth the effort. Whether you’re tackling this as a DIY project or deciding whether to bring in a professional, understanding the process helps you make better choices. At Suman Custom Carpentry, we’ve handled crown molding installations on every ceiling type across Cape Cod, vaulted, cathedral, tray, you name it, and the angled ones always get the most questions from homeowners.
This guide walks you through how to install crown molding on vaulted ceilings, from measuring and cutting compound angles to handling transitions where sloped sections meet flat walls. We’ll cover the tools you need, the mistakes to avoid, and when a project like this makes sense to hand off to a carpenter who does it daily.
Plan the look and confirm crown works here
Before you touch a saw, spend real time planning the look you want and confirming your ceiling geometry actually supports crown molding. Many homeowners skip this step and end up mid-project with a profile that doesn’t work on a sloped surface or a wall height that leaves almost no visual room for trim. Pull up your room dimensions, sketch where the flat ceiling meets the vault, and mark every transition point before you buy a single piece of material.
Choose the right crown profile
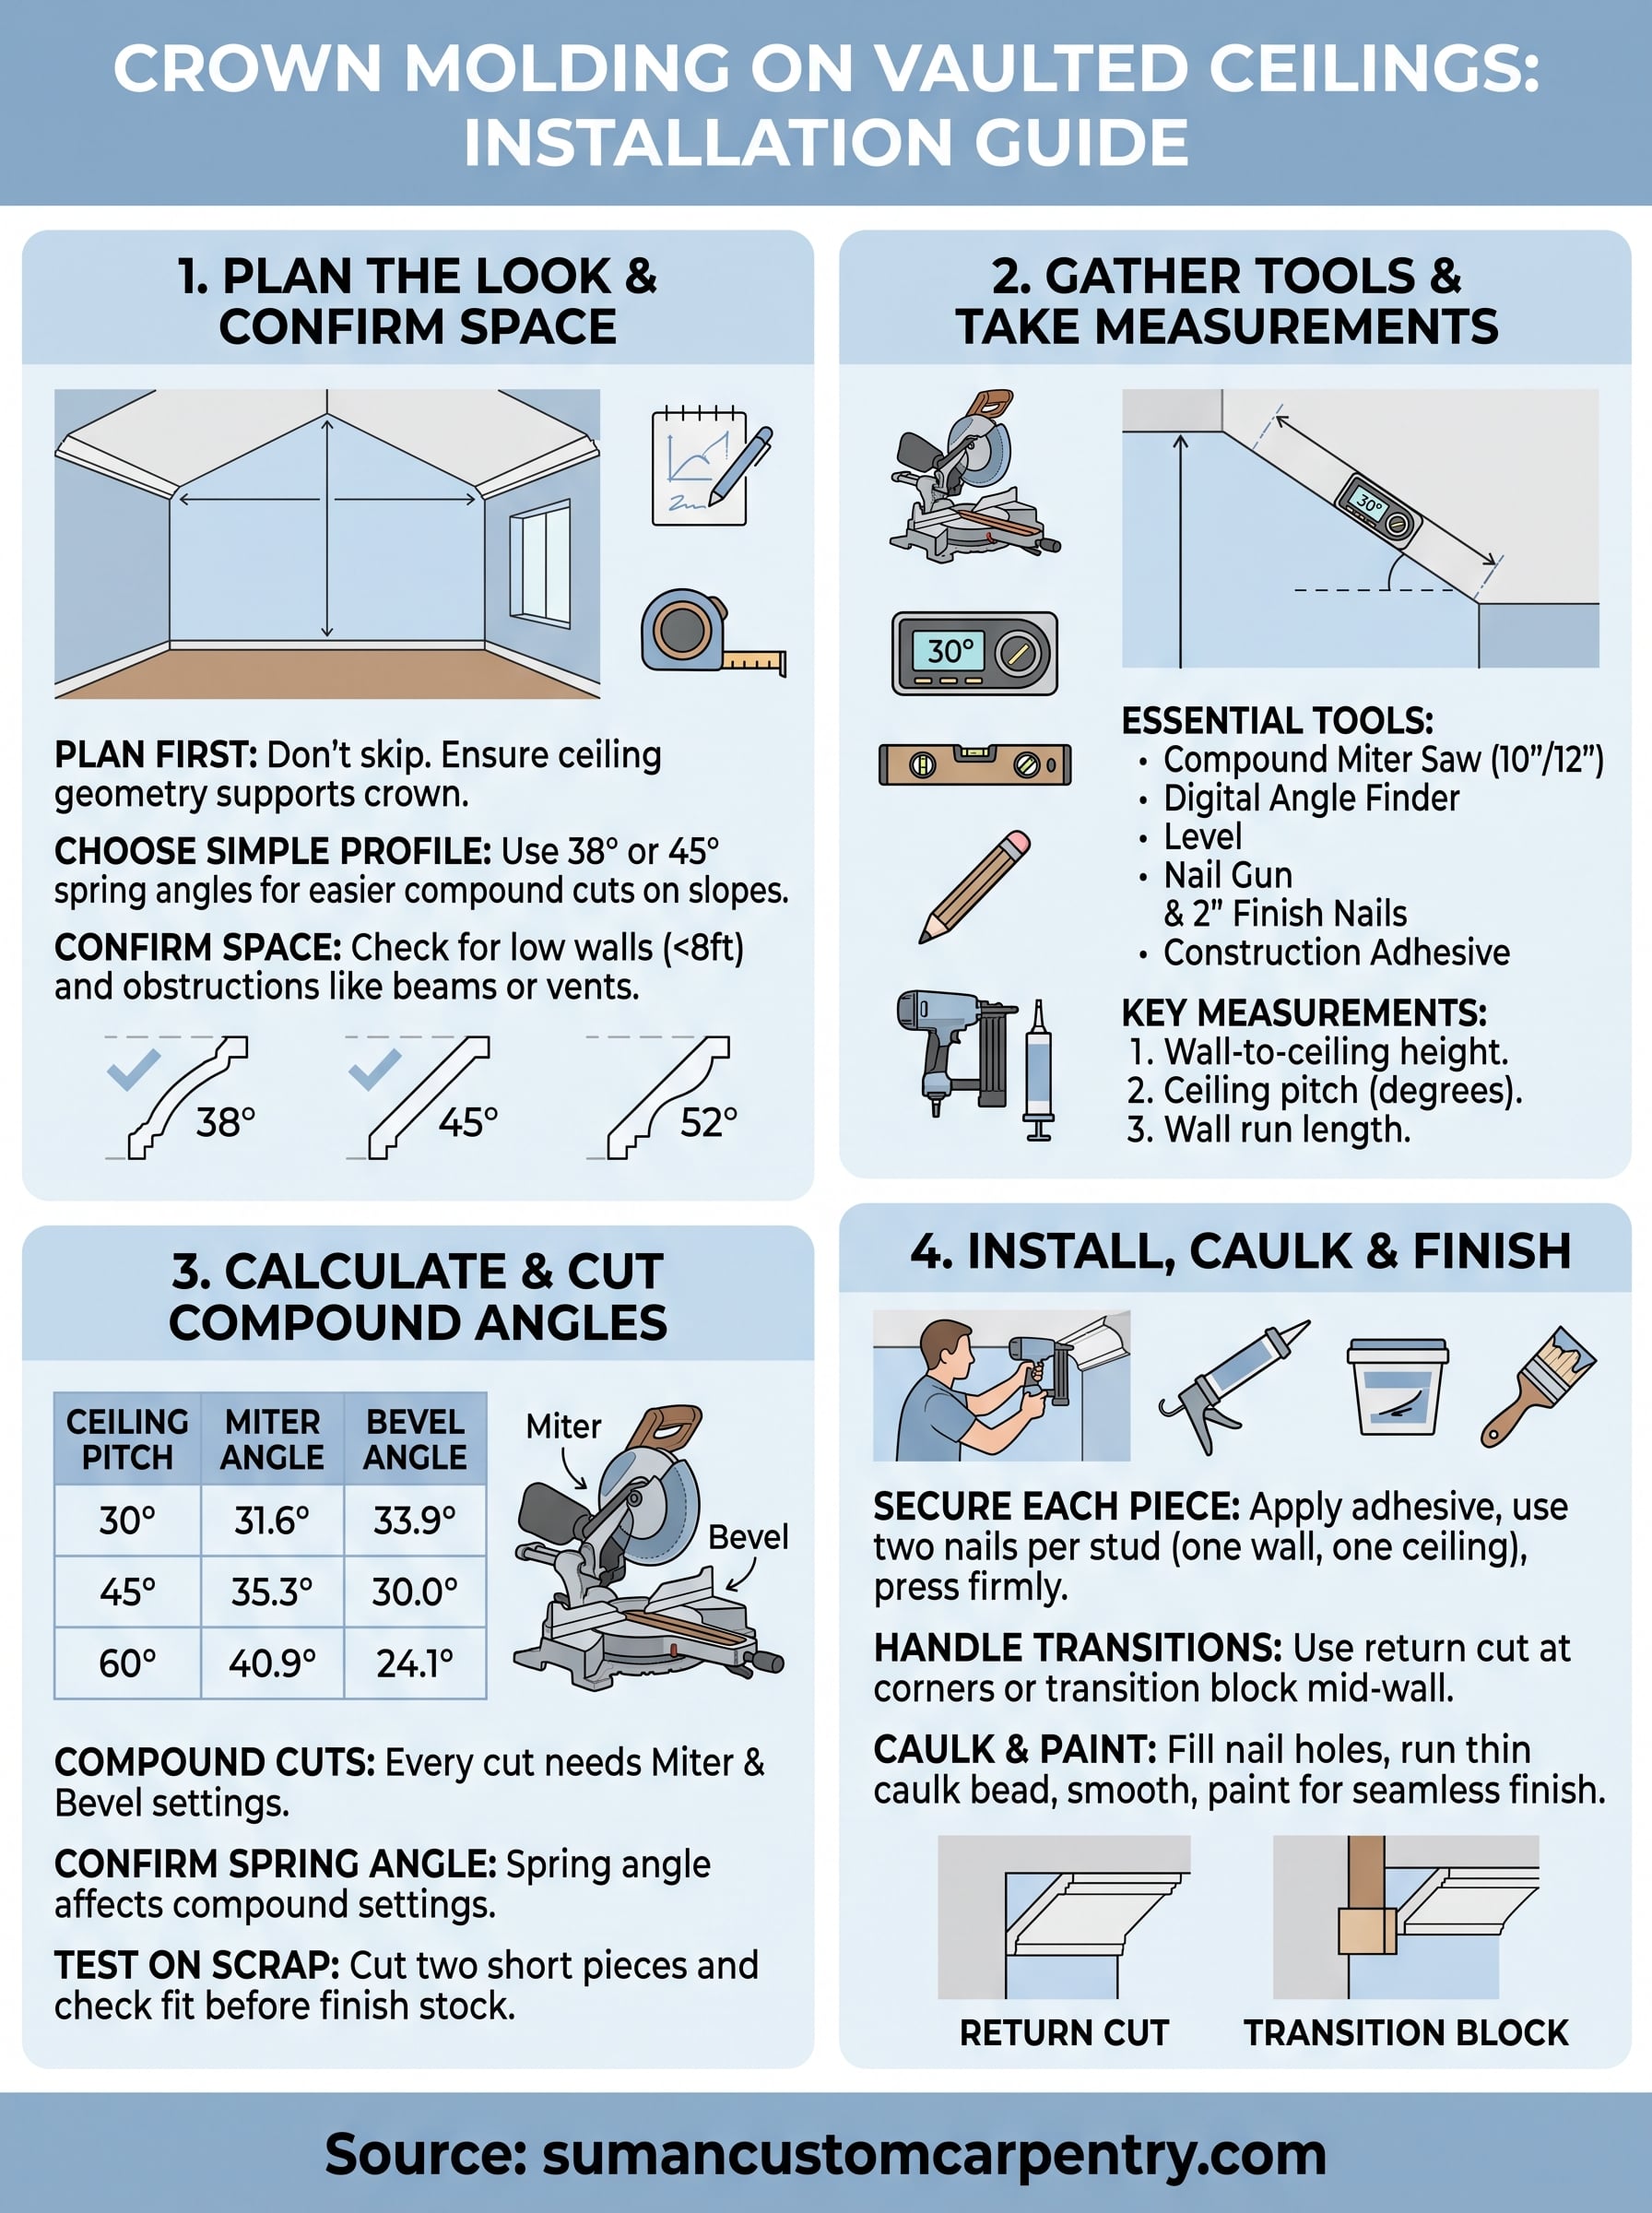
Not every crown molding profile works well on vaulted ceilings. Simpler profiles with a clean spring angle (typically 38 or 45 degrees) are far easier to cut and fit on sloped surfaces than ornate multi-step profiles. If you’re set on a more detailed look, consider running the decorative profile only on the flat ceiling sections and transitioning to a simpler piece where the vault begins.
The spring angle of your crown determines every compound cut you’ll make later, so confirm it before purchasing material.
Crown molding with vaulted ceilings looks best when the profile stays consistent enough that the eye reads the trim as one continuous line. The three spring angles you’ll most commonly encounter are:
- 38 degrees: the most common, found on standard residential profiles
- 45 degrees: less common but produces compound cuts that are easier to verify
- 52 degrees: occasionally used on wider profiles, trickier to manage on sloped surfaces
Confirm the space can support it
Low knee walls or tight ceiling-to-wall intersections can make crown installation impractical or visually awkward. Measure the actual height where your wall meets the vaulted ceiling run, and if that measurement is under 8 feet, a large profile will overwhelm the space rather than frame it.
Check also for obstructions like recessed light housings, structural beams, or HVAC soffits sitting inside the area where crown would land. Clearing these issues before you buy lumber saves you a costly mid-project restart.
Gather tools, materials, and key measurements
Having the right tools on hand before you start keeps the project moving and reduces the chance of wasted cuts. Crown molding with vaulted ceilings demands a compound miter saw (not a standard miter saw) because you need to cut two angles at once. A basic miter saw handles flat ceiling work, but a sloped ceiling adds a bevel cut to every corner, and only a compound miter saw manages that combination accurately.
Tools you’ll need
Every cut on a vaulted run involves compound angles, so precision tools matter here more than on a standard trim job. Gather these before you begin:
- Compound miter saw with a 10- or 12-inch blade
- Digital angle finder (or protractor) for reading the ceiling slope
- Level and pencil for layout lines
- Nail gun with 2-inch finish nails
- Construction adhesive for any spots without direct framing access
Key measurements to take first
Measure the slope angle of your vaulted ceiling with a digital angle finder before you calculate any cuts. Write down three numbers: the wall-to-ceiling height at the lowest point, the ceiling pitch in degrees, and the length of each wall run.

These three figures drive every compound angle calculation you’ll make, so confirm them twice before cutting anything.
| Measurement | What it determines |
|---|---|
| Wall-to-ceiling height | Which profile size fits the space |
| Ceiling pitch in degrees | Bevel angle setting on the saw |
| Wall run length | Piece length and how much material to order |
Build a clean transition at the vault
The trickiest part of crown molding with vaulted ceilings isn’t the long runs; it’s the point where the flat ceiling section meets the rising slope. Without a deliberate transition strategy, that junction looks unfinished no matter how clean your cuts are elsewhere. Plan this detail before you cut anything, because the method you choose affects how you set up every adjacent piece.
Getting the transition right here is what separates trim work that looks intentional from trim work that looks patched together.
Handle the flat-to-slope junction
Two approaches work well at this junction: a return cut that terminates the flat-ceiling crown cleanly against the wall, or a transition block that bridges the profile change between the flat run and the sloped run. The return cut is simpler and works when the vault starts near a corner. Cut the molding at a 90-degree outside miter, then cut a small matching piece to cap the open end flush against the wall face.

A transition block suits situations where the vault begins mid-wall with no corner nearby. Mill or purchase a small square block that matches the crown thickness, fasten it at the junction point, and butt both molding pieces into it cleanly on either side. This hides the angle change without requiring a compound joint at an awkward location.
Cut the angles and fit each corner
Cutting crown molding with vaulted ceilings requires compound miter settings, not the single miter angle used on flat runs. Your saw needs two simultaneous adjustments: a miter angle (left or right rotation of the blade) and a bevel angle (tilt of the blade). Getting both right before you cut full-length pieces saves material and time.
Calculate the compound miter settings
Your ceiling pitch reading from the digital angle finder drives these numbers directly. Use the table below as a starting reference for common vault pitches:
| Ceiling Pitch | Miter Angle | Bevel Angle |
|---|---|---|
| 30 degrees | 31.6° | 33.9° |
| 45 degrees | 35.3° | 30.0° |
| 60 degrees | 40.9° | 24.1° |
Confirm your specific crown spring angle against these settings, because a 38-degree spring profile and a 45-degree spring profile produce different compound cuts at the same ceiling pitch.
Test on scrap first
Cut two short scrap pieces at your calculated settings and hold them in position at the corner before touching your finish stock. Check the fit with both pieces pressed firmly to the wall and ceiling simultaneously. Adjust one angle at a time until the joint closes without gaps, then lock your saw settings and cut the real pieces.
Install, caulk, and finish for a seamless line
With your angles confirmed on scrap, you’re ready to fasten the real pieces. Start at the flat ceiling sections and work toward the vault, since those runs set the reference line for every sloped piece that follows. Apply a thin bead of construction adhesive to the back of each piece before nailing to give yourself holding power in spots where your nail hits between studs.
Nail and secure each piece
Drive two finish nails at each stud location, one into the wall framing and one into the ceiling framing. On sloped runs of crown molding with vaulted ceilings, press the piece firmly against both surfaces while nailing to prevent the adhesive from shifting the profile before it sets.
Sink each nail just below the surface with a nail set so the putty fills flush instead of leaving a raised bump.
Caulk and paint the final line
Fill all nail holes with lightweight spackling compound, let it dry fully, and sand lightly before caulking. Run a thin, consistent bead of paintable caulk along the top and bottom edges of every run, smooth it with a damp finger in one pass, and paint within 24 hours for the cleanest finish.
Wrap up and get help when needed
Installing crown molding with vaulted ceilings takes patience, the right saw setup, and a solid plan before any material gets cut. When you follow the steps in this guide, from confirming your ceiling pitch and spring angle to testing compound cuts on scrap before committing to finish stock, the results hold up and look intentional from every angle in the room.
That said, some projects are better left to someone who cuts these angles every week. Tight timelines, complex room geometry, or high-end millwork profiles are all good reasons to bring in a professional rather than risk wasted material and a frustrating install. If your Cape Cod home has vaulted ceilings and you want trim work that’s built to last, the team at Suman Custom Carpentry can handle every step from design through final caulk line. Contact us to talk through your custom carpentry project and get an honest assessment of what your space needs.