
Your wood cabinets still have good bones, they just look tired. Maybe the finish is faded, the stain is dated, or the paint is chipping in spots that drive you crazy every time you open a door. Before you rip everything out and start from scratch, it’s worth knowing how to refinish wood cabinets yourself. A solid refinish can make existing cabinetry look brand new at a fraction of the cost of a full replacement.
At Suman Custom Carpentry, we build custom cabinets by hand in our Hyannis shop, so we spend every day working with wood finishes, stains, and paints. That hands-on experience has taught us exactly what makes a refinishing job last, and what causes it to peel, blister, or look uneven within months. We put this guide together to give you an honest, step-by-step walkthrough that actually works, whether you’re going with paint or stain.
This guide covers everything from assessing your cabinets and prepping surfaces to choosing the right finish and applying it correctly. We’ll also cover methods that skip heavy sanding, plus how to tell when refinishing makes sense and when it might be time for a full custom replacement. Let’s get into it.
Before you start: choose paint, stain, or clear
Picking the wrong finish is the most common mistake people make before they even touch a brush. The finish you choose controls every step that follows, from how much sanding you need to do, to whether you need a separate primer, to how long the whole project takes. Before you dive into learning how to refinish wood cabinets properly, lock in this decision first. Each option has a specific use case, and choosing the right one for your situation saves you time and money.
Paint: cover imperfections and change the color completely
Paint is the most forgiving option on this list. If your cabinet wood has uneven grain, old stain bleed-through, or surface repairs that would show through a clear or stained finish, paint hides all of it. You also get full control over the final color, which makes it the obvious choice for anyone doing a full kitchen refresh or updating a dated look.
The tradeoff with paint is that it needs proper priming and thorough surface prep to stick well long-term. Skip the primer and you will see chips within a year. Oil-based paints give you a harder, more durable finish, while water-based latex paints dry faster and clean up with soap and water. For cabinets specifically, a satin or semi-gloss sheen holds up to daily wiping and cleaning far better than flat or eggshell options.
Stain: keep the natural wood look while refreshing the tone
Stain works by soaking into the wood and enhancing the grain rather than covering it. If you have solid wood cabinets or quality hardwood veneer in good structural condition, staining is a strong way to refresh the look without losing what makes the wood attractive.
Stain only absorbs correctly on clean, uniform wood that is free of old paint or thick finish layers blocking the surface.
The catch is that stain shows everything. Repairs, patches, and wood filler absorb stain differently than the surrounding wood, which creates blotchy, uneven spots unless you plan for it. Staining also requires a compatible clear topcoat applied over it to protect the finish from moisture and daily wear.
Clear coat: protect what you already have
A clear coat makes sense when your cabinet wood itself looks good but the surface finish is worn, dull, or lightly scratched. You are not changing the color or tone, just sealing and protecting what is already there. This is the fastest option and works well on cabinets that need a refresh rather than a full transformation.
Here is a quick comparison to help you decide before buying anything:
| Finish | Hides imperfections? | Shows wood grain? | Requires primer? | Best for |
|---|---|---|---|---|
| Paint | Yes | No | Yes | Full color change, covering repairs |
| Stain | No | Yes | No | Refreshing solid wood with good grain |
| Clear coat | No | Yes | No | Protecting an already decent surface |
Step 1. Remove doors, label parts, and protect the space
Skipping this step and trying to refinish cabinets in place is one of the main reasons DIY jobs look uneven. Removing doors and drawer fronts gives you flat, horizontal surfaces to work on, which means fewer drips, better brush control, and a cleaner final result. Take the extra 30 minutes upfront and you will save yourself hours of touch-up work later.
Label every door and drawer before anything comes off
Before you unscrew a single hinge, label each door and drawer front so you know exactly where each piece goes when it is time to rehang. Cabinet doors look nearly identical when they are stacked in a garage, and mixing them up during reinstallation creates alignment and fit problems you do not want to deal with after the finish is already dry.
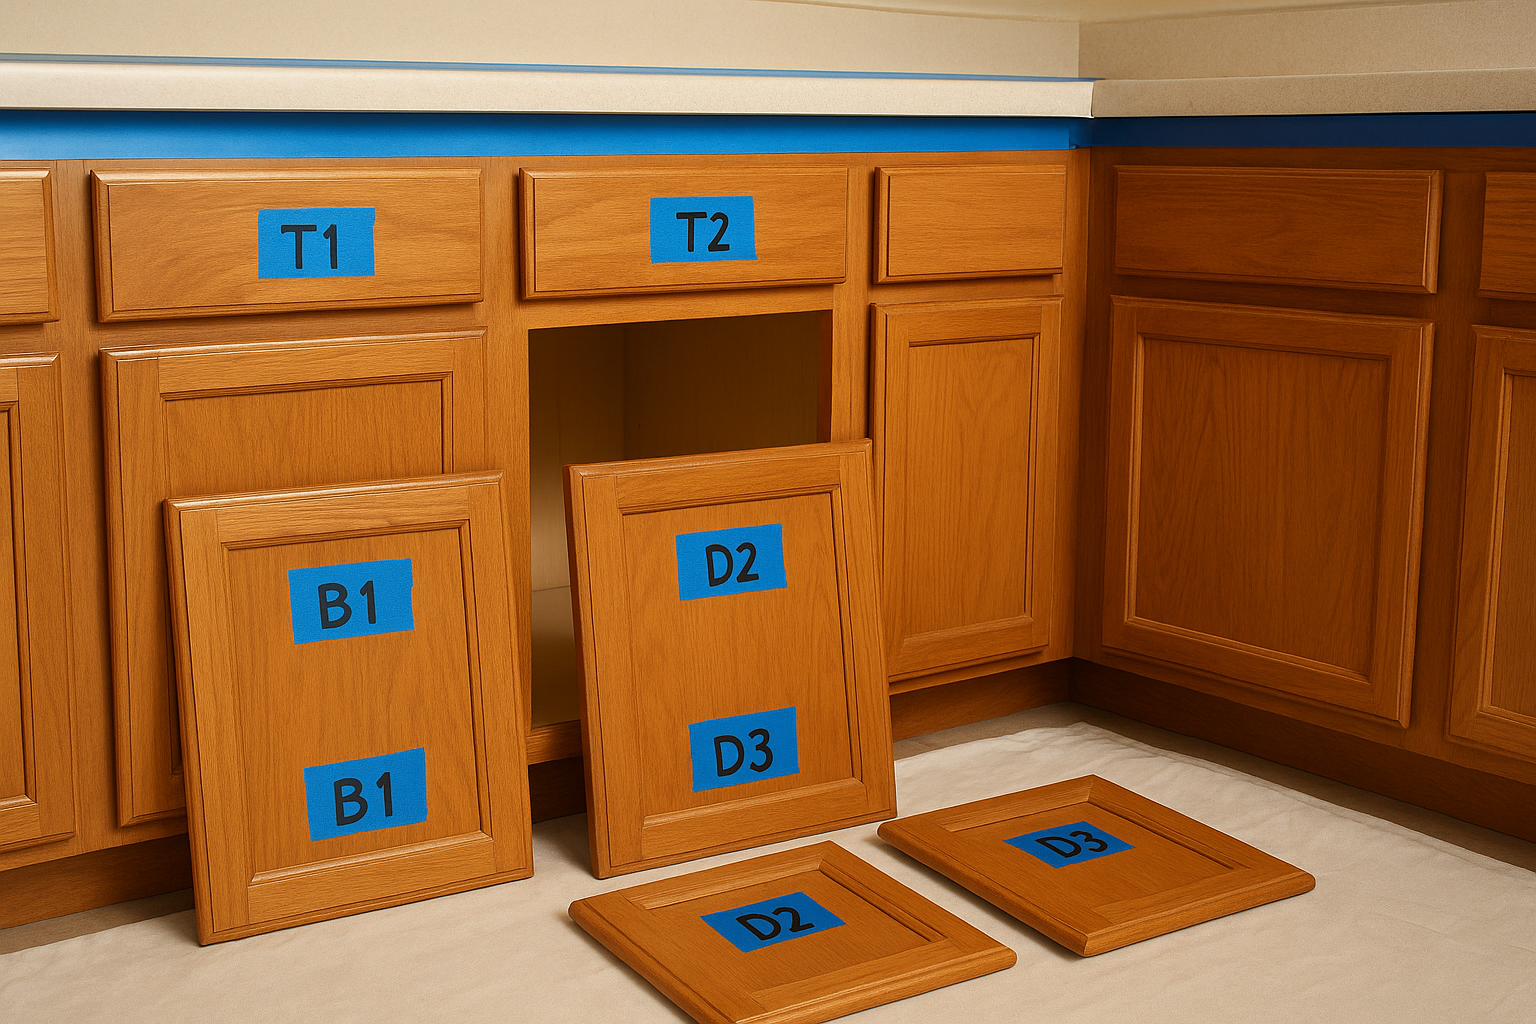
Use a piece of blue painter’s tape on the back of each door and write the cabinet position directly on it. A simple system works best:
- Top row = T1, T2, T3 (numbered left to right)
- Bottom row = B1, B2, B3 (same pattern)
- Drawer fronts = D1, D2, D3 (numbered left to right)
Once you remove the doors, place the hinges and screws in a labeled zip-lock bag that matches each door number. This keeps hardware organized and makes reinstallation straightforward.
Taking photos of your full cabinet layout from multiple angles before disassembly gives you a reliable reference point throughout the entire project.
Protect your floors, counters, and adjacent surfaces
Overspray, drips, and sanding dust travel further than you expect, especially in a kitchen with appliances and open surfaces nearby. Lay down canvas drop cloths on the floor directly below your work area, and tape plastic sheeting over countertops and any appliances that cannot be moved out of the space.
Clear everything out from inside the cabinet boxes and cover each opening with plastic sheeting held down with painter’s tape. Keeping dust and finish particles out of the interior is one of those details that separates a clean result from a frustrating one, and it applies whether you are painting, staining, or learning how to refinish wood cabinets for the first time.
Step 2. Clean, degloss, and sand for strong adhesion
Surface prep is where most DIY refinishing jobs either hold up for years or start failing within months. Grease, soap residue, and cooking oils build up on cabinet surfaces over time, and any new finish applied on top of that contamination will not bond correctly. Clean everything thoroughly before you touch sandpaper or a deglosser.
Clean the surface with a degreaser first
Trisodium phosphate (TSP) cleaner or a dedicated cabinet degreaser cuts through the grease layer that normal household cleaners leave behind. Mix TSP according to package directions, apply it with a sponge or cloth, and scrub every surface you plan to refinish, including the cabinet box frames, not just the doors. Wipe each surface down with clean water afterward to remove any residue, then let everything dry completely before moving on.
Rushing past the cleaning step is one of the fastest ways to end up with a finish that peels at the edges within the first year.
Degloss to break down the existing finish
Liquid deglosser, sometimes called liquid sandpaper, chemically scuffs the existing finish so the new coat has something to grip. Apply it with a clean cloth using firm, even strokes, working in sections. You do not need to scrub hard; the product does the work. Allow the deglosser to flash off fully before moving to sanding, which usually takes around 10 to 15 minutes depending on temperature and humidity.
Sand to open the wood and improve grip
Sanding after deglossing gives you a mechanically abraded surface that holds finish far better than a chemically etched one alone. For anyone learning how to refinish wood cabinets the right way, this combination is the standard. Use 120-grit sandpaper for most surfaces, then finish with 180-grit to smooth out scratch marks before priming or staining. Always sand in the direction of the wood grain to avoid cross-grain scratches that show through the final finish. Wipe down every surface with a tack cloth when you finish sanding to pull up all the fine dust before the next step.
Step 3. Repair dents, fill grain if needed, and prime
This step is where surface imperfections either get fixed or get locked permanently under your finish. The quality of your repairs and your primer coat directly determines whether the final result looks smooth and intentional or rough and amateur. Before you apply a single drop of stain or paint, deal with every dent, gouge, and open pore in the wood first.
Fix dents, gouges, and surface damage
Wood filler handles most surface damage you will encounter on residential cabinets. Use a flexible putty knife to press the filler firmly into each damaged area, slightly overfilling so you have material to sand back flush once it dries. After it sets, sand level with 180-grit paper and confirm the surface feels flat under your fingers before continuing.
Here is a quick reference for the most common repair scenarios:
- Small scratches and shallow dings: water-based wood filler, sanded flush after drying
- Deep gouges: two-part epoxy wood filler, which shrinks less than standard filler on thick applications
- Stain projects with visible repairs: tinted stain-compatible filler matched to your target wood tone
Fill open grain for a smooth painted finish
Open-grain woods like oak and ash have visible pores that show through paint as a rough, dimpled texture if you skip grain filling. Apply a dedicated grain filler using a plastic spreader, working it in circular motions to push the product into the pores, then wipe the excess off across the grain before it dries. Once fully cured, sand lightly with 220-grit paper to knock down any residue sitting above the surface.
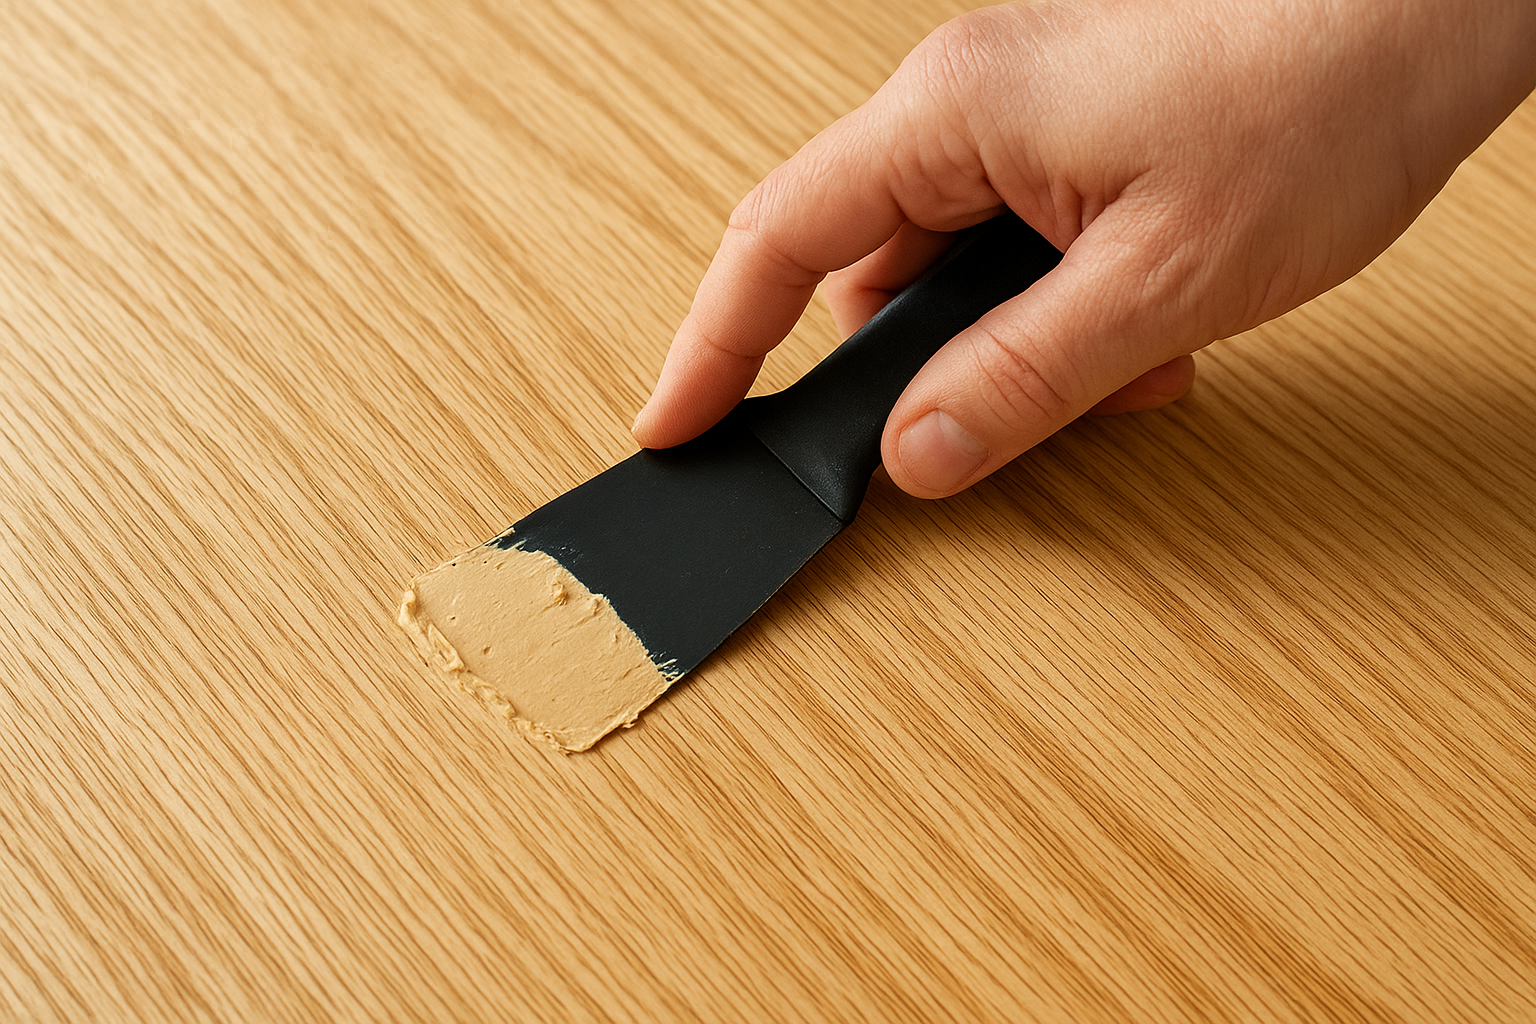
Grain filling is only necessary if you are painting over open-grain wood. If you are staining, skip it entirely since grain filler blocks the wood from absorbing stain evenly across the surface.
Prime to seal the surface and lock in adhesion
A good primer prevents bleed-through from repaired areas and gives your topcoat a uniform, grippable base. Use a shellac-based or oil-based primer for any surfaces that involved wood filler, as these seal more aggressively than latex options. Apply one thin coat, let it dry fully according to the label, then sand lightly with 220-grit paper and wipe clean with a tack cloth before your finish coat.
This priming step is one of the most skipped parts of how to refinish wood cabinets, and it is also one of the main reasons DIY finishes start peeling within the first year.
Step 4. Apply your finish and build a durable topcoat
With your surface prepped, repaired, and primed, you are ready to apply the actual finish. This is the step most people rush, and that rush is what creates brush marks, uneven color, and a finish that fails early. Thin coats applied correctly beat thick coats applied fast every single time. The key to learning how to refinish wood cabinets properly is patience at this stage.
Apply stain in thin, even sections
Work stain onto the wood using a clean foam brush or lint-free cloth, moving in the direction of the grain. Apply the stain generously across a manageable section, let it penetrate for the time listed on the product label (usually two to five minutes), then wipe off the excess with a clean rag using long strokes that follow the grain. The longer you leave stain on before wiping, the darker the tone gets, so be consistent across all pieces.
Test your stain on a scrap piece of the same wood species before touching your cabinet doors, so you know exactly what the final tone will look like.
Paint in thin, even coats and let each one dry fully
Use a high-quality synthetic brush or a short-nap foam roller for painted cabinets. Foam rollers minimize brush marks on flat door panels, while a brush handles frames and edges more cleanly. Apply the first coat thin enough that it looks slightly transparent, then let it dry completely before sanding lightly with 220-grit paper and wiping with a tack cloth. Two to three thin coats give you a far smoother result than one heavy coat that sags or wrinkles.
Seal everything with a clear topcoat
Whether you painted or stained, a clear protective topcoat is what actually protects the finish from daily wear, moisture, and cleaning products. Use a water-based polyurethane or a dedicated cabinet topcoat in a satin or semi-gloss sheen. Apply two to three thin coats, sanding lightly with 320-grit paper between each layer. This final step locks in your work and gives the surface the durability it needs to hold up for years.
Step 5. Let it cure, rehang everything, and maintain it
Your finish looks dry to the touch within hours, but dry and cured are not the same thing. Hanging doors too soon, stacking pieces, or placing objects on freshly finished surfaces before the coating fully hardens is one of the most common ways people undo a good refinishing job at the very end. The final step in how to refinish wood cabinets is really about patience and protecting the work you already put in.
Wait for a full cure before putting it back together
Most water-based topcoats feel dry within two to four hours, but they need at least five to seven days to reach full hardness. Oil-based finishes take even longer, sometimes up to 30 days for a complete cure. During this window, the finish scratches and dents far more easily than it will once hardened.
Do not hang doors or reinstall drawer fronts until the finish has cured for a minimum of 48 hours, even if it feels completely dry to the touch.
Keep finished pieces flat and supported on a clean surface while they cure. Avoid stacking them, leaning them against walls where they might rub, or placing anything on top of them until the cure window has passed.
Rehang doors and reinstall hardware carefully
Refer back to your labeled tape system from Step 1 when you start rehanging. Install each door in its original labeled position to avoid fit and alignment issues. Use your hinge adjustment screws to fine-tune the alignment once all doors are back on, checking that gaps are even and doors open without binding.
Keep the finish looking good long-term
Maintenance is straightforward if you stay consistent with a few basic habits. Daily cleaning choices make the biggest difference over time:
- Wipe spills immediately rather than letting moisture sit on the surface
- Clean with a soft damp cloth and a mild dish soap solution, avoiding abrasive scrubbers
- Avoid silicone-based sprays and harsh chemical cleaners that degrade the topcoat
- Reapply a fresh clear topcoat every three to five years depending on wear level
Staying on top of minor touch-ups keeps the finish looking sharp for years without requiring a full redo.
Ready for a fresh finish
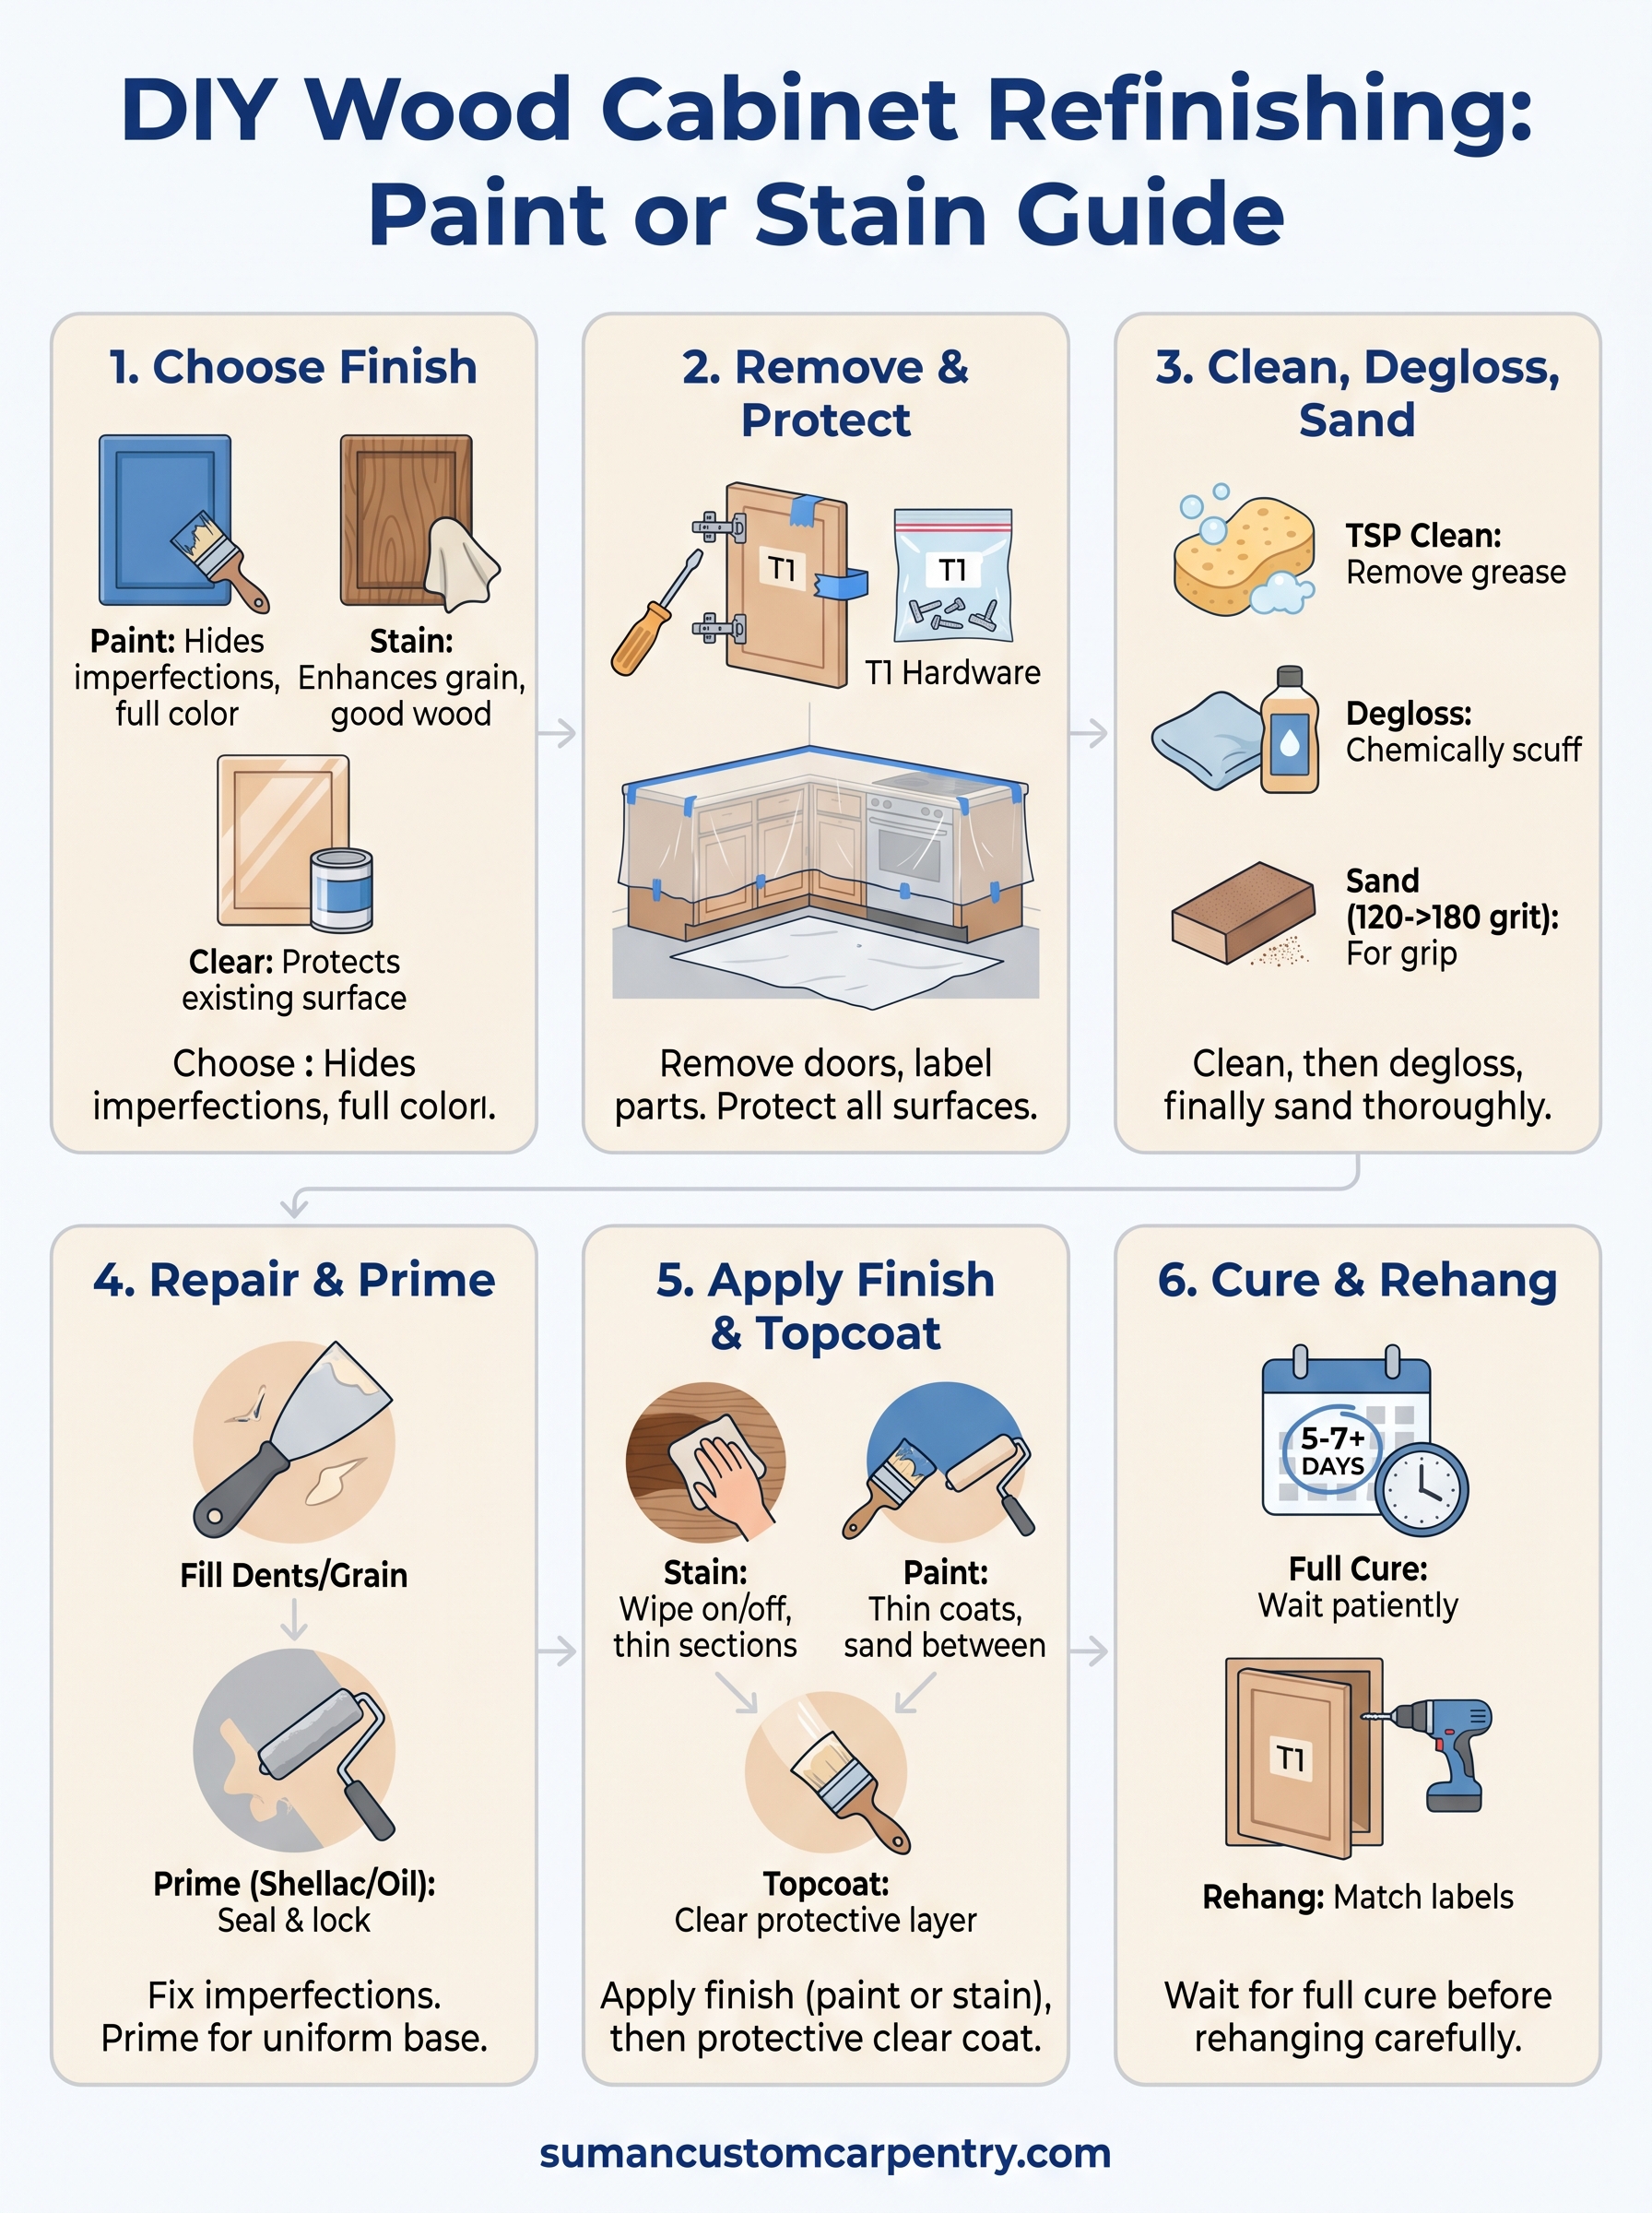
Now you have a complete, step-by-step picture of how to refinish wood cabinets from start to finish. The process takes time, but each stage builds directly on the last, and doing the prep work correctly is what separates a finish that lasts a decade from one that starts failing within a year. Take your time at every step, and your cabinets will come out looking intentional and solid rather than patched together.
That said, some cabinets are past the point where refinishing makes practical sense. If your cabinet boxes are warped, the joints are failing, or the layout simply does not work for your space, a fresh refinish will not fix the underlying problem. That is when a full custom build is worth considering. If you are weighing your options on Cape Cod, reach out to Suman Custom Carpentry to talk through what actually makes sense for your home.