
You’re probably staring at a wall in your dining room or entryway, picturing wainscoting, and wondering what it’s actually going to cost you. That’s a fair question, because wainscoting installation cost varies a lot more than most homeowners expect, and the ballpark figures you see on big home improvement sites rarely match what you’ll pay on Cape Cod for real wood, custom-fit panels.
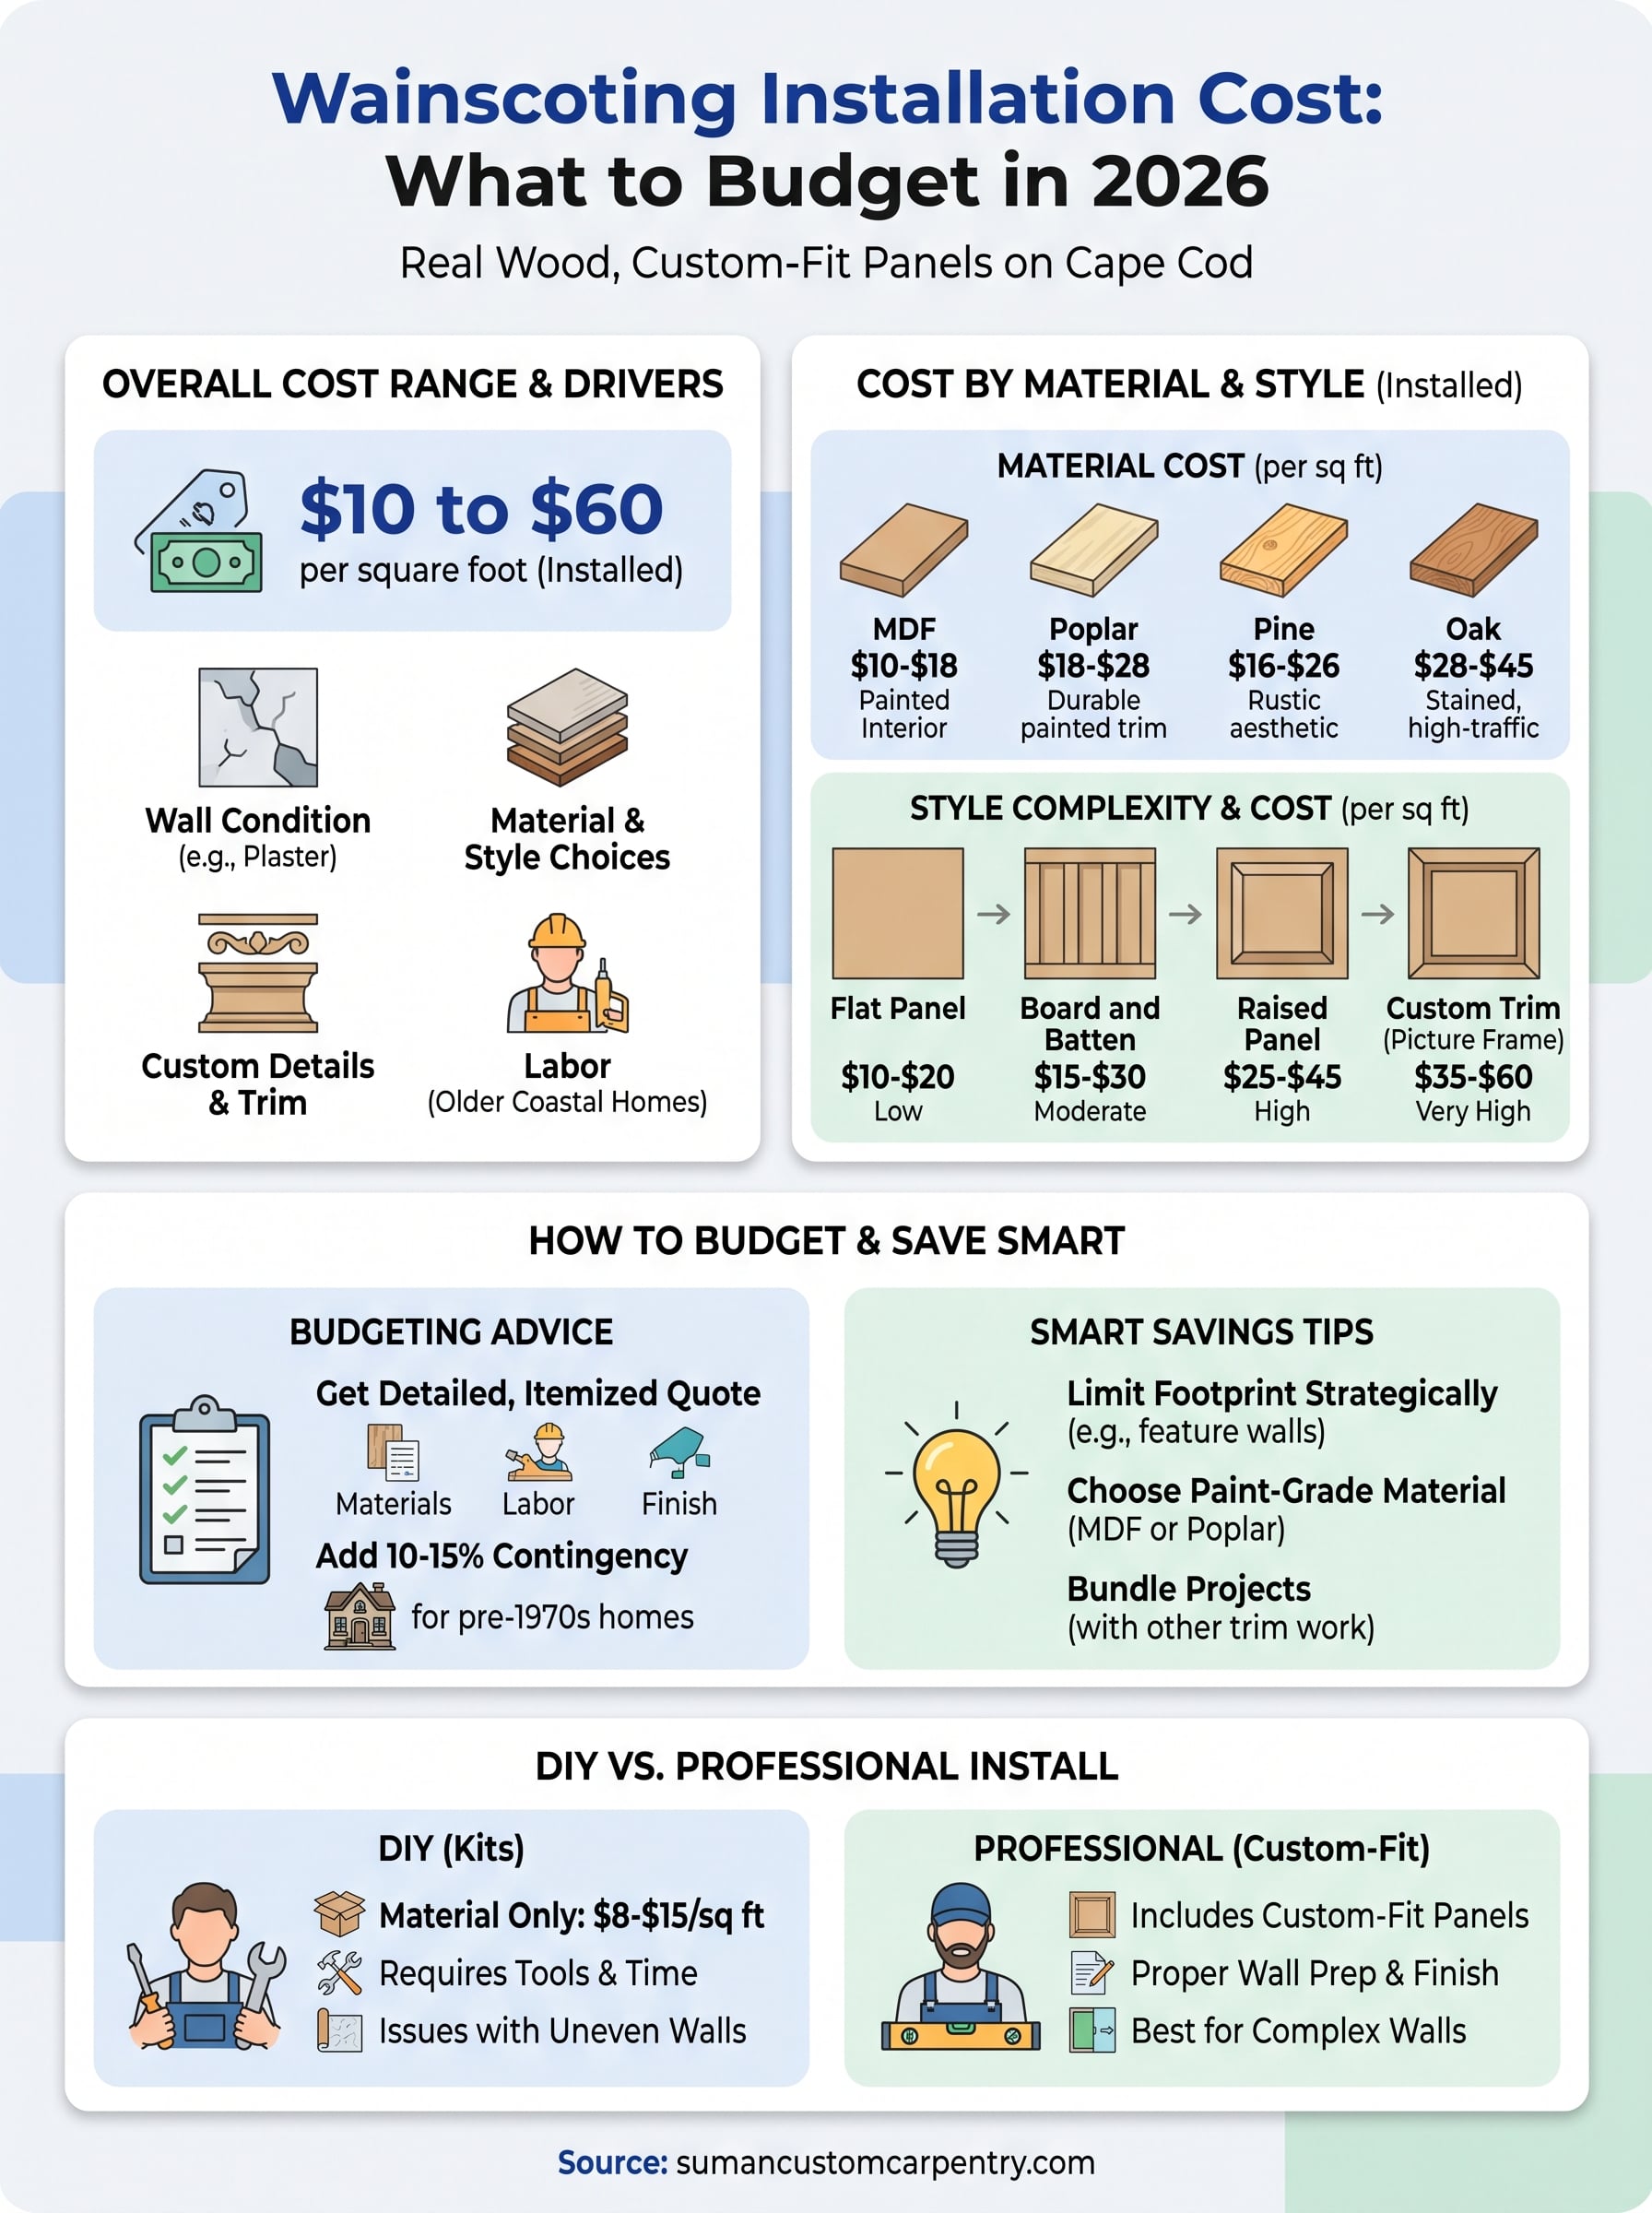
In general, you’re looking at anywhere from $10 to $60 per square foot installed, depending on the style, material, and how much custom carpentry work the room requires. Simple flat panel wainscoting sits at the low end, while raised panel or board and batten styles with custom trim details push toward the higher end fast.
This guide breaks down what drives that price, from material choices like MDF versus solid wood to labor factors specific to older coastal homes with uneven walls and tight corners. We’ll also cover where homeowners typically overspend, what a fair quote looks like in 2026, and how a hand-built, in-house approach like ours compares to prefab kits you might be considering instead.
Why wainscoting installation costs vary so much
Ask five contractors for a wainscoting quote and you’ll likely get five different numbers, sometimes wildly different. That’s not because anyone’s padding the bill. Wainscoting installation cost swings so much because the job isn’t one product, it’s a combination of material, design complexity, wall condition, and labor hours that changes from room to room. A straightforward flat panel job in a new-construction home costs a fraction of what a raised panel installation in a 1920s Cape Cod farmhouse runs, even if the square footage is identical.
Room size and wall condition
Square footage matters, but wall condition matters more. Older homes on Cape Cod often have plaster walls that aren’t flat, corners that aren’t square, and baseboards that have shifted over decades of settling. Before a single panel goes up, a carpenter has to shim, level, and sometimes reframe sections just to get a clean substrate. That prep work can add several hours of labor per room, and it’s the single biggest reason two similarly sized rooms can land on opposite ends of the price range.
Material and style choices
The material you choose swings cost more than almost anything else. MDF (medium-density fiberboard) is affordable and paints beautifully, but it doesn’t hold up well to moisture, which matters in bathrooms or mudrooms near the water. Solid wood, like poplar or oak, costs more upfront but lasts decades and takes stain if you want a natural look instead of paint.
| Style | Typical Cost Range (installed) | Complexity |
|---|---|---|
| Flat panel | $10-$20/sq ft | Low |
| Board and batten | $15-$30/sq ft | Moderate |
| Raised panel | $25-$45/sq ft | High |
| Custom trim with picture frame molding | $35-$60/sq ft | Very high |
The material and design you pick will move your final price more than any other single decision you make.
Labor and coastal home quirks
Labor rates alone don’t explain the spread either. A carpenter working in a historic Cape Cod cottage has to account for existing crown molding, chair rails, or electrical outlets that need to be worked around without damaging original trim. Salt air and humidity also affect material choices and finishing techniques, since homes near the water need wainscoting that resists warping and moisture better than an inland installation would.
Custom details and trim work
Finally, custom details like picture frame molding, decorative caps, or curved transitions around bay windows push costs up fast because they require more precise cuts and more time on-site. Homeowners who want a fully custom look, matched to existing millwork throughout the house, should expect to pay a premium for that level of craftsmanship, but it’s also what makes the finished room look built-in rather than bolted on.
How to budget for your wainscoting project
Budgeting for wainscoting starts with a realistic room-by-room estimate, not a single number pulled from a national average. Measure the linear footage of wall you actually want covered, factor in the height (chair-rail height around 32-36 inches is standard, full wainscoting can run higher), and multiply by the per-square-foot range for the style you like. A 12×14 dining room with chair-rail-height flat panel wainscoting might land around $2,000-$3,500 installed, while the same room in raised panel with custom trim could climb past $6,000.
Get a detailed, itemized quote
Any carpenter worth hiring should break a quote into materials, labor, and finishing separately, not hand you one lump figure. That breakdown lets you see exactly where your money’s going and where you have room to adjust.
- Material cost per linear or square foot
- Labor hours estimated for prep, install, and trim work
- Finish work (paint, stain, or clear coat) as its own line item
- Any allowance for unexpected wall repairs
A quote without an itemized breakdown makes it nearly impossible to know if you’re getting a fair price.
Build in a contingency for older homes
Homeowners on Cape Cod, especially those in homes built before the 1970s, should add a 10-15% contingency to whatever number they land on. Plaster repairs, hidden electrical, and uneven framing show up more often than not once a carpenter opens up a wall, and it’s better to plan for that upfront than get surprised mid-project.
Decide what’s really in scope
Lastly, separate what you actually need from what you’d like. Baseboard replacement, crown molding upgrades, and repainting the whole room are common add-ons that inflate a wainscoting quote fast. Deciding upfront whether those belong in this project or a future one keeps your wainscoting installation cost anchored to what you’re actually asking for, rather than a broader remodel that crept in along the way.
Wainscoting cost by material and style
Material choice drives price just as much as design style, and it’s worth understanding the tradeoffs before you commit to one. MDF stays the budget favorite because it’s smooth, paints cleanly, and costs less per sheet than solid wood, but it swells if it gets wet, which rules it out for bathrooms, mudrooms, or any room near a door that opens to salt air. Solid wood, especially poplar or oak, costs more per square foot but holds up to decades of humidity swings and takes stain if you want the grain to show instead of hiding it under paint.
Comparing material costs directly
Seeing the numbers side by side makes the tradeoff clearer than any general description could.
| Material | Cost Range (installed) | Best For |
|---|---|---|
| MDF | $10-$18/sq ft | Painted, dry interior rooms |
| Poplar | $18-$28/sq ft | Painted trim needing durability |
| Pine | $16-$26/sq ft | Rustic or knotty aesthetics |
| Oak | $28-$45/sq ft | Stained, high-traffic areas |
Choosing solid wood over MDF in a moisture-prone room isn’t an upgrade, it’s often the only choice that avoids a repair bill later.
Paint-grade versus stain-grade finishes
Finish grade matters almost as much as the wood species itself. Paint-grade material can have minor imperfections because the paint hides them, which keeps costs lower. Stain-grade lumber has to be free of knots and color variation, since stain highlights every flaw instead of covering it, and that selectivity adds cost to the material before a carpenter even starts cutting.
Matching style to your home’s age
Older Cape homes often look best with raised panel or picture-frame wainscoting that echoes original millwork, while newer builds can carry simpler flat panel styles without looking out of place. Picking a style that fits the house, rather than whatever’s trending, keeps your wainscoting installation cost proportional to the value it actually adds to the room.
DIY vs. hiring a professional carpenter
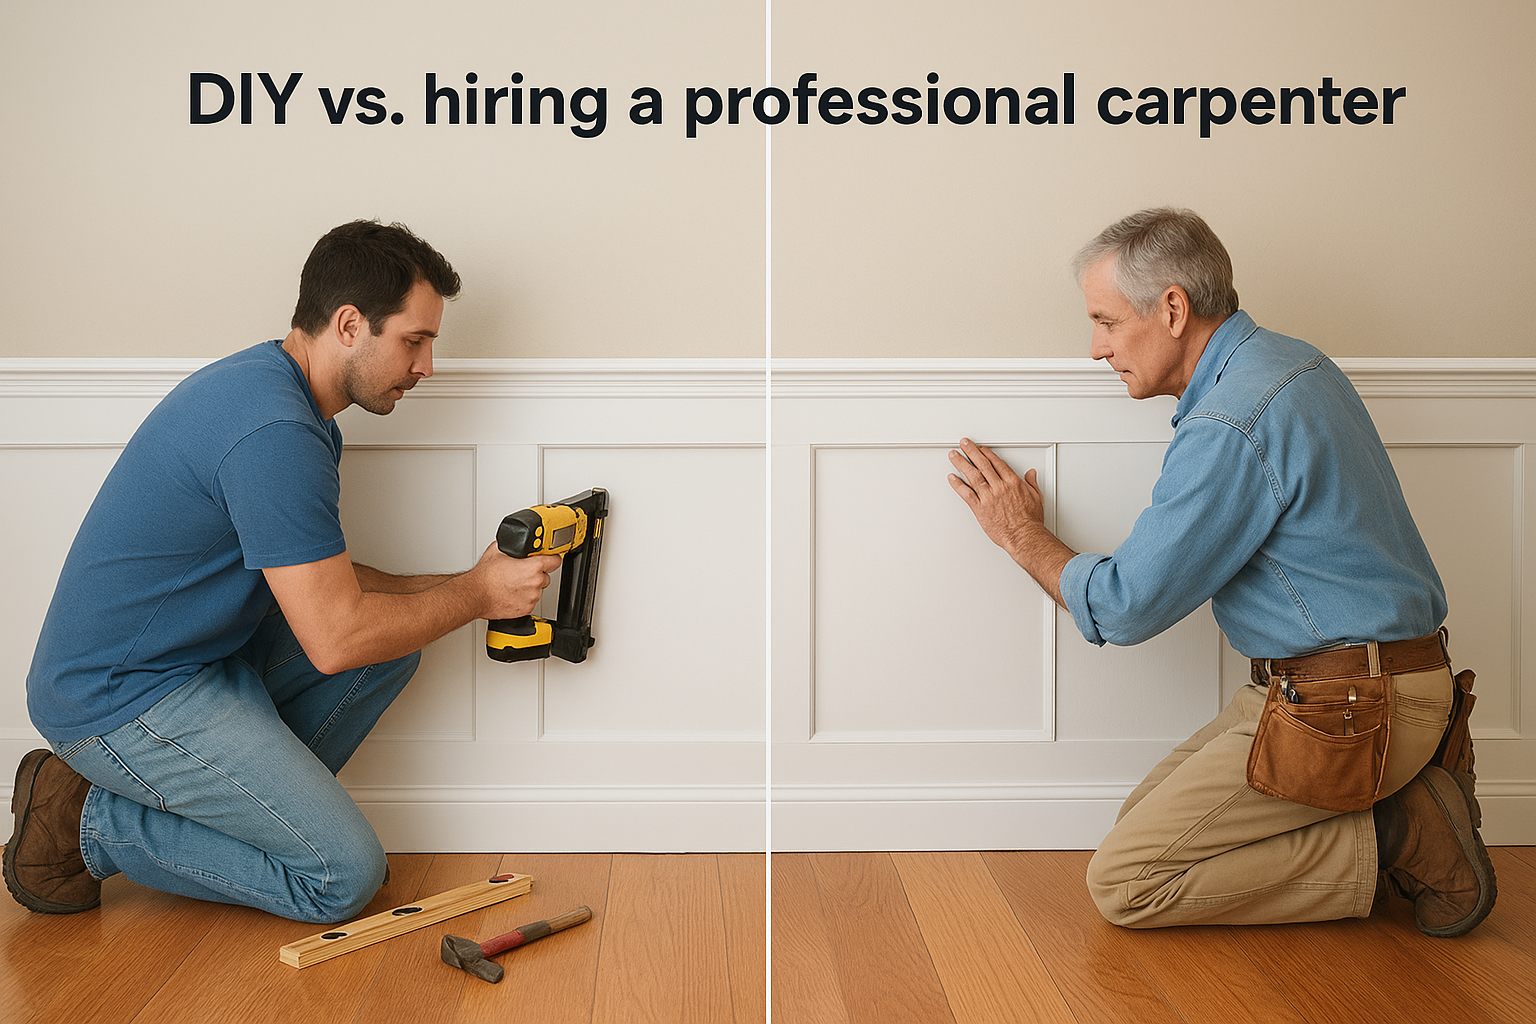
Wainscoting kits at big box stores make the project look approachable, and if you’ve got a square room with flat walls, a DIY install can genuinely save you money. But most Cape Cod homes don’t have square rooms or flat walls, and that’s where DIY budgets fall apart fast. Prefab kits assume standard dimensions that rarely match a 1930s cottage, so you end up cutting, shimming, and patching gaps that a professional would have anticipated before the first panel went up.
What DIY actually costs
Material for a DIY kit runs cheaper on paper, often $8-$15 per square foot, but that number doesn’t include the tools you’ll need to buy or rent, like a pneumatic nailer, miter saw, and level. It also doesn’t account for the time you’ll spend, which for most homeowners means multiple weekends rather than a single afternoon.
- Kit materials: $8-$15/sq ft
- Tool rental or purchase: $150-$400
- Time investment: 15-25 hours for an average room
- Risk of redo if cuts are off: adds cost fast
What professional installation adds
A professional carpenter charges more upfront, but that price includes custom-fit panels, proper wall prep, and a finish that matches existing trim throughout the house. Hiring someone who builds in-house rather than installing a boxed kit also means the wainscoting is scaled to your actual wall, not a generic template, which matters more in older homes than most people expect going in.
A kit built for a perfectly square room will never look right in a house that’s settled for eighty years.
When DIY makes sense
Small, low-visibility spaces like a mudroom or laundry room with flat, modern walls are reasonable DIY candidates if you’re comfortable with basic carpentry tools. Dining rooms, entryways, and anywhere guests will notice every seam are worth handing to a professional, since a bad miter joint at eye level is a lot harder to ignore than one behind a washing machine.
Smart ways to save on your wainscoting budget
Saving money on wainscoting doesn’t mean cutting corners on materials, it means being smart about where the labor and design choices go. Wainscoting installation cost drops fastest when you simplify the scope without sacrificing the parts of the room people actually notice, like the chair rail line and the corners near doorways.
Limit the footprint strategically
Instead of wrapping wainscoting around every wall in a room, apply it to the wall that gets the most visual attention, like the one behind a dining table or facing the front door. Full-room coverage looks great in photos, but partial coverage in the right spot often delivers 80% of the visual impact for 50-60% of the cost.
Choose paint-grade material
Paint-grade MDF or poplar costs noticeably less than stain-grade oak, and once it’s painted, most guests can’t tell the difference from across the room. Save the stain-grade lumber for smaller accent areas, like a single feature wall, where the wood grain actually gets seen up close.
Bundle projects with one carpenter
Scheduling wainscoting alongside other trim work, like new baseboards or a mudroom bench, spreads the carpenter’s setup and travel time across multiple jobs instead of billing it all to one project.
- Combine wainscoting with baseboard replacement in the same visit
- Ask about off-season scheduling discounts, since Cape Cod carpentry demand dips outside peak summer months
- Request a phased project, doing one room now and another next year, to spread cost without losing design consistency
- Skip decorative caps or picture-frame molding in secondary rooms where a simple flat panel does the job
The biggest savings come from choosing where wainscoting matters most, not from cutting quality everywhere.
Ask about material sourcing
A carpenter who builds in-house, rather than subcontracting the millwork out, often has better access to bulk material pricing and fewer markups passed along from a supplier. That’s worth asking about directly when comparing quotes, since it can shave real dollars off the material line without changing the design at all.
What to remember before you budget
Wainscoting installation cost isn’t a single number you can copy from a website, it’s a range shaped by your walls, your material, and how much custom detail you want in the finished room. Start with an honest measurement of the space, pick a material that fits the room’s moisture level, and build in a contingency if your home predates 1970. Getting quotes broken into materials, labor, and finish work protects you from surprises once the project starts.
Every number in this guide assumes hand-built, custom-fit work rather than a boxed kit, because that’s what actually holds up in an older Cape Cod home. If you’re ready to see what your specific room would cost, reach out to Suman Custom Carpentry for a detailed, in-person quote before you commit to a budget.