
A kitchen island can be the hardest-working piece in your entire home, or it can be a missed opportunity. The difference usually comes down to one thing: how well you plan the storage. Whether you’re working with a compact galley kitchen or a sprawling open floor plan, the right kitchen island storage ideas can turn wasted space into something that actually makes your daily routine easier. And if you’re on Cape Cod, where seasonal entertaining and coastal living put extra demands on kitchen functionality, smart island storage matters even more.
At Suman Custom Carpentry, we design and hand-build custom kitchen islands at our shop in Hyannis, so we see firsthand what works and what doesn’t. Over seven years of building kitchens across Cape Cod, we’ve learned which storage configurations our clients actually use every day and which ones just look good on Pinterest. That real-world experience shapes everything in this article.
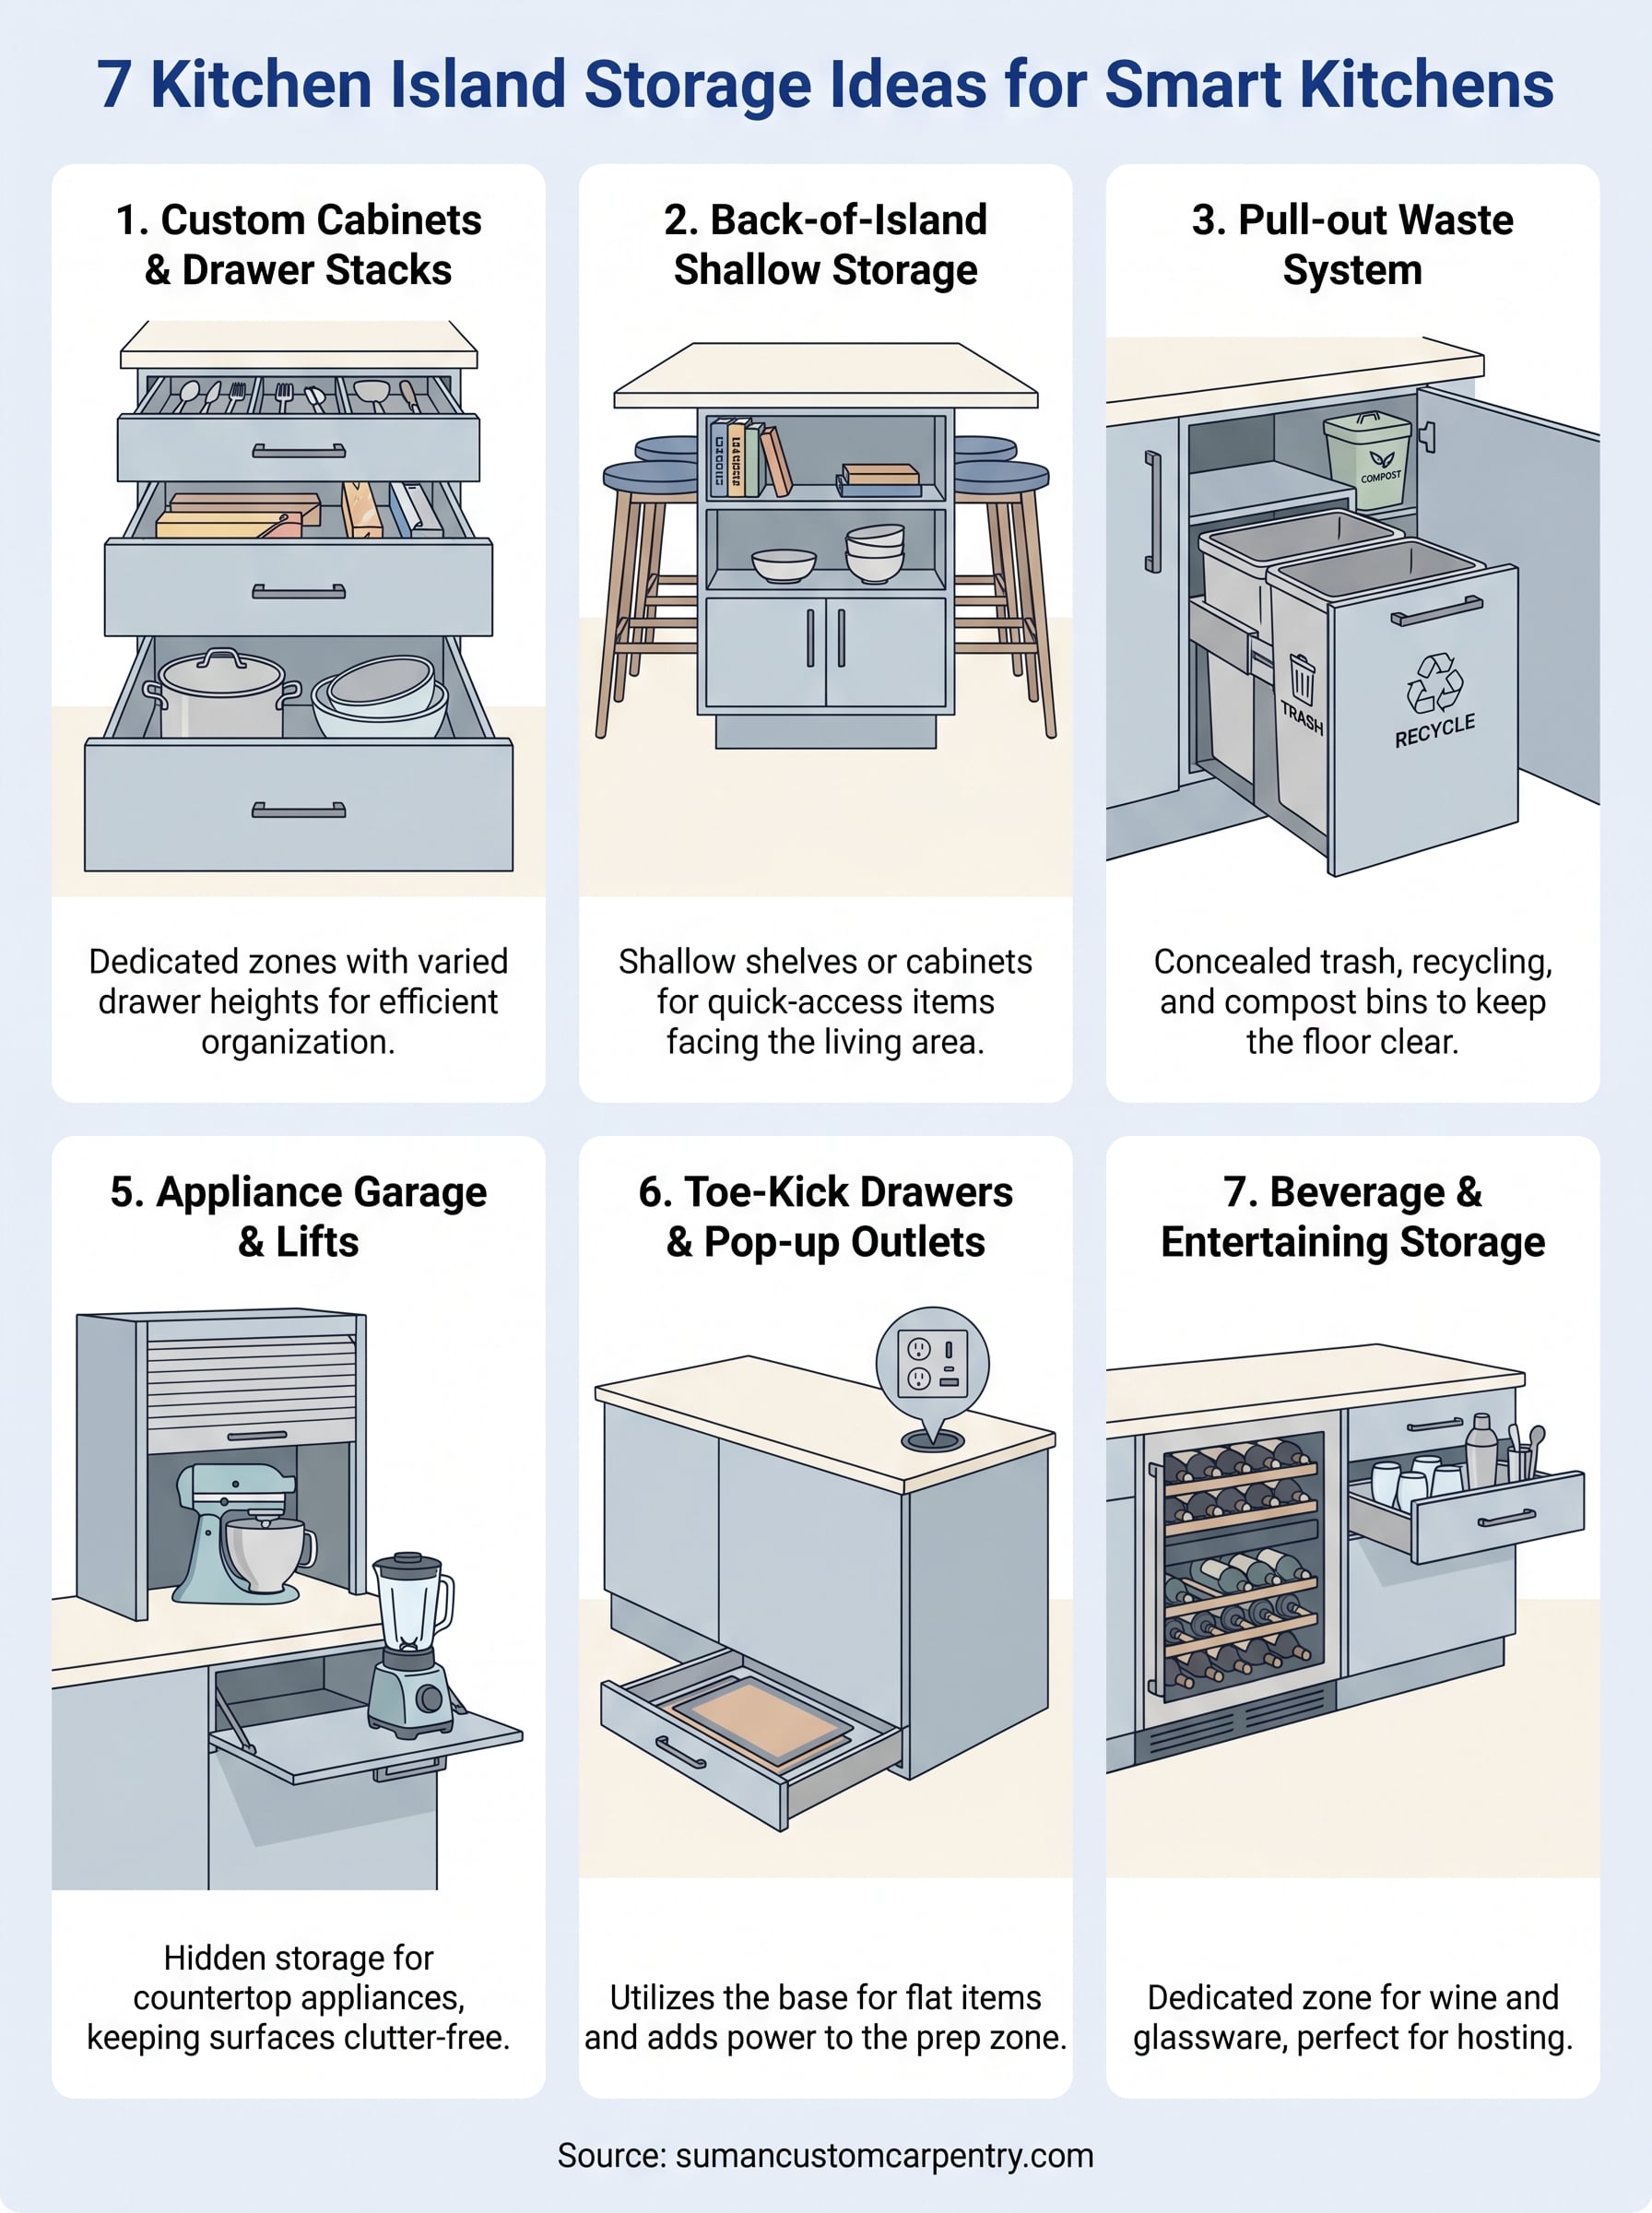
Below, we’re sharing 7 kitchen island storage ideas that work for both small and large kitchens. You’ll find practical layouts, organizational approaches, and design details that help you get more out of every square inch of your island.
1. Custom island cabinets and drawer stacks
Custom-built cabinets and drawer stacks are the foundation of any well-planned island. When you size the cabinet boxes to your specific needs, every inch of interior space gets used rather than wasted on dead corners or awkward proportions. This approach is one of the most flexible kitchen island storage ideas available because the configuration builds around exactly what you store, not the other way around.
What you gain
A full cabinet-and-drawer setup gives you dedicated zones for different categories of items. Deep base cabinets hold large pots and Dutch ovens, while stacked drawers keep utensils, linens, and smaller tools organized and easy to reach without digging. Unlike stock cabinetry, custom boxes can be sized to your cookware rather than forcing your cookware to fit the box.
The biggest benefit of custom drawer stacks is that nothing ends up in a junk zone because every drawer has a purpose from day one.
Smart design details
Think about drawer height variation when you plan your stack. A shallow top drawer works for flatware and prep tools, a mid-height drawer handles foil, wraps, and bags, and a deep bottom drawer is ideal for cast iron or mixing bowls. Soft-close undermount slides and full-extension hardware make every inch accessible and keep the action quiet.
- Top drawer: 3 inches deep, flatware and prep tools
- Middle drawer: 6 inches deep, wraps, bags, and linens
- Bottom drawer: 10 to 12 inches deep, cast iron, mixing bowls
Sizing and clearances
Your island needs a minimum depth of 24 inches to run standard cabinet boxes on the work-surface side. If you want cabinets on both sides of the island, plan for at least 36 to 42 inches of total island depth so the walkway clearance on each side stays at the code-recommended 42 inches. Islands shallower than 24 inches are better suited to open shelving or shallow pull-outs.
Cost and complexity
Custom cabinet boxes and drawer stacks cost more than stock options upfront, but they outlast them by a wide margin. At Suman Custom Carpentry, all cabinet boxes are hand-built in-house and backed by a lifetime warranty, which changes the cost-per-year calculation considerably. For most Cape Cod homeowners, the investment returns value through durability and a layout that never needs to be worked around.
2. Back-of-island shallow cabinets or shelves
When you add shallow cabinets or open shelves to the back face of your island, you create a separate storage layer without increasing your kitchen’s footprint at all. This is one of the more underused kitchen island storage ideas, especially in kitchens where the island faces a seating area or open living space.
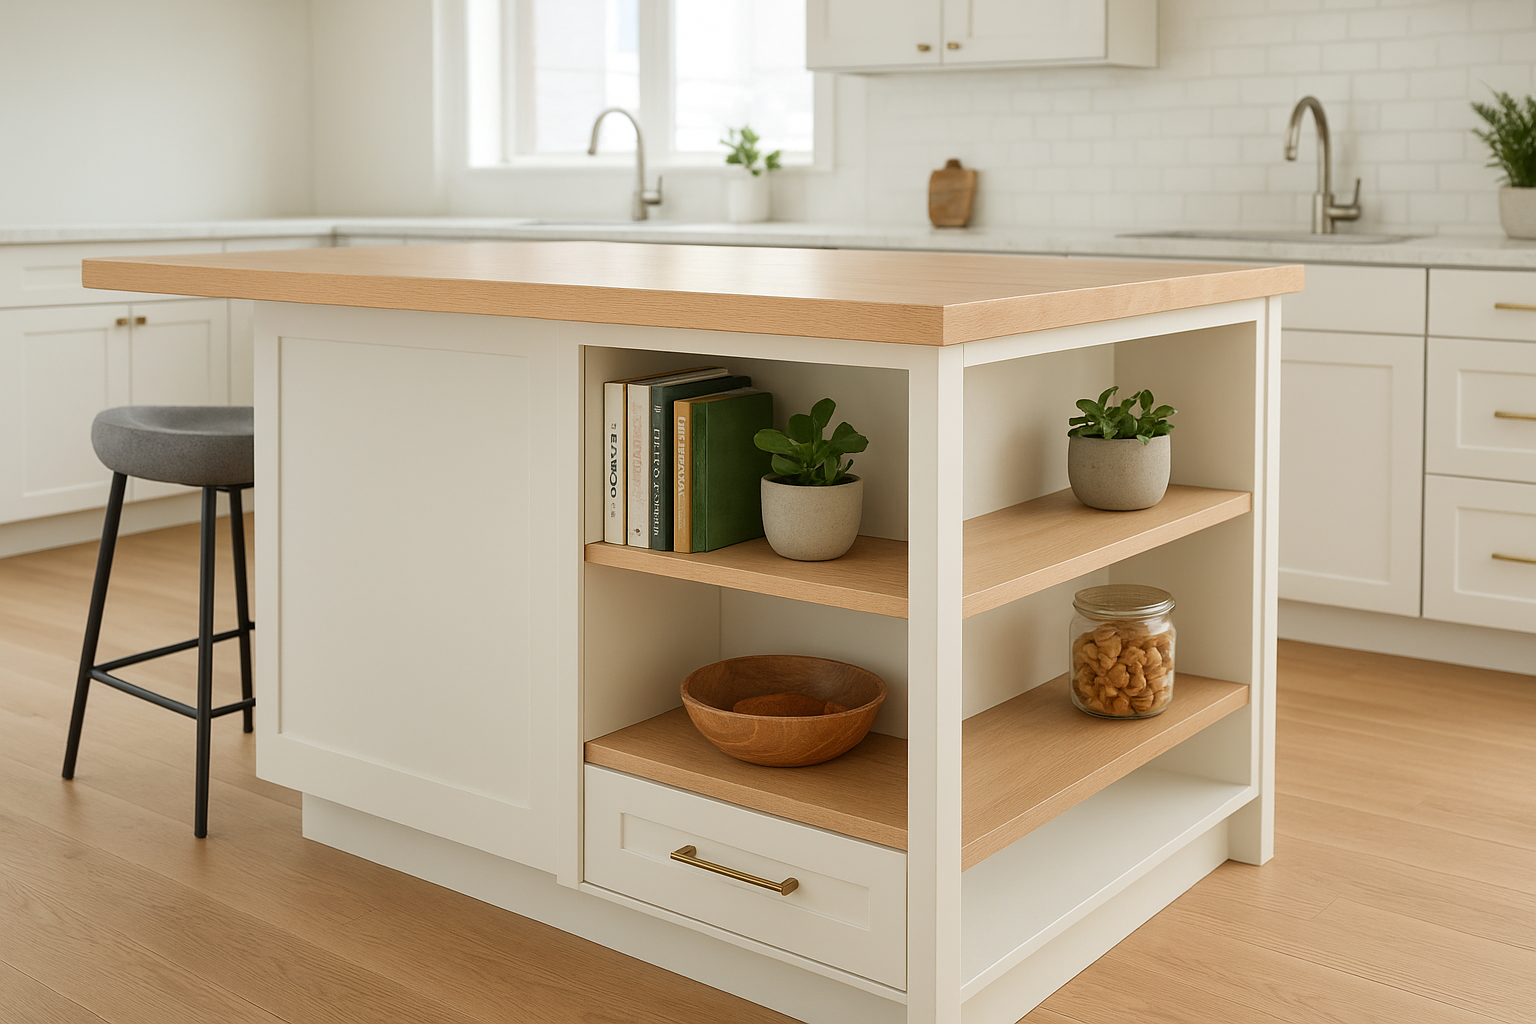
What you gain
Shallow back-of-island storage gives you quick-access spots for items you reach for constantly but don’t want sitting on the countertop. Open shelves handle cookbooks, small plants, or decorative bowls, while closed shallow cabinets keep snacks, napkins, or bar tools within arm’s reach of whoever is seated at the island.
This setup also gives your island a finished, purposeful look from both sides rather than leaving a blank panel facing your living area.
Smart design details
Keep the depth between 6 and 10 inches so these cabinets don’t cut into knee clearance at a seating overhang. Open shelves look best with consistent spacing of 10 to 12 inches between each shelf, which keeps items visible and easy to grab rather than stacked and hidden.
Sizing and clearances
These cabinets work on any island that is at least 18 inches deep on the back side. If your island includes a seating overhang, confirm the overhang depth of 12 to 15 inches remains intact after subtracting the shallow cabinet depth.
Cost and complexity
Back-of-island shelves are among the most straightforward additions to a custom island build. Because the boxes are shallow and structurally simple, both material and labor costs stay well below a full deep-cabinet configuration on the same face.
3. Pull-out trash, recycling, and compost
Building waste management directly into your island is one of the most practical kitchen island storage ideas you can implement. Instead of a freestanding bin that takes up floor space or sits awkwardly beside a cabinet, a pull-out system keeps everything concealed behind a door and right where you prep food.
What you gain
A pull-out waste station puts trash, recycling, and compost in one dedicated spot, which means fewer trips across the kitchen and less clutter on the floor. You also gain the countertop and cabinet space you would otherwise lose to a standalone bin.
Positioning the pull-out directly below your main prep zone cuts down on cleanup time significantly because you can scrape scraps straight from the cutting board into the compost.
Smart design details
A double-bin or triple-bin configuration fits inside a standard 18-inch-wide base cabinet pull-out. Stainless or plastic liner buckets drop into the frame and lift out for emptying. Look for soft-close slides rated for the combined weight of the bins when full, since this hardware takes more daily wear than almost any other cabinet component.
Sizing and clearances
A single-bin pull-out fits in a 12-inch cabinet opening, while a two or three-bin version needs 18 to 21 inches. Allow at least 16 inches of interior cabinet height to accommodate a standard liner bucket with the lid open.
Cost and complexity
Pull-out waste hardware is mid-range in cost and straightforward to incorporate during a custom island build. Adding this feature at the design stage costs far less than retrofitting it later.
4. Vertical pull-outs for trays and spices
Baking sheets, cutting boards, serving platters, and spice collections all share one problem: they’re awkward to store in a standard base cabinet. Vertical pull-outs solve that by turning a narrow slice of island space into an organized column where each item stands upright and stays visible. This is one of the most space-efficient kitchen island storage ideas for people who cook regularly.
What you gain
A vertical pull-out keeps tall flat items like sheet pans and trays separated and accessible without stacking. You pull the whole unit out and grab exactly what you need in one motion rather than unloading half the cabinet to reach the item at the back.
Placing a spice pull-out on the side of the island closest to your cooktop cuts your steps during cooking down to almost nothing.
Smart design details
A dual-zone pull-out combines a tray divider section on top with a tiered spice rack below, which makes the most of one narrow opening. Use metal or solid wood dividers spaced roughly 2 inches apart to keep trays from leaning and spices from tipping.
Sizing and clearances
Vertical pull-outs fit comfortably in a cabinet opening as narrow as 6 inches, and a 9-inch opening handles both trays and a spice section with room to spare. The interior height should match your tallest tray plus at least 2 inches of clearance above it.
Cost and complexity
These units are straightforward to build into a custom island during the initial design phase. Hardware costs are modest, and the narrow footprint means this feature adds strong organizational value at a relatively low material cost.
5. Appliance garage and lift-up appliance storage
Countertop appliances like stand mixers, toasters, and coffee makers take up valuable prep space if you leave them out permanently. Building an appliance garage or lift-up storage compartment into your island removes them from the surface when they’re not in use while keeping them plugged in and ready to deploy in seconds.
What you gain
An appliance garage gives you dedicated, concealed storage for bulky countertop appliances without forcing you to lug them in and out of a base cabinet. Lift-up mechanisms bring heavy appliances like stand mixers to counter height with minimal effort, which makes this one of the more practical kitchen island storage ideas for serious home cooks who want a clean countertop between uses.
Smart design details
A tambour door or bi-fold door works best for an appliance garage because it doesn’t swing out into your prep zone. Lift-up platforms use spring-loaded or motorized hardware that holds the appliance at counter height while you work, then lowers it back below the surface when you’re finished.
Installing a dedicated outlet inside the garage means your appliances stay plugged in at all times, which removes the extra step of reconnecting them each use.
Sizing and clearances
Plan for at least 18 to 24 inches of interior width and a cabinet height that clears your tallest appliance by 2 to 3 inches with the door open. Lift-up mechanisms require a minimum cabinet depth of 24 inches to operate correctly.
Cost and complexity
Lift-up hardware is the most mechanically involved feature in this list. Budget accordingly and source hardware rated for the specific weight of your heaviest appliance to avoid premature wear.
6. Hidden toe-kick drawers and pop-up outlets
Most people overlook the toe-kick zone at the base of an island, treating it as dead space. Building shallow drawers into that 3-to-4-inch recessed strip, and adding pop-up outlet stations into the countertop, turns two commonly wasted features into genuinely useful ones.
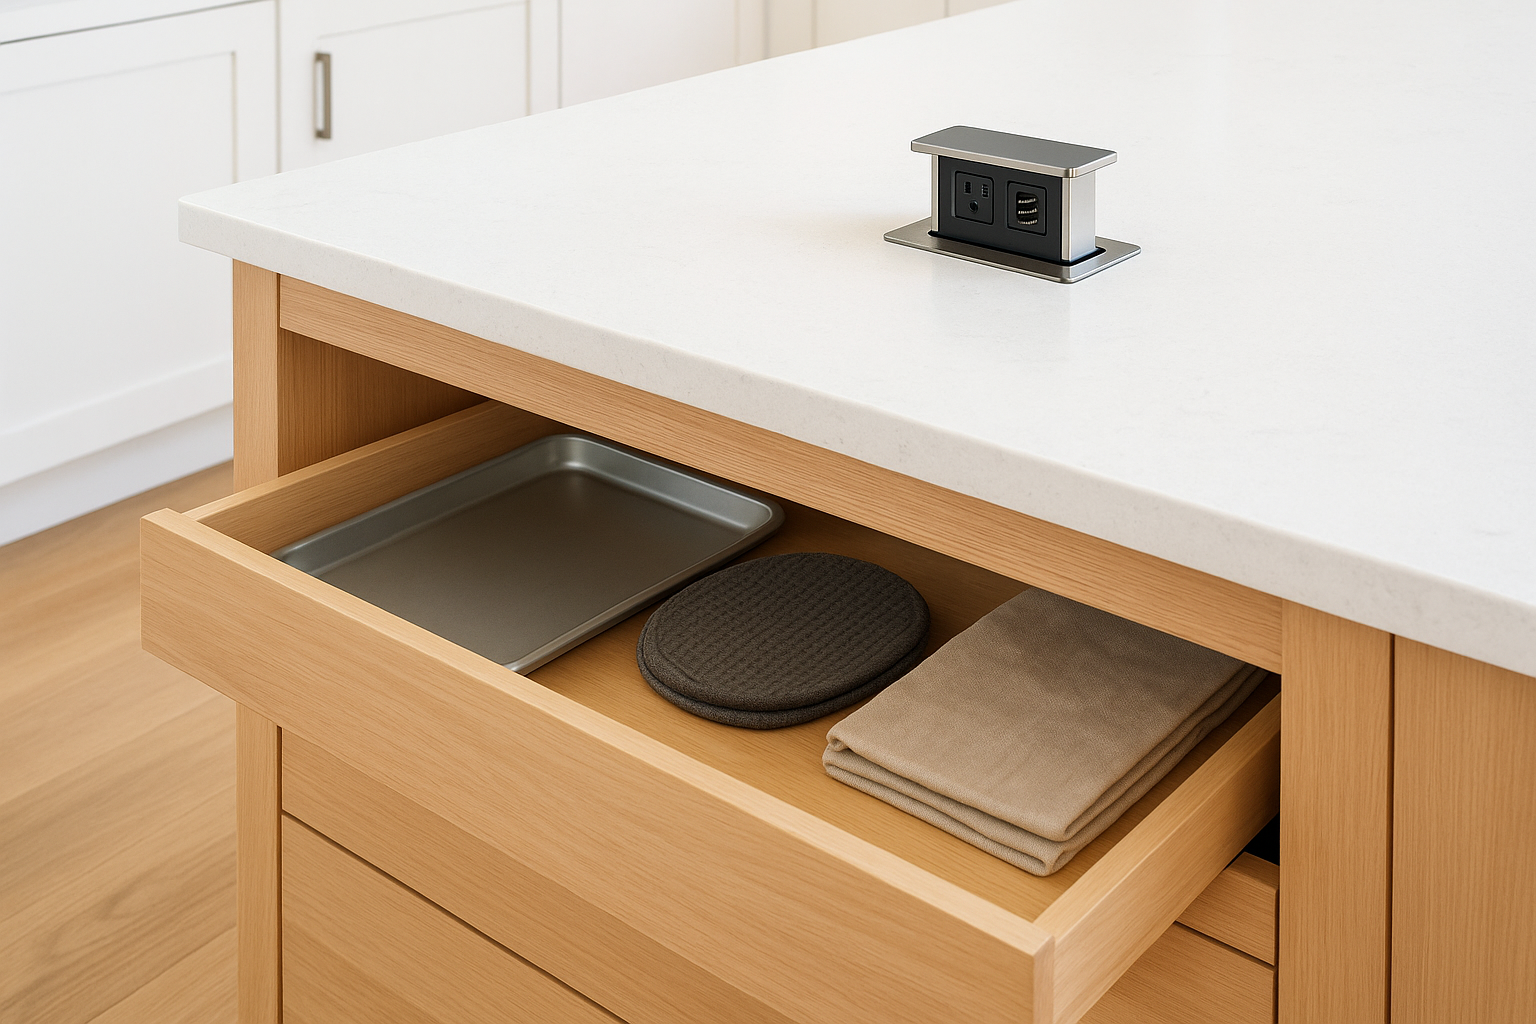
What you gain
Toe-kick drawers give you extra storage for flat items like baking mats, trivets, extra placemats, and folded linens that don’t need frequent access. Pop-up outlets keep your countertop clear of visible cords while still giving you power exactly where you prep and serve.
Combining both features in one island build costs far less than adding them separately after the fact.
Smart design details
Toe-kick drawers use a touch-latch or finger-pull mechanism since there’s no room for a standard handle at floor level. For pop-up outlets, look for a spring-loaded countertop unit that sits flush when closed and rises with a light press, keeping USB ports and standard plugs within reach without cluttering the surface.
Sizing and clearances
Toe-kick drawers work in any island with a standard 3.5-inch toe-kick height. Interior depth typically runs 20 to 22 inches, which is enough for sheet pans laid flat. Pop-up outlet boxes require a cutout of roughly 3.5 by 5 inches in the countertop surface.
Cost and complexity
Both features are low-cost additions relative to the value they provide. Toe-kick drawer hardware is simple, and pop-up outlet units are widely available in configurations that include USB-A, USB-C, and standard receptacles.
7. Beverage and entertaining storage in the island
If you entertain regularly on Cape Cod, dedicating part of your island to beverage and entertaining storage pays off every time guests arrive. This is one of the most underrated kitchen island storage ideas for homeowners who want the kitchen to function as a social hub without a cluttered bar cart taking up floor space.
What you gain
Building beverage storage into your island keeps wine, glassware, and bar tools in one contained zone rather than scattered across three different cabinets. You free up perimeter cabinet space for everyday cooking supplies while keeping everything your guests need within easy reach of the seating side.
A well-placed under-counter wine cooler in the island means you never leave the conversation to cross the kitchen for a refill.
Smart design details
A 15-inch under-counter wine cooler drops into a base cabinet opening and keeps bottles at the right temperature without taking any counter space. Pair it with a dedicated glassware drawer or open shelf directly above so everything for pouring stays in one spot. Deep drawers on the same side handle bar tools, cocktail napkins, and bottle openers.
Sizing and clearances
Most under-counter beverage coolers require a minimum cabinet opening of 15 inches wide and 34 inches tall. Leave at least 1 inch of clearance on each side for ventilation unless you choose a built-in model rated for zero-clearance installation.
Cost and complexity
Under-counter beverage coolers range widely in price depending on capacity and brand. The cabinetry surrounding the unit is straightforward to build, so the main variable in your budget is the appliance itself rather than the carpentry work.
Wrap-Up and Next Steps
These seven kitchen island storage ideas cover the full range of what a well-designed island can do, from basic cabinet and drawer configurations to specialized features like toe-kick drawers and integrated beverage storage. The common thread across all of them is intentional planning before a single board gets cut.
Getting the most out of your island means knowing how you cook, how you entertain, and what you actually reach for every day. Every feature in this list works best when it’s sized and positioned around your specific habits rather than copied from a catalog. That difference between a custom build and a stock solution is exactly where long-term functionality either holds up or breaks down.
If you’re planning a kitchen renovation on Cape Cod and want an island built to your exact specifications, contact Suman Custom Carpentry to start the conversation. All work is hand-built in-house at our Hyannis shop, and we back every cabinet box with a lifetime warranty.