
A cluttered bathroom counter doesn’t mean you need more space, it usually means you need smarter storage. Built-in solutions like recessed niches, custom vanities, and hidden cabinets keep everyday essentials accessible without eating into your floor plan. If you’ve been searching for bathroom built-in storage ideas that actually work with your layout (not against it), you’re in the right place.
At Suman Custom Carpentry, we design and hand-build custom bathroom cabinetry and built-ins right here in our Hyannis shop on Cape Cod. We’ve seen firsthand how the right storage transforms a bathroom from frustrating to functional, especially in older Cape homes where square footage is tight and every inch matters.
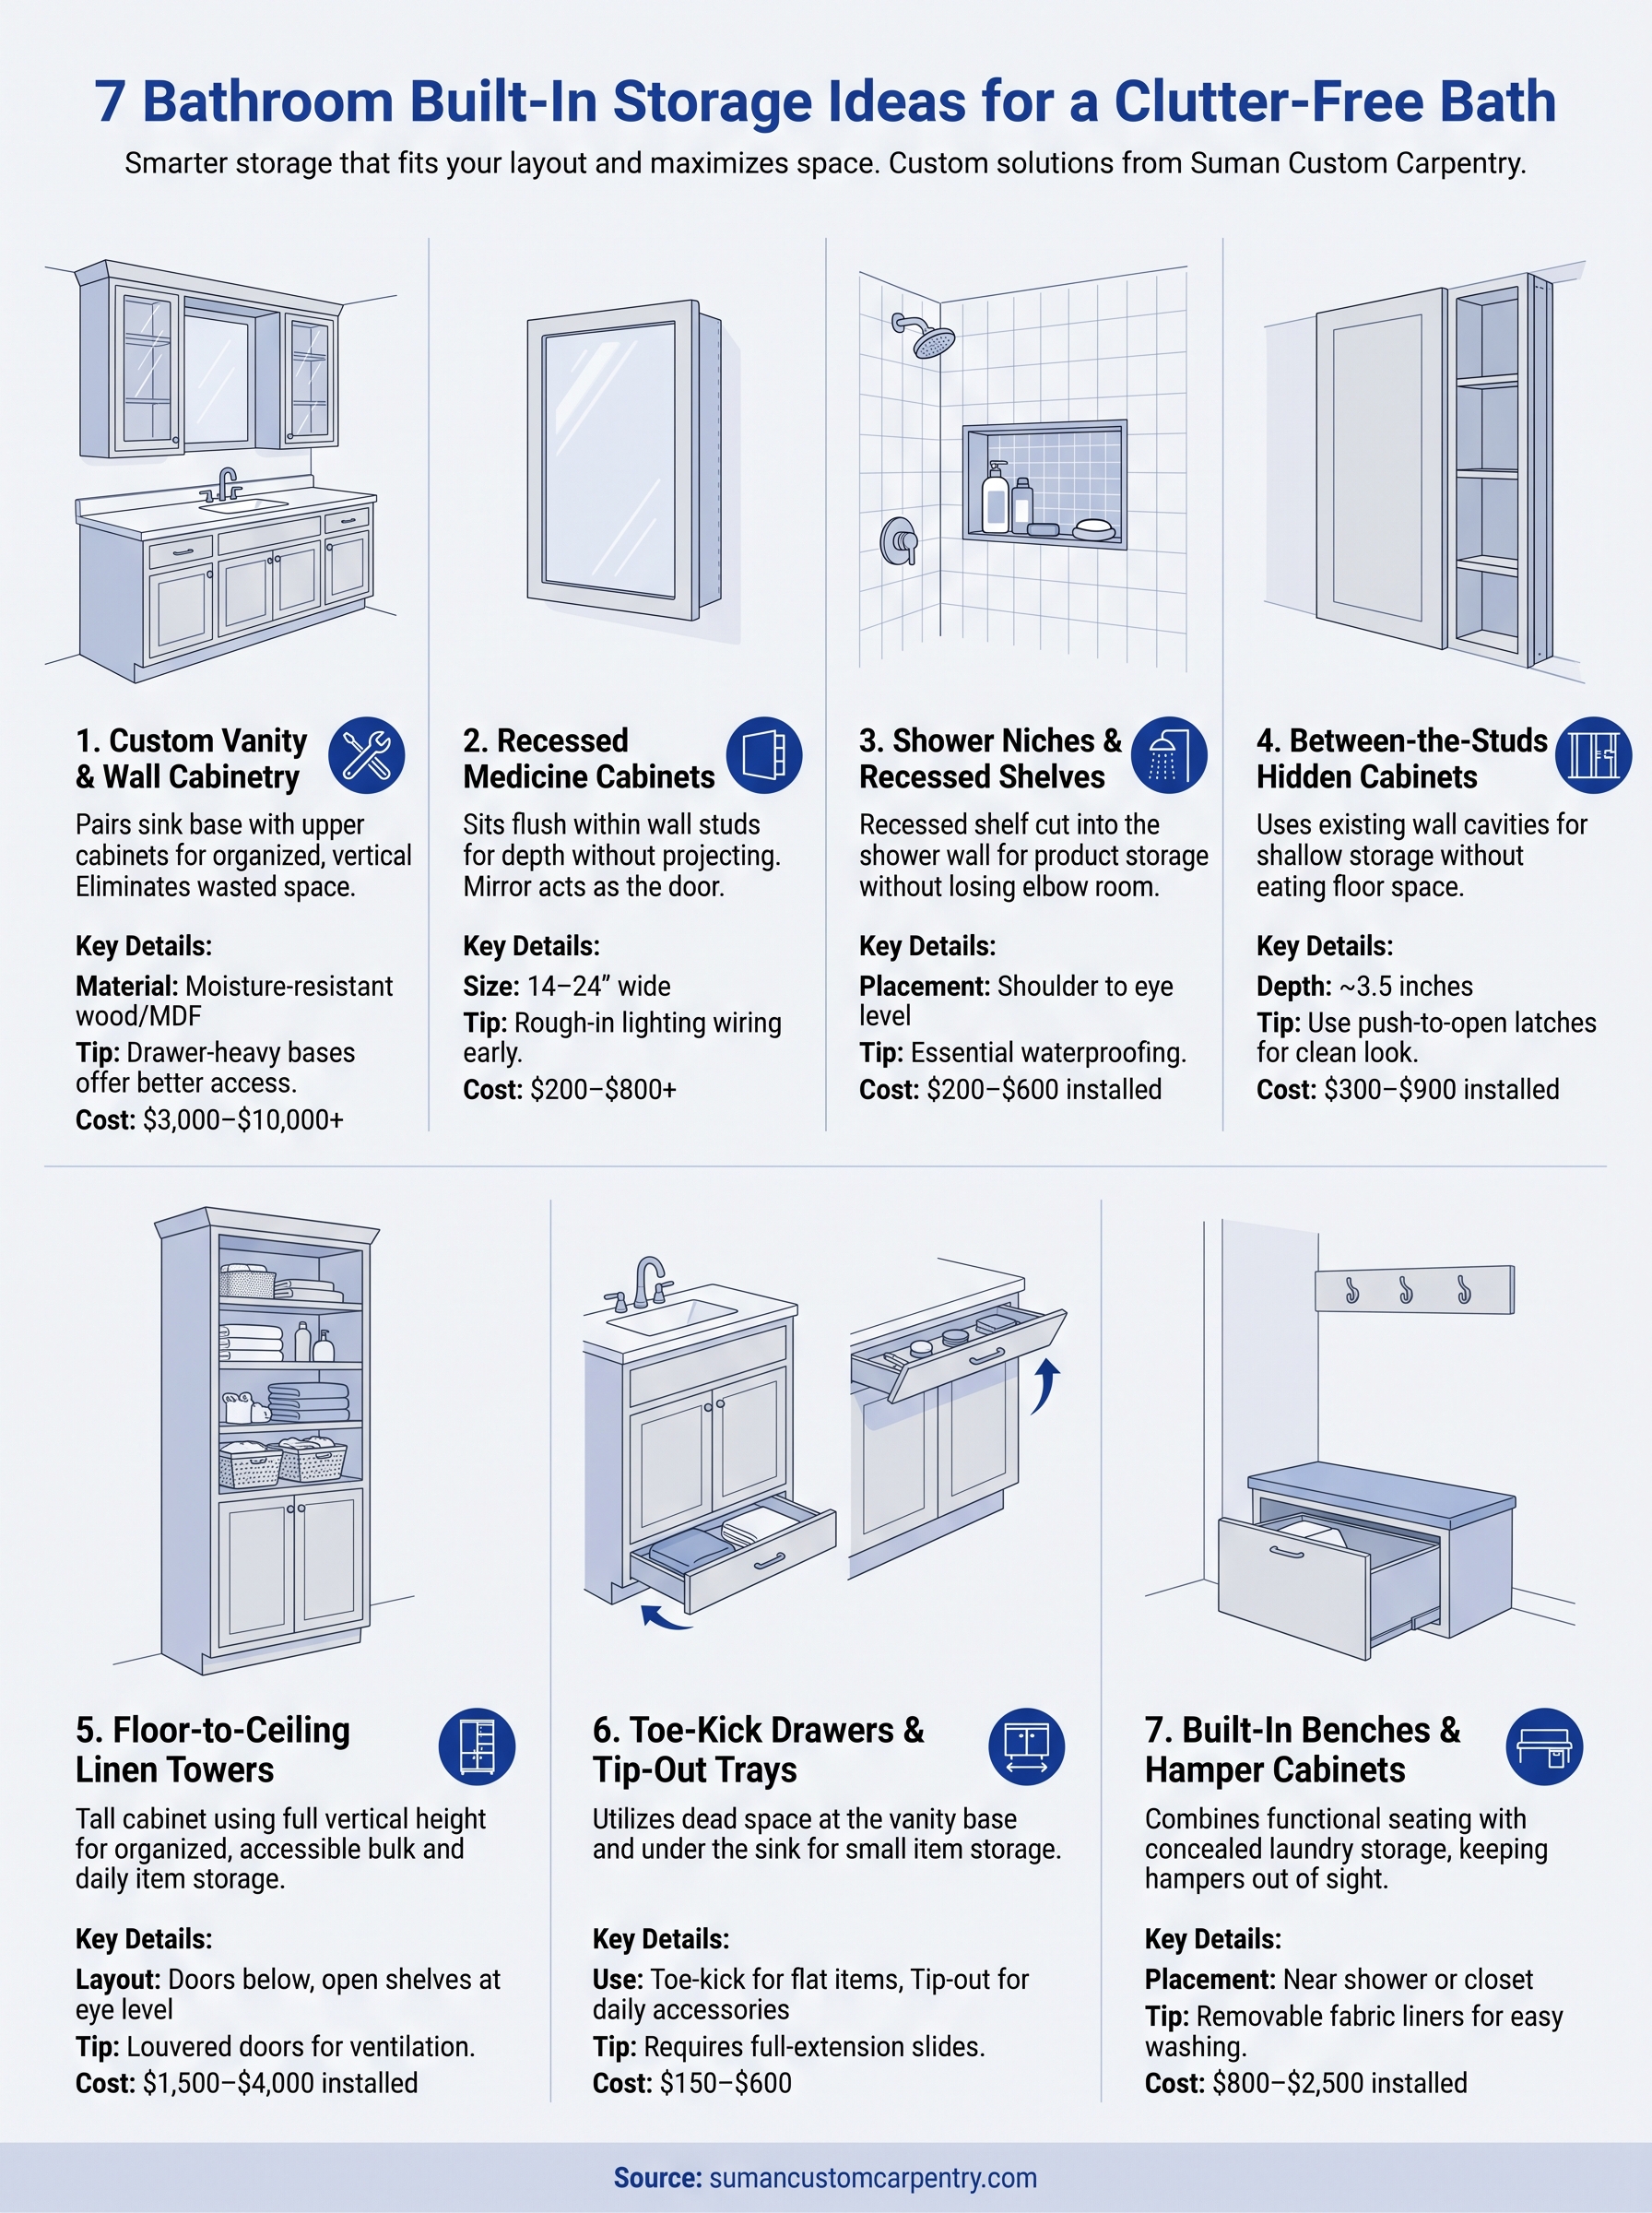
Below, we’re sharing seven built-in storage ideas we recommend to our clients, from simple recessed shelving to full custom vanity builds. Each one is practical, looks intentional, and can be tailored to fit your exact bathroom dimensions. Whether you’re planning a full remodel or just want to upgrade one problem area, these ideas will give you a clear starting point.
1. Custom built-in vanity and wall cabinetry
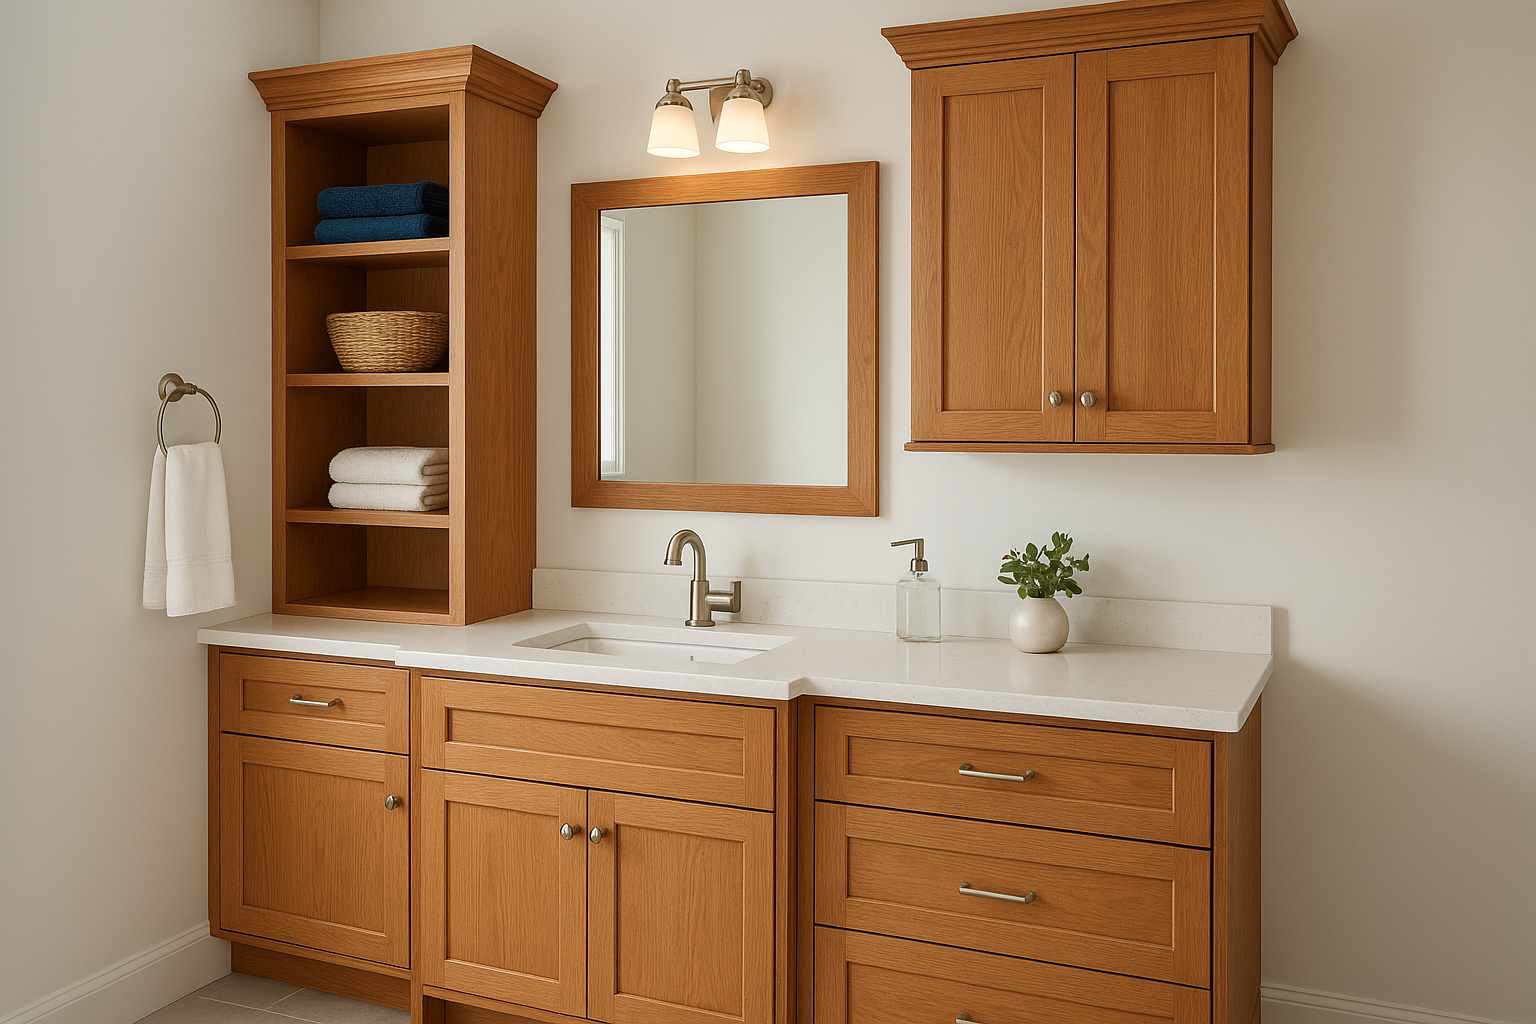
A custom vanity paired with wall cabinetry is the most impactful of all bathroom built-in storage ideas because it replaces generic, wasted space with storage designed around how you actually use your bathroom. Instead of a freestanding unit that sits on the floor and collects moisture underneath, a built-in anchors itself to the room and uses every vertical inch available to you.
What it is and why it works
A custom built-in vanity pairs a sink base cabinet with upper wall cabinets or open shelving directly above. Unlike stock cabinetry, yours gets built to your exact wall dimensions, eliminating awkward gaps and filler strips. This setup creates dedicated zones for daily items, cleaning supplies, and linens, all within arm’s reach and out of sight.
Your countertop and sink drop into the custom base, making the whole unit look like one cohesive piece rather than a collection of parts that happen to share a wall.
Layout options that add storage fast
Common layouts that work well in most bathrooms include:
- Stacked configuration: Upper cabinet above the sink with closed doors flanking each side
- Tower addition: A tall side cabinet next to the vanity for deep drawer storage without widening your footprint
- Full-width run: A continuous vanity across a longer wall mixing drawers, doors, and open shelves
A drawer-heavy base almost always outperforms a door-and-shelf setup for daily items because everything stays visible and reachable without digging.
Material and finish choices for humid bathrooms
Solid wood or high-density MDF with a moisture-resistant finish both hold up well in standard bathroom conditions. Avoid particleboard cores near sinks or shower walls, since they absorb moisture and break down quickly over time.
Soft-close hinges and metal drawer slides are worth the upgrade here. Humidity warps cheap plastic hardware, so investing in quality components up front saves you from repairs in a few years.
Typical cost range and timeline
A custom vanity with wall cabinetry typically runs between $3,000 and $10,000 or more depending on size, materials, and complexity. At Suman Custom Carpentry, our build-and-install timeline for bathroom cabinetry runs four to six weeks from final design approval, covering hand-building in our Hyannis shop, finishing, and installation.
2. Recessed medicine cabinets that sit flush
A recessed medicine cabinet sits inside the wall rather than hanging in front of it, giving you storage without the cabinet face projecting into the room. This is one of the simplest bathroom built-in storage ideas for gaining depth where you don’t have floor space to spare.
What it is and why it works
The cabinet body installs between wall studs, using the standard 3.5-inch depth already built into most framing. Your mirror acts as the door, so the unit disappears completely when closed. This setup eliminates the bulky surface-mount look while still holding a useful amount of daily product.
Sizing, placement, and mirror options
Most units run 14 to 24 inches wide, and two can be combined side by side for a wider span. Center the cabinet above the sink at eye level for the primary user. Mirror upgrades worth considering include beveled edges and fog-resistant coatings, both practical choices for humid bathrooms.
Electrical and lighting details to plan early
If you want lighting inside the cabinet, rough-in your wiring before the cabinet goes in, not after. Retrofitting wiring through a finished wall adds significant cost and labor. A side-lit mirror mounted adjacent to the cabinet is a cleaner alternative that skips interior electrical work entirely.
Plan electrical before installation. Adding it after the wall is closed almost always costs more than doing it during rough-in.
Typical cost range and scope
A quality recessed unit runs $200 to $800 before installation labor. Custom versions with lighting or specialty mirrors cost more. Most installations wrap up in one to two days once framing and any electrical rough-in is complete.
3. Shower niches and recessed bath shelves
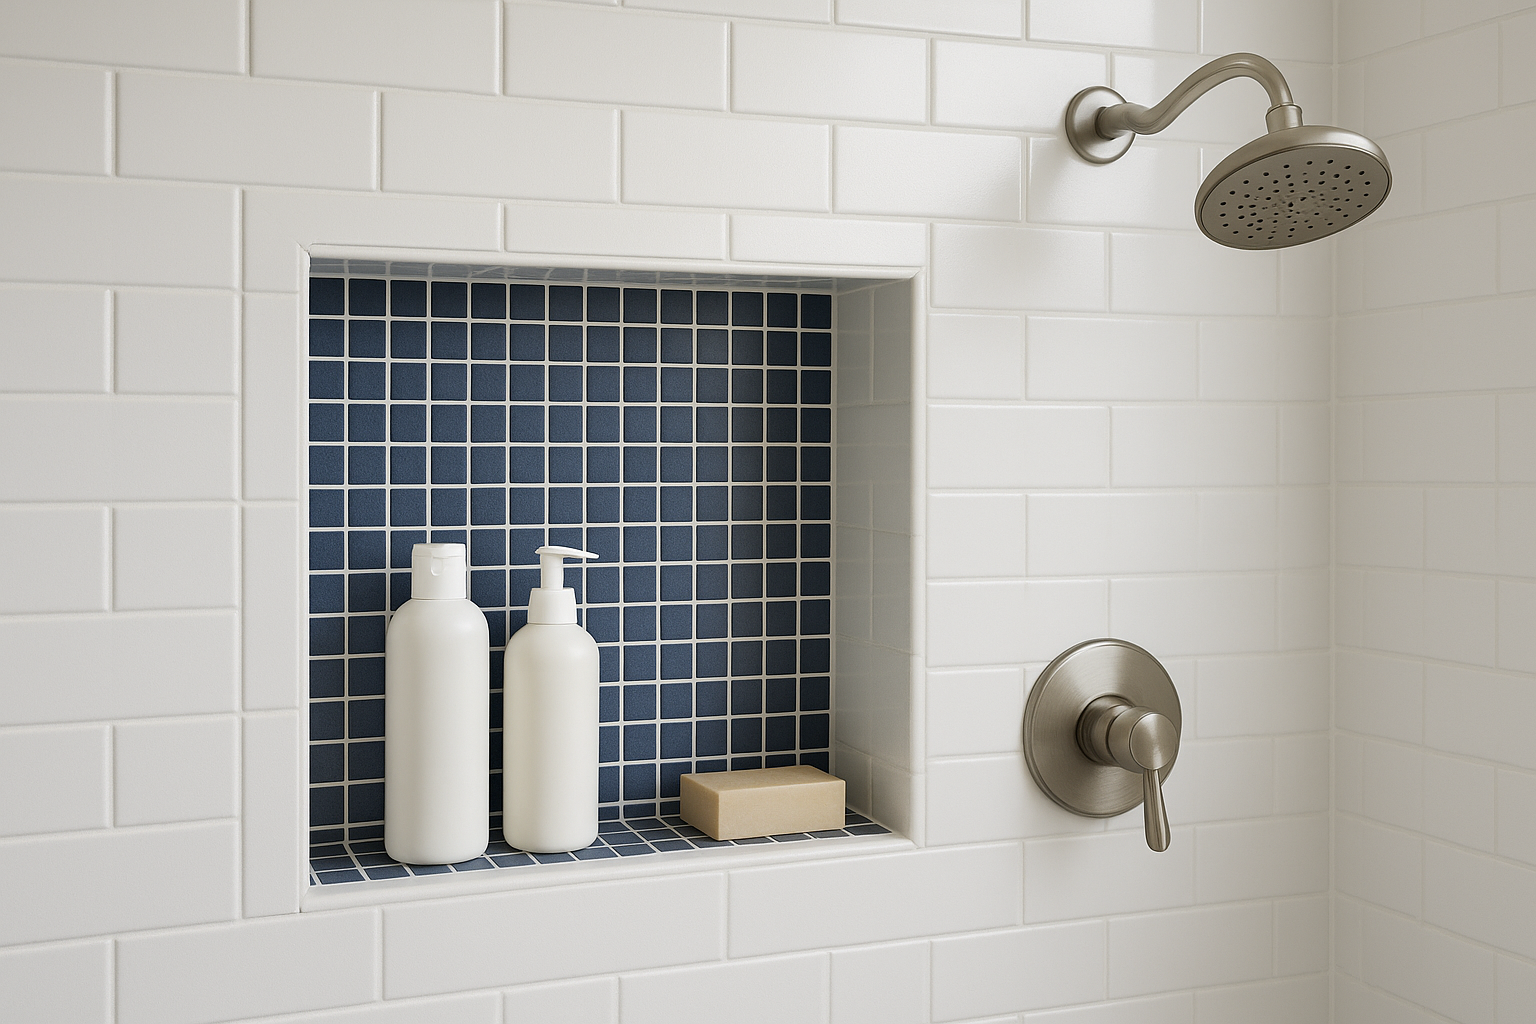
A shower niche is a recessed shelf cut into your shower wall, giving you a dedicated spot for shampoo, soap, and conditioner without a single hanging caddy or wire rack. This is one of the most practical bathroom built-in storage ideas for keeping your shower looking clean and organized.
What it is and why it works
A niche uses the cavity between wall studs to create a flush-mounted shelf that sits level with your tile surface. Nothing projects into your shower space, so you gain storage without losing elbow room. Standard sizes run 12 to 24 inches wide and about 4 inches deep, which holds full-size bottles comfortably.
Niche placement rules that prevent clutter
Put your niche on a non-exterior wall to avoid cutting through insulation or your home’s thermal barrier. Position it at shoulder to eye level for the primary user so reaching for products feels natural with wet hands. One well-placed niche almost always outperforms two poorly positioned ones.
Plan niche placement during rough framing, not after tile goes up. Moving it later means tearing out finished work.
Waterproofing and tile details that matter
Waterproof membrane applied inside the niche before tiling is non-negotiable. Skipping it lets water migrate behind the wall and causes mold over time. Matching your niche tile to your shower surround keeps the look cohesive, while a contrasting accent tile inside adds intentional visual interest without extra hardware.
Typical cost range and scope
A single shower niche runs $200 to $600 installed, depending on tile selection and labor. Most installs wrap up in one to two days as part of a larger shower or bathroom remodel.
4. Between-the-studs hidden wall cabinets
Between-the-studs cabinets rank among the cleverest bathroom built-in storage ideas because they use space that already exists inside your walls. The standard stud cavity in most homes is 3.5 inches deep, enough to hold toiletries, folded washcloths, and small bottles without adding any bulk to the room.
What it is and why it works
A between-the-studs cabinet fits flush within your wall framing, using the existing cavity as the cabinet box. The door closes level with your drywall surface, so the unit disappears completely when shut. You gain usable depth without losing any floor space or walking clearance, which makes this option especially useful in tight bathrooms.
Best locations to "steal" depth without crowding
The wall opposite your shower or toilet is usually the cleanest candidate since it’s often empty framing with no plumbing or electrical behind it. Good spots to check first include:
- Walls adjacent to hallways or closets
- The wall behind your toilet tank
- Long blank walls in a master bathroom
Avoid exterior walls where insulation fills the cavity and cutting through disrupts your home’s thermal envelope.
Always verify wiring and plumbing inside your target cavity before framing begins. A stud finder with live-wire detection prevents costly surprises.
Door styles and hardware for a seamless look
Flat-panel or shaker-style doors keep the cabinet looking intentional. Pair them with magnetic push-to-open latches to eliminate visible hardware and keep your wall surface clean.
Typical cost range and scope
Most between-the-studs cabinets run $300 to $900 installed, depending on size, finish, and any drywall patching involved. Most installs wrap up in one to two days.
5. Floor-to-ceiling linen towers and built-ins
A floor-to-ceiling linen tower turns unused vertical wall space into organized, accessible storage from baseboard to crown. This is one of the most efficient bathroom built-in storage ideas for bathrooms with limited counter space but enough wall length to fit a full column of cabinetry.
What it is and why it works
A linen tower is a tall, narrow cabinet that runs the full height of your wall, typically 84 to 96 inches, filling the vertical gap that standard vanities leave completely wasted.
The extra height lets you separate daily-use items on lower shelves from bulk supplies stored on top, which creates a natural organization system without any extra hardware or bins.
Door, drawer, and shelf combinations to copy
Mixing solid doors on the lower half with open shelves near eye level gives you concealed storage where you need it and easy access for daily items above. A practical middle-section layout adds two to three drawers for folded hand towels and small accessories that get lost in open shelves.
Ventilation and odor control for towel storage
Louvered door panels allow air to move inside the cabinet, which prevents the musty smell that builds when damp towels sit in an enclosed space. Specifying ventilated doors at the design stage costs far less than retrofitting them after the cabinet is installed and finished.
Build ventilation into the design from the start. Adding it after installation adds both cost and disruption to finished work.
Typical cost range and scope
A custom floor-to-ceiling linen tower typically runs $1,500 to $4,000 installed, depending on height, materials, and hardware selection. Most builds complete in three to five days including finishing and installation.
6. Toe-kick drawers and tip-out trays
Toe-kick drawers and tip-out trays are among the most overlooked bathroom built-in storage ideas on this list, but they recover space that almost every vanity currently wastes. The toe-kick area at the base of your cabinet sits empty in most stock installations, and that gap typically runs three to four inches tall across the full width of your vanity.
What it is and why it works
A toe-kick drawer slides out from the recessed base panel beneath your cabinet doors, while a tip-out tray hinges forward from the false front above your sink. Both options use dead space that would otherwise collect dust and nothing else.
Because these additions work within your existing cabinet footprint, you gain organized storage without touching your floor plan or wall space.
Where these small add-ons make the biggest impact
These work best directly under your sink where a pipe chase blocks deep drawer storage. Toe-kick drawers fit flat items like cleaning cloths and hair tools, while tip-out trays hold small daily accessories like hair ties and soap slivers that typically scatter across your counter.
Tip-out trays above the sink keep items you reach for every morning within arm’s reach without cluttering your countertop.
Hardware choices for smooth, durable operation
Use full-extension undermount slides for toe-kick drawers so the entire drawer pulls completely clear of the cabinet. Tip-out hinges should be stainless steel or brass-coated to handle the moisture that builds in most bathrooms.
Good hardware choices to spec at the design stage include:
- Full-extension metal drawer slides rated for at least 75 lbs
- Soft-close tip-out hinges to prevent slamming and wear
Typical cost range and scope
Adding toe-kick drawers or tip-out trays typically runs $150 to $600 depending on the number of units and hardware selected. Most installs complete in one day.
7. Built-in benches and pull-out hamper cabinets
A built-in bench with a pull-out hamper solves two problems at once: it gives you a functional seat for getting dressed and eliminates the freestanding laundry basket that takes up floor space and tips over constantly. This combination is one of the most practical bathroom built-in storage ideas for master bathrooms and larger ensuite layouts.
What it is and why it works
A built-in bench sits against the wall with hamper cabinets built into its base, so dirty laundry slides in through a pull-out drawer or hinged door and stays completely out of sight. The bench top can double as folding space, and the full unit reads as intentional furniture rather than an afterthought.
Smart placements that feel intentional, not bulky
Place the bench along a wall adjacent to your shower or closet entry where it naturally fits into your daily routine. Avoid positioning it where it narrows your traffic path or blocks a door swing.
A bench placed near the shower entry feels logical and purposeful, while the same bench squeezed into a corner just reads as filler.
Moisture-proofing and easy-clean details
Use solid wood or moisture-resistant MDF for the bench top and seal it with a waterproof finish. Line hamper interiors with a removable fabric bag so you can pull the liner out for washing without touching the cabinet itself.
Typical cost range and scope
A custom built-in bench with hamper cabinetry typically runs $800 to $2,500 installed, depending on size and materials. Most builds complete in two to three days.
Next Steps
These seven bathroom built-in storage ideas cover a wide range of budgets and bathroom sizes, so you don’t need to tackle all of them at once. Start by identifying your biggest daily frustration in the bathroom, whether that’s a cluttered counter, a lack of towel storage, or wasted shower space, then pick the one idea that solves it directly.
Custom work takes planning, and the earlier you loop in a builder, the more options you have. Framing constraints, plumbing locations, and material choices all shape what’s possible in your specific bathroom, and those details are worth sorting out before you commit to a final design.
If you’re ready to turn one of these ideas into a finished project, contact Suman Custom Carpentry to start the conversation. We hand-build every piece in our Hyannis shop and manage your project from initial design through final installation, so nothing falls through the cracks along the way.