
A kitchen island can make or break how your kitchen actually functions day to day. Get the layout wrong, and you’re squeezing past corners, losing counter space, or staring at a beautiful island nobody sits at. Get it right, and it becomes the spot where meals get prepped, homework gets done, and guests naturally gather. That’s why exploring kitchen island layout ideas before you commit to a build matters more than most homeowners expect. The shape, size, orientation, and features you choose all need to work with your specific floor plan, not just look good on a screen.
At Suman Custom Carpentry, we design and hand-build custom kitchen islands at our shop in Hyannis for homeowners across Cape Cod. We’ve seen firsthand how the right layout transforms a kitchen, and how the wrong one creates daily frustration. Every kitchen we build starts with understanding how the space actually gets used.
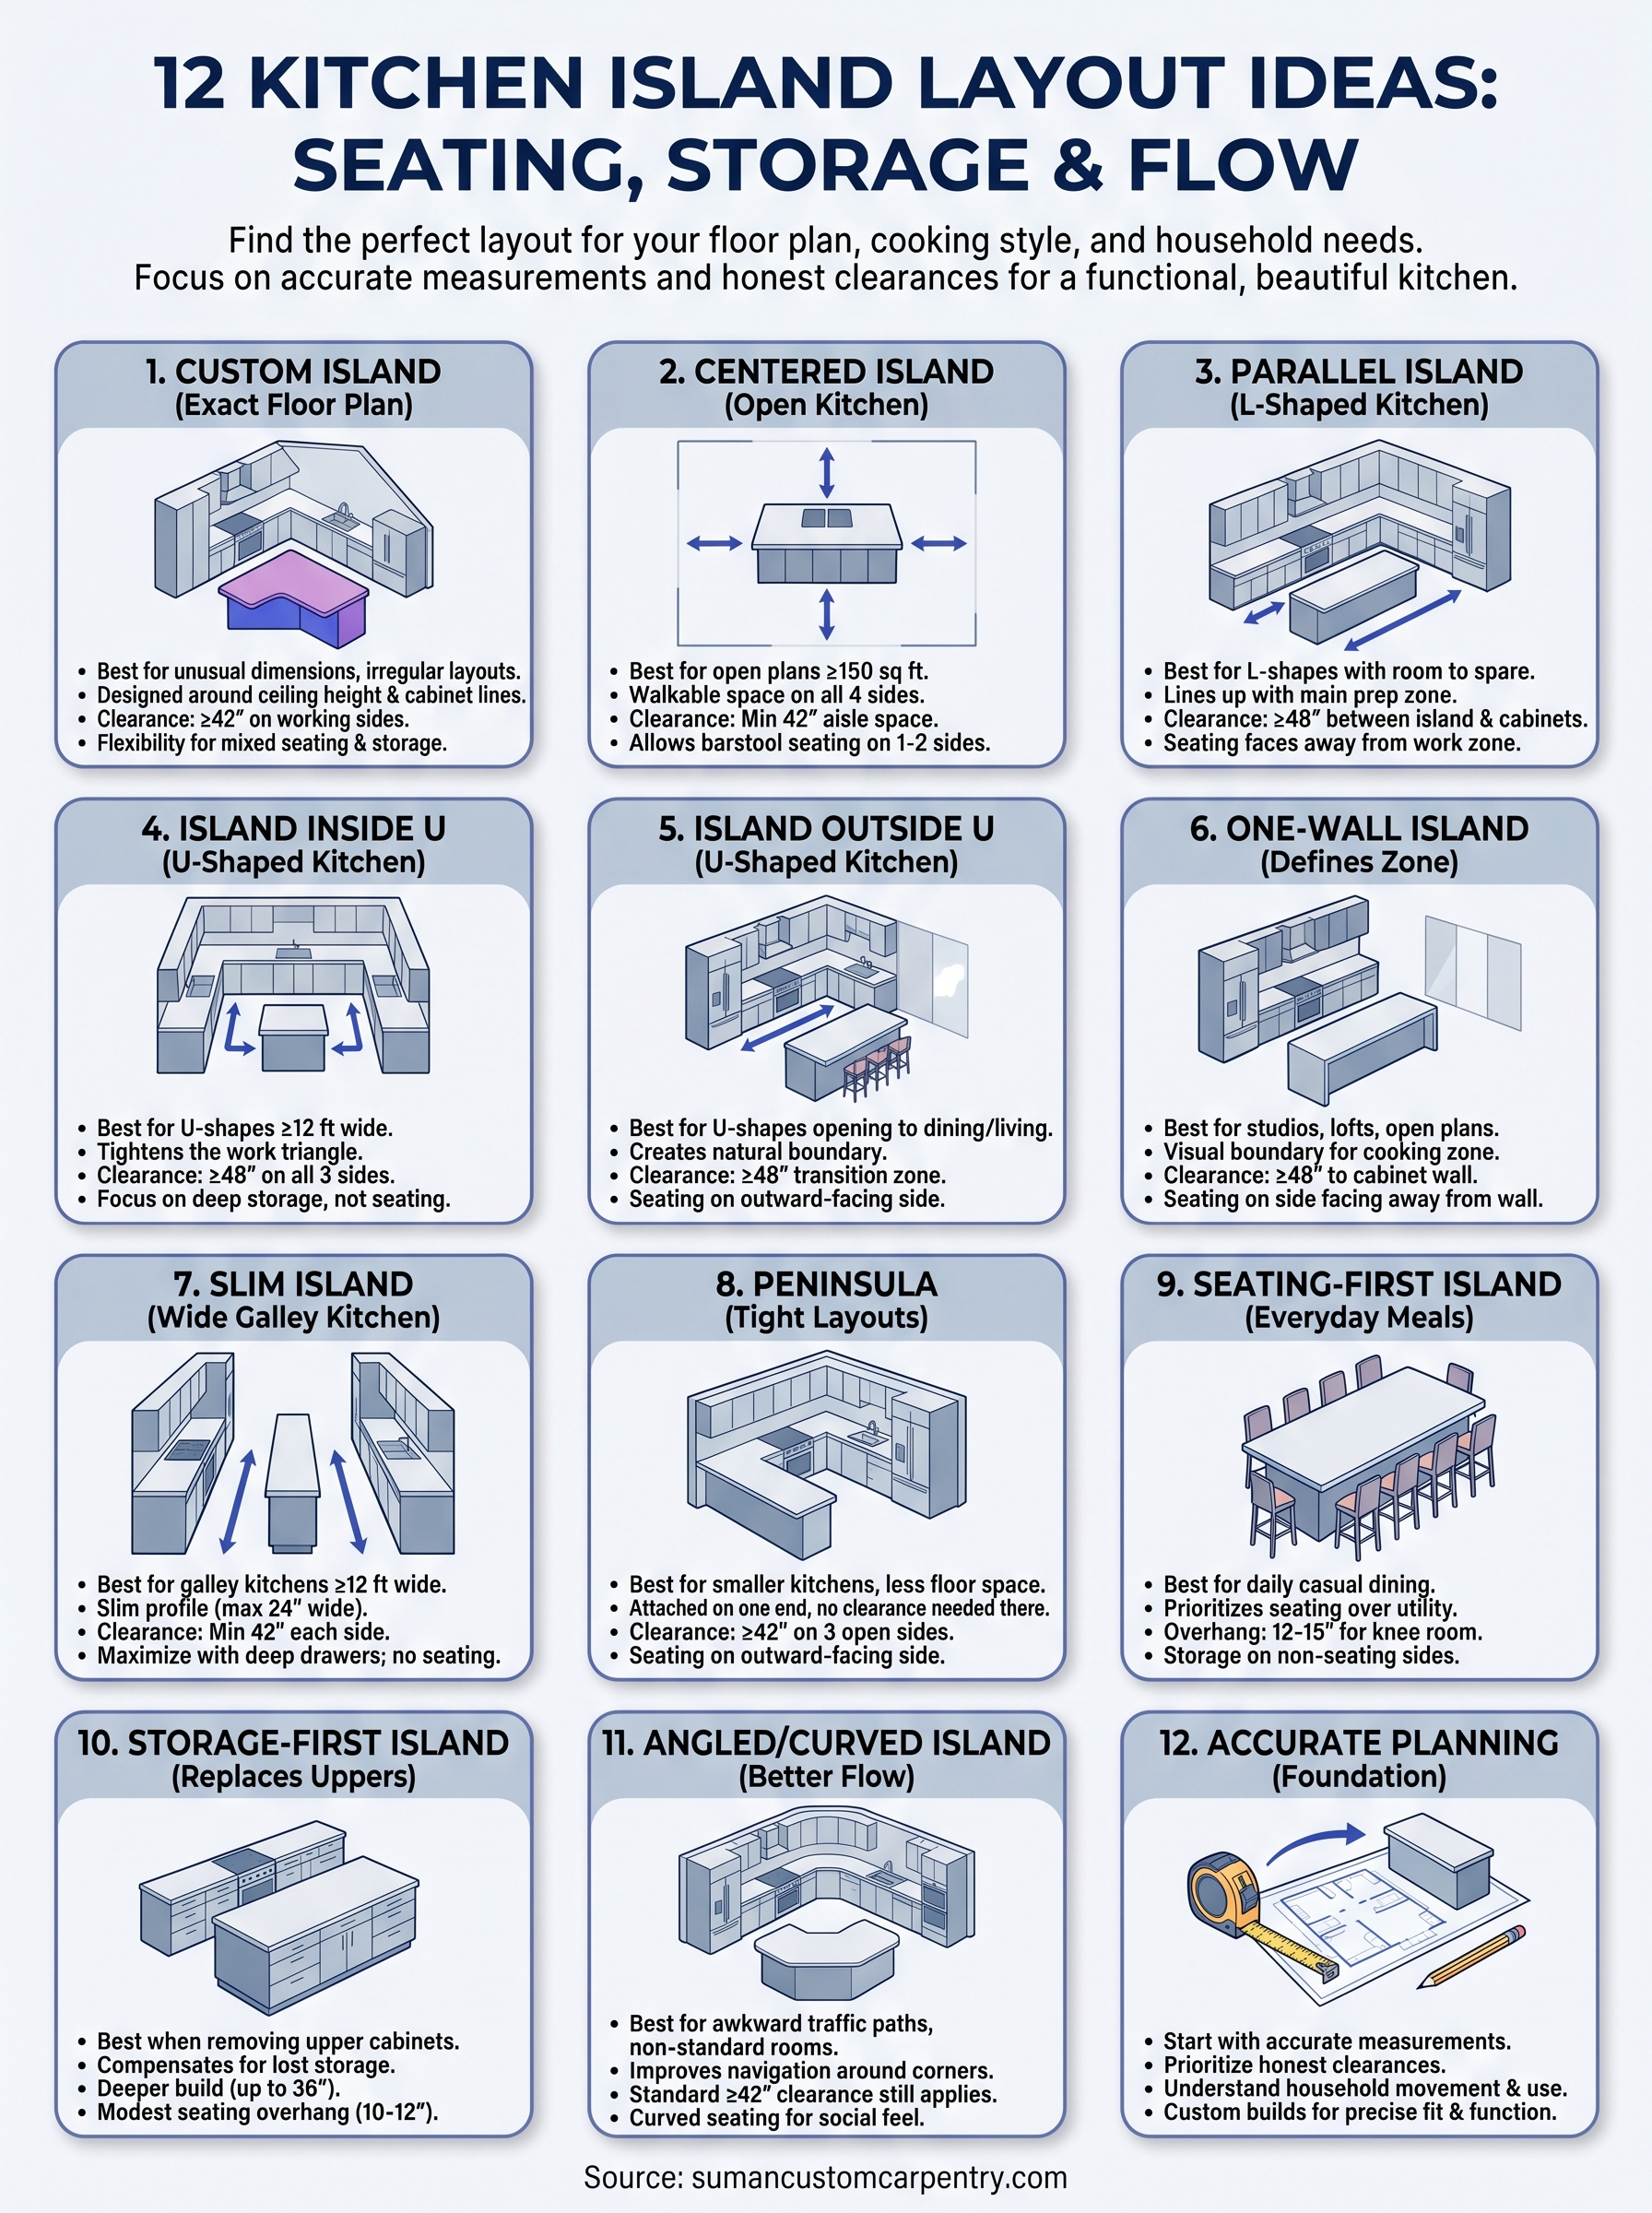
This article breaks down 12 island layout configurations worth considering, covering seating options, storage solutions, traffic flow, and how each setup fits different kitchen sizes. Whether you’re planning a full kitchen renovation or rethinking your current island, these ideas will help you narrow down what actually works for your home and how you cook, eat, and live in your kitchen.
1. A custom island built for your exact floor plan
Before jumping into specific kitchen island layout ideas, it’s worth understanding why a custom-built island stands apart from a stock option. A custom island is designed around your actual floor plan, your ceiling height, your existing cabinet lines, and how you use the space. If none of the standard configurations fit your kitchen perfectly, this is often the smarter starting point.
Best for
Custom islands work best for kitchens with unusual dimensions, irregular layouts, or specific functional needs that a prefab unit simply cannot address. If you have a peninsula that needs to transition into an island, a sloped ceiling that cuts into headroom, or a kitchen that opens into a living area at an odd angle, building custom solves problems that catalog options never will.
Recommended clearances and dimensions
The standard rule is at least 42 inches of clearance on all working sides of the island, with 48 inches preferred if two people cook at the same time. For the island itself, a width of 24 to 48 inches keeps it functional without blocking flow. A custom build lets you hit those numbers precisely rather than approximating with a unit that is close but not quite right.
Getting clearances right from the start is far easier than adjusting a built island after the fact.
Seating and storage options
A custom island lets you mix seating and storage in ways that off-the-shelf options rarely allow. You can run seating along one or two sides while building deep drawers, pull-out trash, or a wine rack on the working side. The overhang for seating should be 12 to 15 inches to give knees room without making the island feel top-heavy.
Utilities and lighting to plan early
If your island will include a sink, dishwasher, or cooktop, rough-in plumbing and electrical need to happen before the island goes in, not after. Pendant lighting should also be planned alongside the island dimensions so your electrician positions junction boxes correctly. Coordinating these elements early keeps the project on schedule and avoids expensive rework.
Common mistakes to avoid
The most common mistake with custom islands is sizing up based on the room’s visual scale rather than actual clearance measurements. A large kitchen can make an island look small in drawings, so homeowners push the dimensions up and then find the working zones feel cramped. Always measure clearances first and let those numbers determine the island size.
2. The classic centered island in an open kitchen
An open-concept kitchen gives you the freedom to place an island in the middle of the room with walkable space on all four sides. This centered configuration is one of the most common kitchen island layout ideas because it works naturally with the way people move through an open floor plan. It keeps the cook connected to the dining and living areas without creating a physical barrier.
Best for
This layout works best in open-plan kitchens with at least 150 square feet of kitchen floor space. If your kitchen flows directly into a dining room or living area without walls breaking up the space, a centered island gives you a clear visual anchor for the cooking zone.
Recommended clearances and dimensions
You need a minimum of 42 inches of clear aisle space on every side of the island. An island that runs 4 to 6 feet in length fits most open kitchens without cutting into traffic paths. Measure the room before locking in dimensions.
Centering the island too close to the perimeter cabinets is the single most common sizing mistake in open kitchens.
Seating and storage options
A centered island gives you flexibility to add barstool seating along one or two sides while keeping the opposite side free for prep work. Deep drawers on the prep side and open shelving on the seating side balance storage capacity with visual openness.
Utilities and lighting to plan early
Running plumbing to a centered island costs more because lines travel farther. Plan pendant lighting placement at the same time you finalize island dimensions so junction boxes land directly overhead.
Common mistakes to avoid
Avoid placing the island too close to the refrigerator swing path or oven door. Both need clear room to open fully without colliding with someone standing at the island.
3. L-shaped kitchen with a parallel island
An L-shaped kitchen creates a natural corner workflow, but it can leave a large open floor area that feels underused. Adding a parallel island across from the longer leg of the L gives you a second work surface that lines up with your main prep zone. This is one of the most practical kitchen island layout ideas for kitchens that have room to spare but still need clear traffic paths.
Best for
This configuration works best in kitchens where the L-shaped cabinetry runs along two walls and leaves at least 8 feet of open floor space in front of the longer run. It suits homeowners who want a clear separation between cooking and eating zones without adding a wall or closing off the room.
Recommended clearances and dimensions
Keep at least 48 inches between the island and the facing cabinet run, since this aisle handles both cooking traffic and people passing through. An island length of 4 to 5 feet keeps it proportional without blocking the natural path from the corner into the rest of the room.
Shorter clearances on a parallel layout create a bottleneck that makes a busy kitchen feel chaotic fast.
Seating and storage options
Place barstool seating on the side facing away from the main work zone so guests sit outside the cooking triangle. The side facing your cabinets works well for deep drawers or pull-out storage that mirrors what you have in the perimeter cabinetry.
Utilities and lighting to plan early
A sink or prep faucet on the island works well here since it keeps cleanup close to the main cooking wall. Run pendant lighting parallel to the island’s length to light the surface evenly.
Common mistakes to avoid
Avoid making the island too long relative to the L’s shorter leg, which throws off the visual balance and tightens the corner exit. Measure both legs of the L before finalizing island dimensions.
4. U-shaped kitchen with an island inside the U
A U-shaped kitchen wraps cabinetry and counters along three walls, giving you a compact and efficient work triangle. Placing an island inside the U tightens that triangle further, which works well for serious cooks who want everything within arm’s reach. Among the kitchen island layout ideas covered here, this configuration maximizes work surface but demands careful measurement to keep the space from feeling like a corridor.
Best for
This layout suits kitchens with a U-shaped footprint at least 12 feet wide across the open end. Homeowners who cook frequently and want a dedicated prep zone separate from the cooking wall benefit most from this setup.
Recommended clearances and dimensions
You need at least 48 inches between the island and each of the three surrounding cabinet runs to move comfortably in all directions. Keep the island itself small, typically 24 to 36 inches wide and 3 to 4 feet long, to avoid turning the U into a dead-end corridor.
Dropping below 42 inches of clearance on any side of the island turns a functional U-shaped kitchen into a daily frustration.
Seating and storage options
Seating inside the U rarely works well because it places guests directly inside the active cooking zone. Focus instead on deep drawers and lower cabinet storage on all four sides of the island to maximize every inch of the footprint.
Utilities and lighting to plan early
A prep sink on the island complements this layout since it keeps washing and chopping close to the stove and refrigerator. Recessed or track lighting above the island performs better than pendants in tight overhead spaces.
Common mistakes to avoid
Avoid installing a full-depth island exceeding 24 inches in a U under 12 feet wide. The clearances disappear fast, and the island becomes more obstacle than asset.
5. U-shaped kitchen with an island outside the U
Placing an island outside the open end of a U-shaped kitchen creates a natural boundary between the cooking zone and the rest of the room. Unlike putting the island inside the U, this approach keeps your work triangle clean while adding a separate prep or seating surface that doesn’t crowd the main cooking area.
Best for
This setup works well for kitchens where the U-shaped layout opens into a dining or living area and you want the island to serve double duty as a casual seating bar. Among the kitchen island layout ideas in this list, it’s one of the better fits for homeowners who entertain regularly and want guests nearby without putting them in the middle of the cooking zone.
Recommended clearances and dimensions
Keep at least 48 inches between the island and the open end of the U to maintain a clear transition zone. An island 4 to 6 feet long works well here because it spans the opening without blocking sight lines into the kitchen.
This clearance also gives two people room to pass each other comfortably when the kitchen is busy.
Seating and storage options
Seating on the outward-facing side of the island keeps guests oriented away from the stove and work surfaces. The inward-facing side handles drawers, a trash pullout, or lower cabinet storage that supplements the U’s existing perimeter storage.
Utilities and lighting to plan early
A prep sink works here if your plumbing rough-in can reach the island’s position. Pendant lighting over the seating side improves the space significantly without competing with task lighting inside the U.
Common mistakes to avoid
Avoid extending the island wider than the U’s opening, which creates a visual blockage and makes the kitchen feel walled off from the rest of the home.
6. One-wall kitchen with an island that defines the zone
A one-wall kitchen stacks all cabinets, appliances, and counters along a single wall, which keeps the layout efficient but leaves the rest of the room undefined. Placing an island parallel to that wall gives you a second work surface and creates a clear visual boundary between the cooking zone and the open living area. Among the kitchen island layout ideas in this guide, this one works particularly well in smaller homes or open-plan spaces where the kitchen shares a room with other functions.
Best for
This layout suits studio apartments, lofts, or open-plan homes where the kitchen does not have its own dedicated room. It also works for homeowners who want a casual seating bar without taking on a full kitchen renovation.
Recommended clearances and dimensions
Keep at least 48 inches between the island and the main cabinet wall to give yourself room to open appliance doors and move freely. An island 3 to 5 feet long fits most one-wall setups without overwhelming the room.
Shorter clearances here create a corridor effect that makes even a generous room feel narrow.
Seating and storage options
Place barstools on the side facing away from the wall to keep guests clear of the cooking zone. The wall-facing side handles drawers or cabinet storage that compensates for the limited counter and cabinet run behind it.
Utilities and lighting to plan early
Running electrical for pendant lighting directly above the island requires early coordination with your electrician before any ceiling work closes up.
Common mistakes to avoid
Avoid choosing an island that matches the exact length of your cabinet wall, which makes the kitchen feel like a box rather than a defined zone within a larger room.
7. Wide galley kitchen with a slim island
A galley kitchen runs cabinets and appliances along two parallel walls, creating a tight but efficient corridor layout. If your galley is wide enough, a slim island running down the center adds prep space and storage without turning the aisle into a squeeze. Among the kitchen island layout ideas explored in this guide, this one rewards careful measurement more than almost any other.
Best for
This configuration works best in galley kitchens at least 12 feet wide between the two facing cabinet walls. Homeowners who need extra prep surface or storage but do not want to reconfigure their existing cabinetry get the most out of this setup.
Recommended clearances and dimensions
You need at least 42 inches of clearance on each side of the island, which means your galley needs a total width of roughly 12 feet to fit even a shallow island comfortably. Keep the island no wider than 24 inches so the aisles stay workable.
Dropping below 42 inches on either side makes the galley feel like a hallway rather than a kitchen.
Seating and storage options
A slim island rarely accommodates seating without shrinking the aisles to an uncomfortable width. Focus instead on deep drawers on both sides of the island to make every inch count.
Utilities and lighting to plan early
Recessed ceiling lights or a linear pendant running the length of the island keeps both aisles well lit without low-hanging fixtures creating head clearance issues in a narrow corridor.
Common mistakes to avoid
Avoid adding an island longer than your shortest cabinet run, which creates an awkward dead end at one end of the galley and disrupts the natural flow through the space.
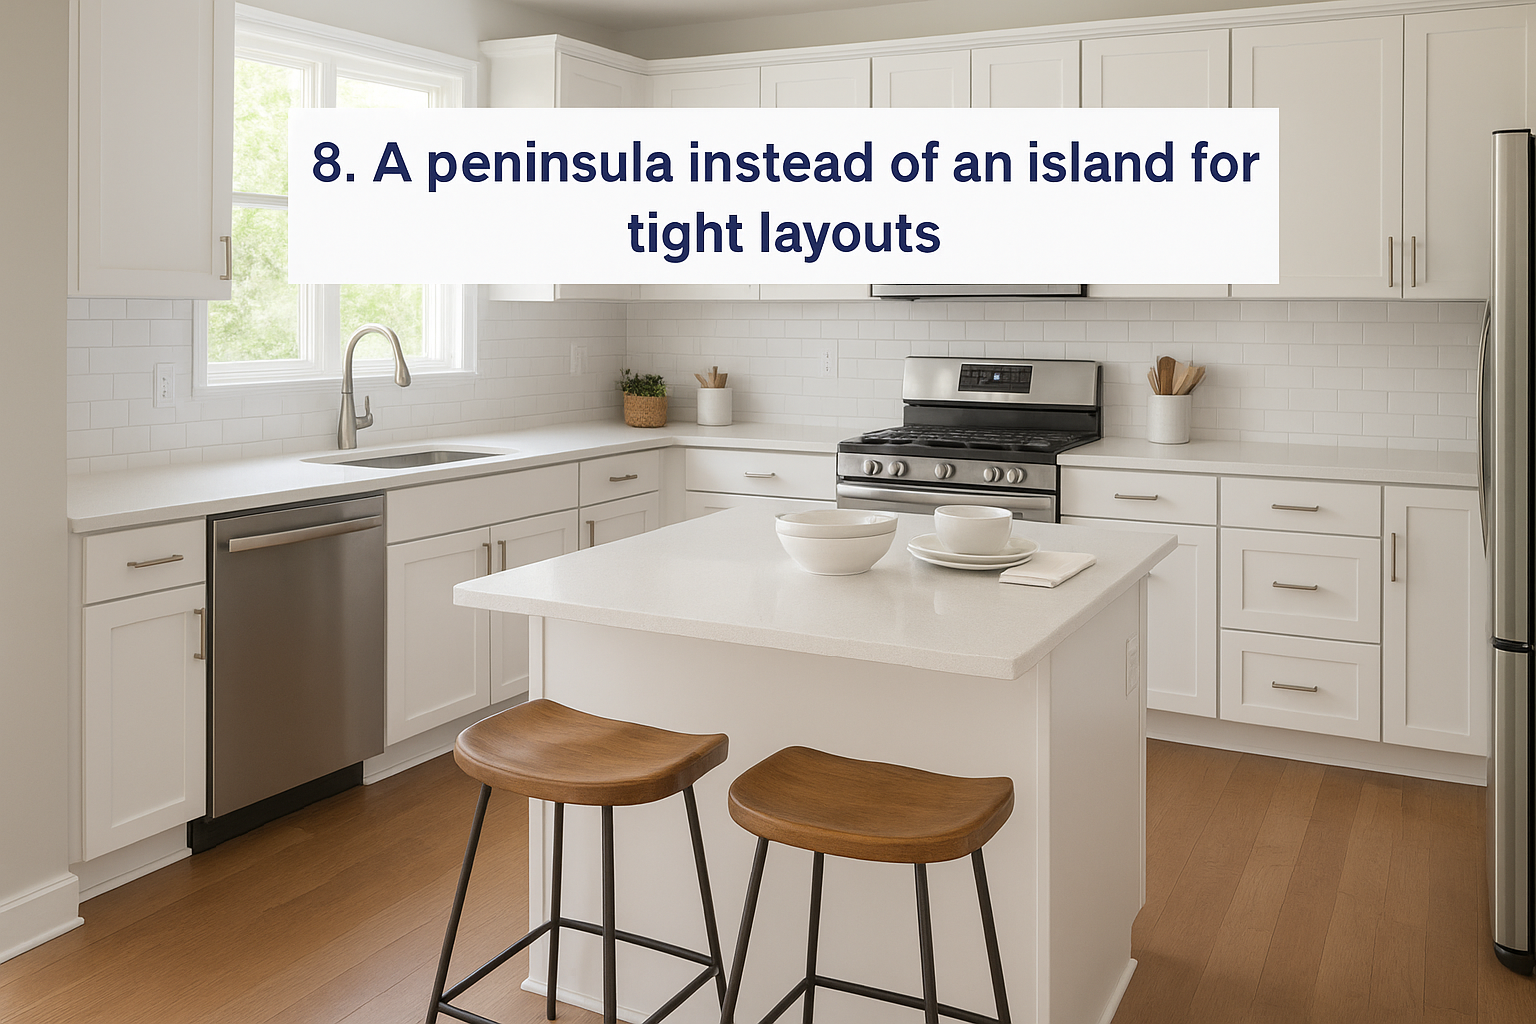
8. A peninsula instead of an island for tight layouts
A peninsula connects to your existing cabinetry on one end, which means it needs no clearance on that side and takes up less floor space than a freestanding island. If your kitchen does not have room for a full island, a peninsula is one of the most practical kitchen island layout ideas to consider. You get extra counter space, seating, and storage without the footprint demands of a four-sided structure.
Best for
This layout works best in smaller kitchens or galley-style layouts where a freestanding island would block traffic flow. It also suits open-plan homes where the peninsula can serve as a room divider between the kitchen and a dining or living area without fully closing off the space.
Recommended clearances and dimensions
You need at least 42 inches of clearance on the three open sides of the peninsula. A length of 3 to 5 feet keeps it functional without pushing into the main traffic path.
Connecting one end to the wall or cabinetry means you only need to protect three sides instead of four, which makes this layout far more achievable in tighter rooms.
Seating and storage options
Place barstool seating on the outward-facing side to keep guests away from the work zone. The cabinet-side face handles drawers or lower storage that supplements your existing perimeter cabinetry.
Utilities and lighting to plan early
Running plumbing to a peninsula costs less than to a freestanding island because the supply lines travel a shorter distance along the connecting wall.
Common mistakes to avoid
Avoid building a peninsula so long that it blocks natural light from windows on adjacent walls. Keep the length proportional to your room so the space stays open and connected.
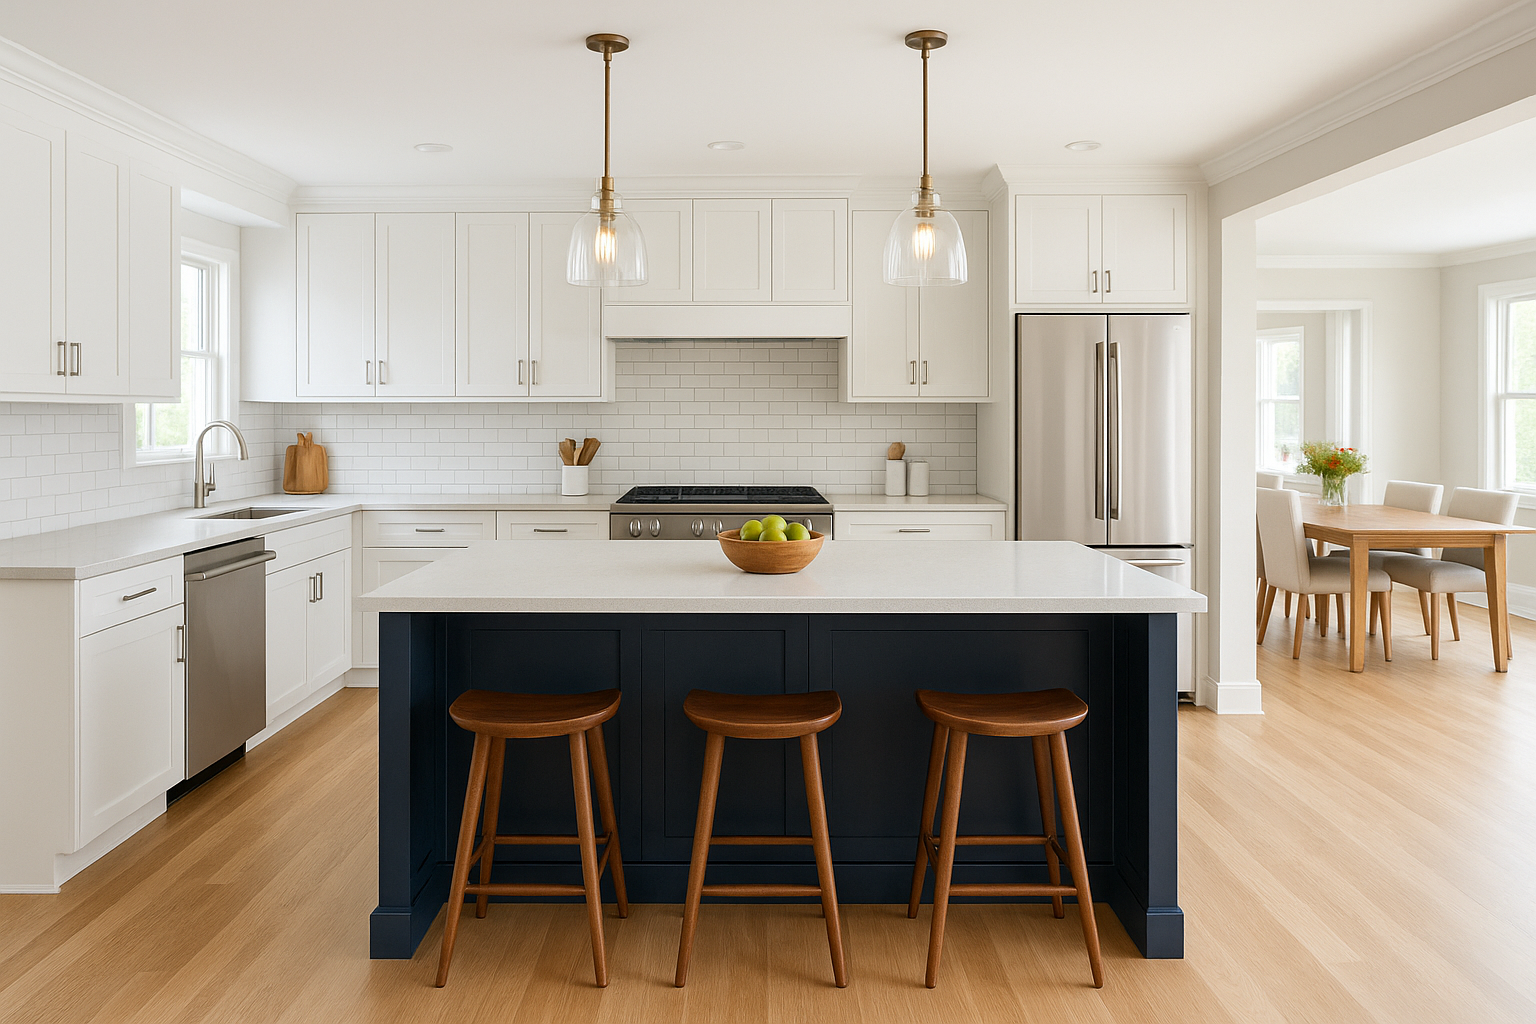
9. A seating-first island for everyday meals
Not every island needs a sink or a cooktop. Some of the most functional kitchen island layout ideas prioritize seating above everything else, turning the island into a daily dining spot for breakfast, lunch, and casual meals without requiring a separate table. If your household eats at the island more than at the dining table, designing around seating from the start makes far more sense than treating it as an afterthought.
Best for
This layout suits families with kids, couples who eat casually, or anyone without a dedicated dining room. It also works well for kitchens where the dining area feels too far from the cooking zone and you want meals to happen closer to where the food gets made.
Recommended clearances and dimensions
Plan for a countertop overhang of 12 to 15 inches on the seating side so knees have room. Each seat needs 24 inches of horizontal space along the overhang to avoid shoulder-to-shoulder crowding.
Getting the overhang right matters more than most homeowners realize until the stools are in and the clearance is wrong.
Seating and storage options
Barstools work on one or two sides depending on your floor plan. The non-seating sides handle all your storage, with deep drawers on the working face and lower cabinets or open shelving on the ends.
Utilities and lighting to plan early
Pendant lighting directly above the seating side makes the island feel like a dedicated dining spot rather than just a counter with stools. Position fixtures so the light lands on the surface, not on the people sitting beneath it.
Common mistakes to avoid
Avoid routing main kitchen traffic directly behind seated guests, which creates constant interruptions during meals. Position the seating side so it faces away from the primary cooking path.
10. A storage-first island that replaces upper cabinets
Some homeowners pull out upper cabinets entirely to open up their kitchen visually, and that decision only works if the island picks up the storage slack. A storage-first island is one of the more practical kitchen island layout ideas for anyone trading a heavier, closed-in kitchen for a lighter, more open feel. Every inch of the island gets dedicated to organized, accessible storage rather than seating or utility functions.
Best for
This layout suits homeowners removing upper cabinets to improve sightlines, natural light, or the overall openness of the kitchen. It works especially well in kitchens where lower storage is already limited and the island needs to carry a larger share of the organizational load.
Recommended clearances and dimensions
Keep at least 42 inches of clearance on all working sides. Build the island deeper than standard, up to 36 inches, to fit larger drawers and cabinet boxes without sacrificing aisle width.
A deeper island compensates for lost upper cabinet volume far better than a taller one does.
Seating and storage options
You can still add a modest seating overhang of 10 to 12 inches on one side without losing meaningful storage depth on the opposite face. Fill the remaining sides with deep drawers, pull-out shelves, and lower cabinets sized for your most-used kitchen items.
Utilities and lighting to plan early
Under-cabinet task lighting on the perimeter walls becomes more important once upper cabinets are gone. Plan those circuits alongside your island build so both elements work together.
Common mistakes to avoid
Avoid building the island too tall in an attempt to add open shelving above it, which recreates the visual weight you removed when the upper cabinets came down.
11. Angled and curved island layouts for better flow
Most kitchen island layout ideas assume a rectangular footprint, but angled or curved islands solve specific problems that straight lines cannot. If your kitchen has an awkward traffic path, a doorway at an odd angle, or a diagonal wall, angling or rounding the island corners can turn a navigation problem into a design feature.
Best for
This layout suits kitchens with non-standard architecture, such as diagonal walls, vaulted ceilings that cut into one corner, or open-plan spaces where foot traffic approaches the kitchen from multiple directions. It also works well for homeowners who want a softer, more organic visual feel rather than the hard geometry of a standard rectangular island.
Recommended clearances and dimensions
Standard clearance rules still apply: at least 42 inches on all sides. The curved or angled sections do not reduce that requirement. Keep the overall footprint within 5 feet in any direction so the irregular shape stays proportional to the room.
Curved corners reduce collision risk in high-traffic kitchens where multiple people move around the island simultaneously.
Seating and storage options
Curved seating edges allow stools to fan out naturally rather than sitting in a straight line, which makes the seating side feel more social. Storage on angled faces requires custom cabinet boxes built specifically for the geometry, which is where a hand-built island outperforms any stock option.
Utilities and lighting to plan early
Pendant lighting placement gets more complex with non-rectangular islands. Work with your electrician early to position fixtures that cover the full surface evenly.
Common mistakes to avoid
Avoid choosing a curved or angled layout purely for aesthetics without confirming the geometry works with your actual clearances and traffic paths first.
Bring it all together
Every one of these kitchen island layout ideas starts with the same foundation: accurate measurements, honest clearances, and a clear picture of how you actually use your kitchen. Whether you’re drawn to a seating-first island, a storage-heavy build that replaces your upper cabinets, or a curved layout that solves a tricky traffic path, the right configuration depends on your specific floor plan and how your household moves through the space.
No stock unit or catalog option accounts for the details that make your kitchen yours. A hand-built custom island, designed around your real dimensions and functional priorities, performs better and lasts longer than any approximation. At Suman Custom Carpentry, we work with homeowners across Cape Cod to design and build islands that fit perfectly from day one. If you’re ready to move from ideas to a finished build, contact Suman Custom Carpentry to start the conversation.