
A small kitchen doesn’t mean you have to give up on having an island. It just means you need to be smarter about it. The right kitchen island ideas for small kitchens can turn a cramped layout into a space that actually works, giving you more prep room, more storage, and even a spot to sit down for breakfast. The trick is choosing a design that fits your kitchen’s footprint without making it feel tighter than it already is.
At Suman Custom Carpentry, we build custom kitchen islands and cabinetry at our shop in Hyannis, Cape Cod. Many of the kitchens we work on are exactly this kind of project, homeowners who love their homes but need more function out of a compact space. We’ve seen firsthand how the right island, built to the right dimensions, can completely change how a kitchen feels and performs. That experience is baked into every idea on this list.
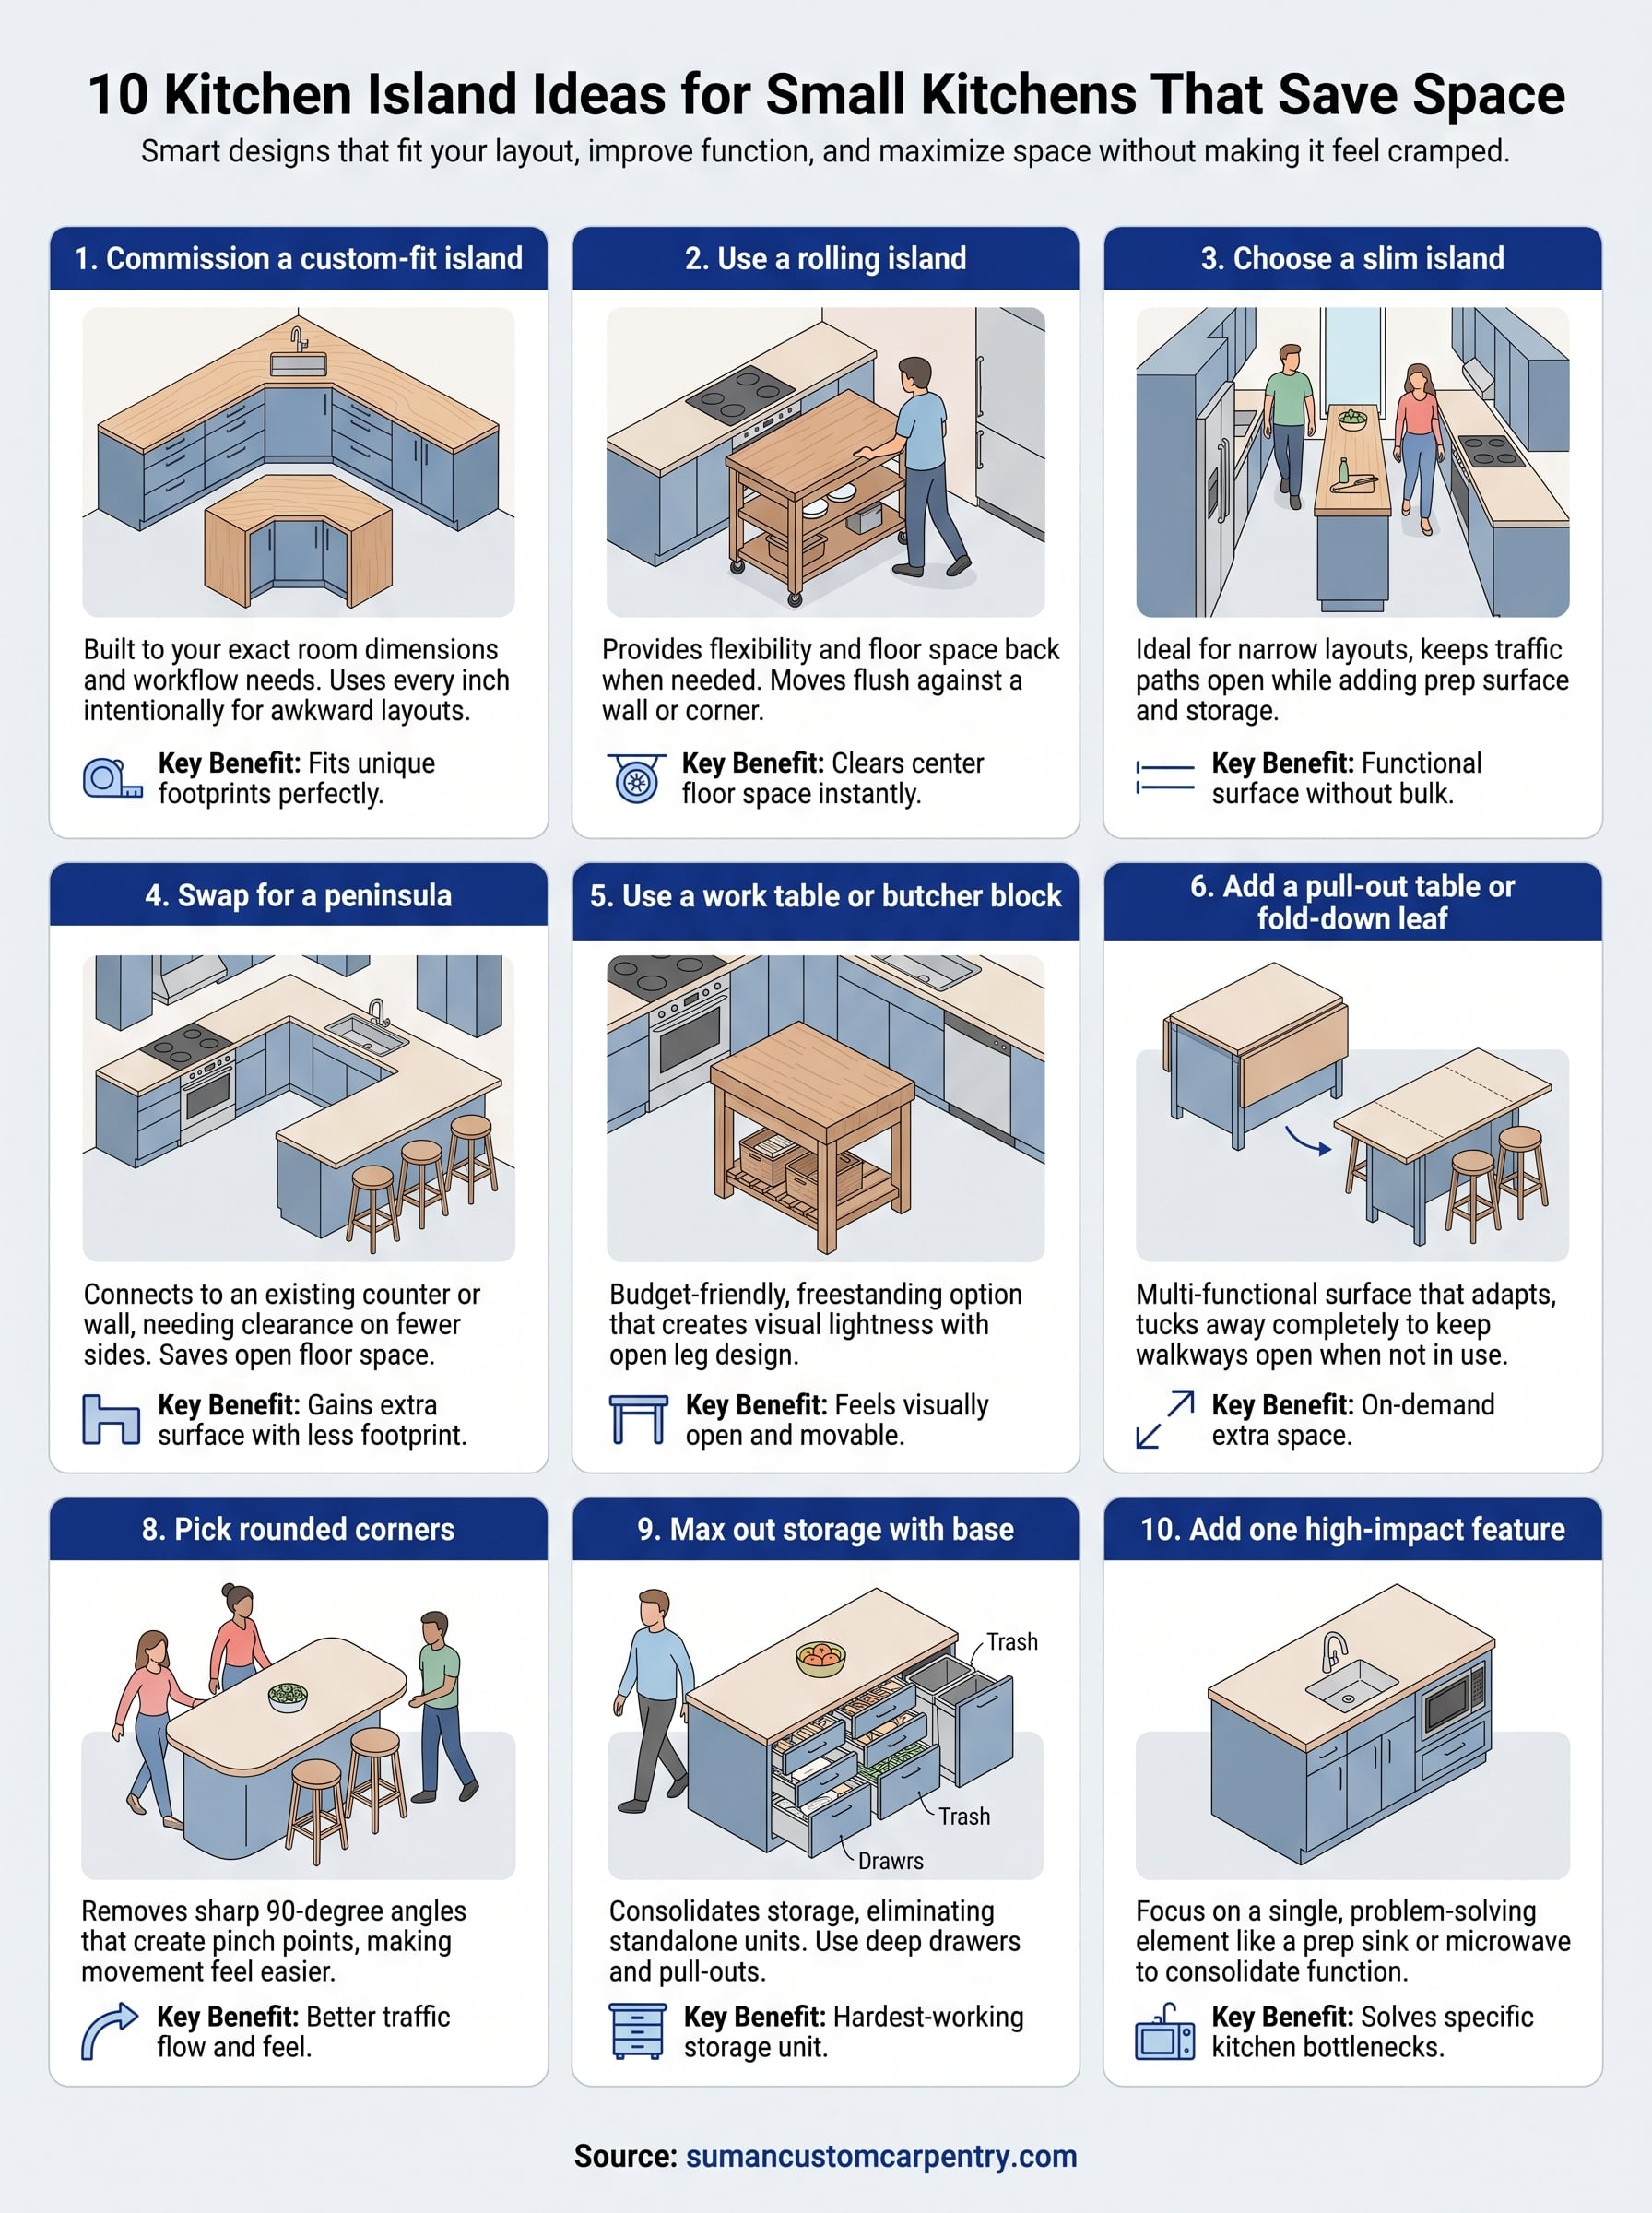
Below, we’re sharing 10 island concepts that prioritize space efficiency without cutting corners on style or utility. Some are mobile, some are built-in, and a few pull double duty in ways you might not expect. Whether you’re planning a full kitchen renovation or just looking for one smart addition, you’ll walk away with options that make sense for a smaller layout. Let’s get into what actually works.
1. Commission a custom-fit island for your layout
When nothing off the shelf fits your kitchen, a custom-built island is the most practical solution. A carpenter builds it to your exact room dimensions and workflow needs, so you’re not compromising on either size or function. This approach works especially well when your kitchen has an unusual footprint, awkward angles, or specific storage demands that pre-made options simply can’t address.
How this saves space
A custom island uses every inch intentionally. Because the dimensions are designed around your actual clearances and not a manufacturer’s standard size, you avoid the common problem of buying an island that’s slightly too wide or too long for the space. Purpose-built storage (think deep drawers in exactly the right spots, or a built-in trash pull-out) means you don’t need extra furniture elsewhere to compensate.
A custom island built to your layout will always outperform a standard-size island squeezed into the same spot.
Best layouts for this idea
Custom islands work across almost any layout, but they perform best in kitchens where you have defined traffic paths to design around. Good candidates include:
- L-shaped kitchens with an open zone across from the main run
- U-shaped kitchens where the island fills the center without crowding the perimeter
- One-wall kitchens where the island adds a second work surface parallel to the main counter
- Kitchens with non-standard angles or alcoves that eliminate pre-made options entirely
Must-know sizing and clearance rules
The standard rule is to keep at least 42 inches of clearance on all walkable sides of the island, with 48 inches preferred if more than one person cooks at once. For smaller kitchens, these target dimensions keep the island from overwhelming the room:
| Dimension | Recommended Range |
|---|---|
| Width | 24 to 36 inches |
| Length | 36 to 48 inches |
| Height | 36 inches (standard counter) |
Your carpenter measures the room against these numbers before anything gets built, so the fit is guaranteed.
Typical cost range in the US
A custom-built kitchen island generally runs between $3,000 and $10,000 depending on size, materials, and storage complexity. High-end hardwoods, specialty hardware, and integrated appliances push costs toward the higher end. For a mid-range custom island in New England, budget somewhere between $4,000 and $7,000 once materials and labor are both included.
2. Use a rolling island you can park against a wall
A rolling island gives you flexibility to work with and floor space back when you need it. This is one of the more practical kitchen island ideas for small kitchens because you get a full prep and storage surface during cooking, then simply roll it out of the way when you’re done.

How this saves space
When you’re not cooking, a rolling island moves flush against a wall or into a corner, clearing the center of your kitchen completely. You get the benefits of an island during meal prep and the openness of an unobstructed floor plan for everything else. No permanent footprint means no permanent compromise on space.
A rolling island gives you two versions of your kitchen in one, a dedicated work zone when you need it and open floor when you don’t.
Best layouts for this idea
Rolling islands work best in kitchens where at least one wall sits open for parking. They fit well in:
- One-wall kitchens with a clear wall opposite the counter
- L-shaped layouts with an open corner or adjacent dining space
- Open-plan kitchens where the island can roll into a nearby zone when not in use
Must-know sizing and clearance rules
Keep the island no wider than 24 to 30 inches so it parks against the wall without blocking traffic. Even in active use, maintain proper walking clearances and choose an island with locking casters so it stays stable while you prep.
| Rule | Measurement |
|---|---|
| Max island width | 24 to 30 inches |
| Minimum clearance on walking sides | 42 inches |
Typical cost range in the US
Pre-made rolling islands typically run $200 to $1,500 based on material and storage configuration. A custom-built rolling island with specific dimensions and matched cabinetry finishes usually starts around $1,500 and can reach $3,500.
3. Choose a slim island for galley and pass-through kitchens
A slim island is one of the most overlooked kitchen island ideas for small kitchens, especially in narrow layouts where a standard island would instantly block traffic. By keeping the island narrow in width, you gain a useful prep and storage surface without sacrificing the clearance you need to move comfortably through the space.
How this saves space
A slim island occupies far less floor space than a traditional island while still delivering a functional work surface. Because the footprint runs long and narrow rather than wide, it fits naturally into tight corridors without squeezing the walking lanes on either side. You get extra counter space and storage without the bulk.
In a galley kitchen, even 12 extra inches of prep surface can change how you cook entirely.
Best layouts for this idea
Slim islands suit specific kitchen configurations better than others. The strongest matches include:
- Galley kitchens with two parallel counter runs and a corridor in between
- Pass-through kitchens that connect to a dining or living area along one side
- Long, narrow kitchens where the island runs parallel to the main counter run
Must-know sizing and clearance rules
Keep a slim island no wider than 18 to 24 inches so it leaves adequate walking room on both sides. Maintain at least 42 inches of clearance between the island and each counter face, which remains the minimum for single-cook kitchens.
| Dimension | Recommended Range |
|---|---|
| Width | 18 to 24 inches |
| Length | 36 to 60 inches |
| Clearance on each side | 42 inches minimum |
Typical cost range in the US
Pre-made slim islands typically run $300 to $1,200. A custom-built slim island matched to your cabinetry and finished to your specifications usually starts around $2,000 and can reach $5,000 depending on materials and storage features.
4. Swap the island for a peninsula when floor space is tight
If your kitchen is too small for a freestanding island but you still want that extra surface area, a peninsula is worth serious consideration. A peninsula connects to an existing counter or wall on one end, which means it needs clearance on fewer sides and takes up less open floor space than a standalone island.
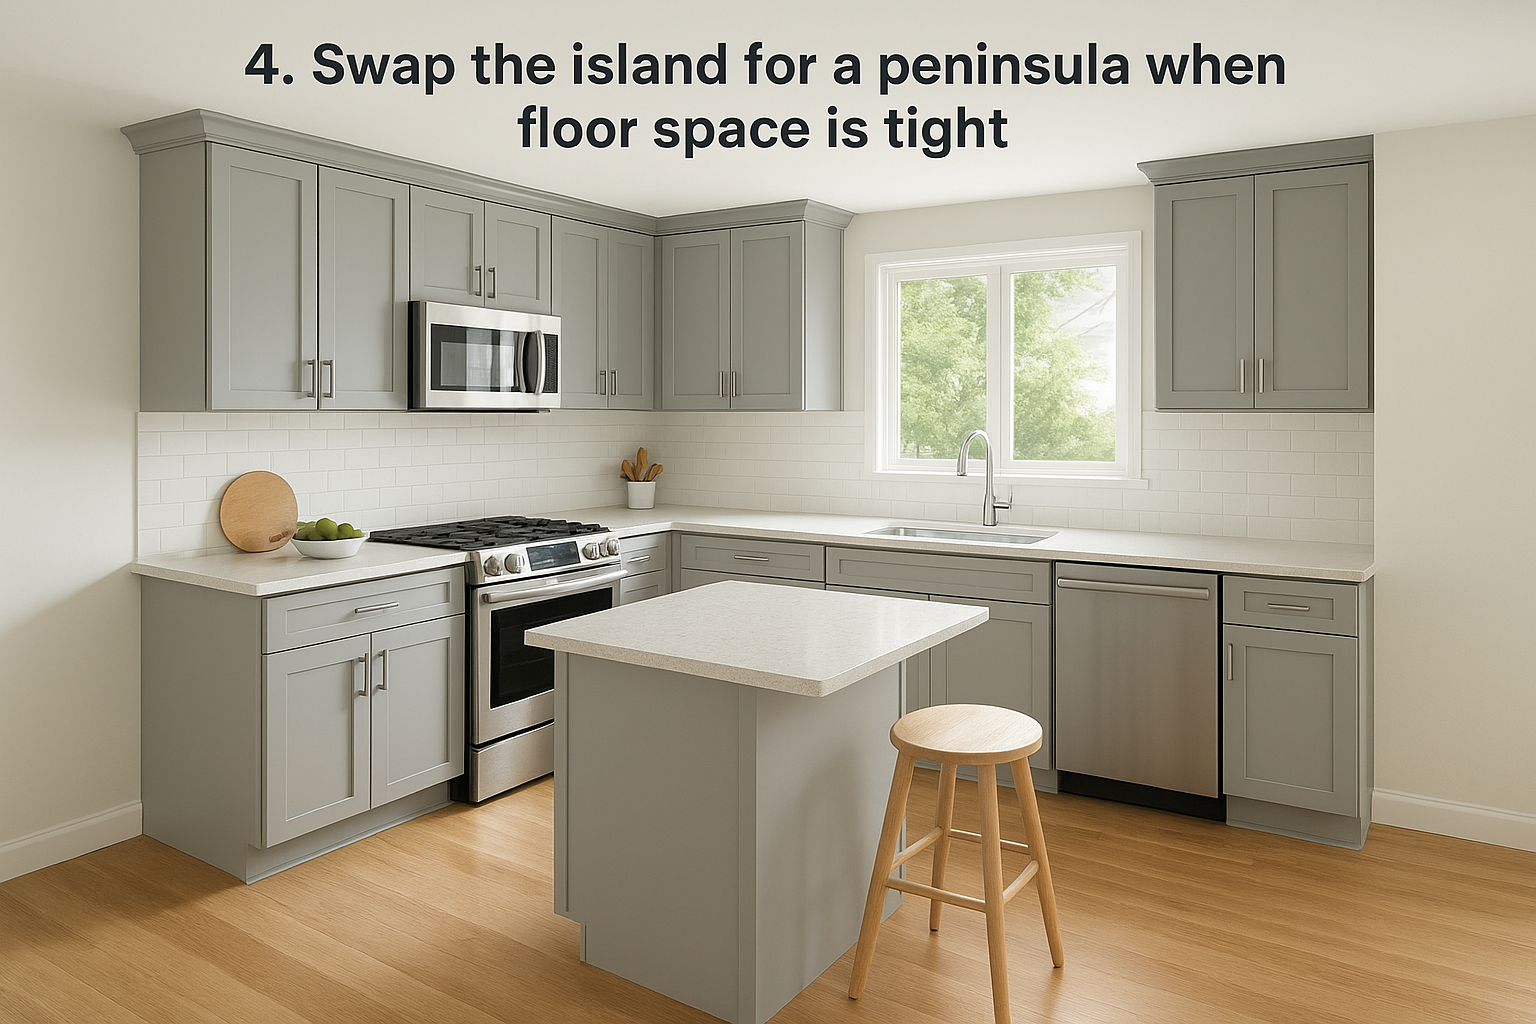
A peninsula gives you most of what an island offers while asking far less of your floor plan.
How this saves space
Because one end of a peninsula attaches to a wall or cabinet run, two of the three sides simply don’t need the standard 42-inch walkway clearance. That single structural choice opens up significantly more room in the center of your kitchen. You gain counter space, storage, and even seating without surrendering the square footage a full island would require.
Best layouts for this idea
Peninsulas fit naturally into kitchens where one counter already runs to an open wall or into a dining zone. The best candidates are:
- L-shaped kitchens where the peninsula extends off one leg into open space
- U-shaped kitchens that need a partial enclosure on one side
- Open-plan layouts where the peninsula acts as a visual divider between the kitchen and living area
Must-know sizing and clearance rules
Keep at least 42 inches of clearance on the two open sides. A peninsula width of 24 to 36 inches works well in compact kitchens without creating a bottleneck at the connecting point.
Typical cost range in the US
A custom-built peninsula typically runs $2,500 to $8,000, depending on materials, storage configuration, and whether seating overhangs are included.
5. Use a work table or butcher block as an island
A freestanding work table or butcher block island is one of the most budget-friendly kitchen island ideas for small kitchens. These pieces bring a functional prep surface and often built-in storage into your kitchen without the cost or commitment of a fully built-in installation. Because they’re freestanding by design, you can reposition them as your needs shift over time.
How this saves space
A work table or butcher block sits on four legs rather than a solid cabinet base, which creates visual lightness in a compact kitchen. The open leg design makes the floor feel larger and keeps the room from feeling enclosed. Many models also include lower shelves or drawers that add storage without adding bulk.
A legged work table takes up the same floor space as a cabinet-base island but makes your kitchen feel noticeably more open.
Best layouts for this idea
Work tables fit comfortably in kitchens where open floor space sits in the center of the room. Strong layout matches include:
- One-wall kitchens with a clear central zone
- L-shaped kitchens where a freestanding piece fills the open area
- Eat-in kitchens where the table can double as a dining surface
Must-know sizing and clearance rules
Keep the standard 42-inch clearance on each walkable side. A work table 24 to 30 inches wide and 36 to 48 inches long fits most small kitchens without blocking your traffic paths.
| Dimension | Recommended Range |
|---|---|
| Width | 24 to 30 inches |
| Length | 36 to 48 inches |
| Clearance on each side | 42 inches minimum |
Typical cost range in the US
Pre-made butcher block work tables typically run $300 to $1,500 depending on wood species and size. A custom-built version matched to your cabinetry finish starts around $2,000 and can reach $4,500 for hardwood options with added storage features.
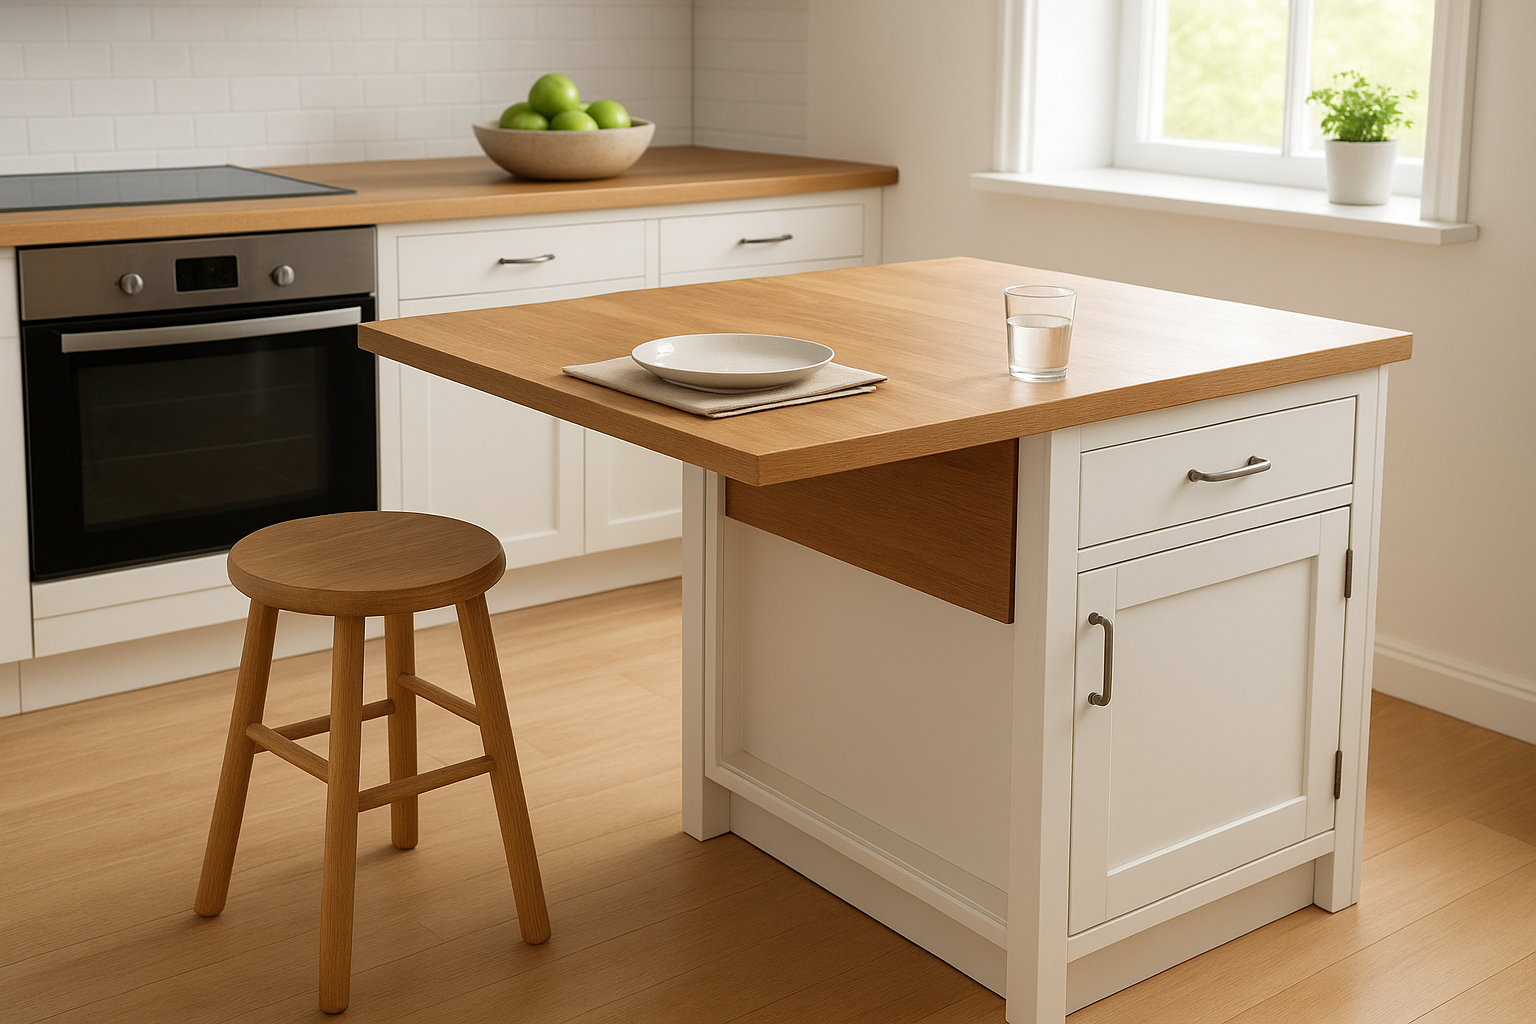
6. Add a pull-out table or fold-down leaf to the island
A pull-out table or fold-down leaf turns a compact island into a multi-functional surface that adapts to what you actually need in the moment. When you’re done cooking, the extension tucks away completely, keeping your kitchen island ideas for small kitchens from claiming floor space you can’t spare the rest of the day.
How this saves space
A fold-down or pull-out extension gives you extra prep or dining surface only when you need it. The rest of the time, it stays flush against the island or tucked inside a drawer cavity, so your walkways stay open and the kitchen doesn’t feel crowded. This approach is one of the most space-efficient upgrades you can add to any island in a compact layout.
A pull-out or fold-down surface effectively doubles your counter space without permanently doubling your island’s footprint.
Best layouts for this idea
This idea works in most small kitchen configurations, but it performs best where one end of the island faces open space rather than a wall. Strong layout matches include:
- L-shaped kitchens with a clear zone at one end of the island
- One-wall kitchens where the leaf extends toward the dining area
- Open-plan layouts where the folded surface doubles as a casual eating spot
Must-know sizing and clearance rules
Keep the extension between 12 and 18 inches deep when open so it doesn’t block traffic lanes. You still need 42 inches of clearance on all active sides, even when the leaf or table is fully extended.
| Feature | Recommended Spec |
|---|---|
| Extension depth | 12 to 18 inches |
| Minimum clearance when open | 42 inches |
Typical cost range in the US
Adding a pull-out table or fold-down leaf to a custom island typically adds $400 to $1,200 to the overall build cost depending on the hardware mechanism and how the extension integrates with the cabinet structure. A pre-built standalone island with this feature already included runs $600 to $2,500 based on construction quality and materials.
7. Build seating into the island without blocking walkways
Seating at the island is one of the most requested kitchen island ideas for small kitchens because it eliminates the need for a separate dining table. When you design the seating into the island rather than around it, you keep your floor plan clean and your traffic paths open.
How this saves space
A cantilevered overhang on one side of the island lets stools tuck completely underneath the counter surface when no one is sitting. That means the stools don’t occupy floor space you need for walking. Your kitchen functions as a prep zone and a dining area without a single extra piece of furniture taking up room.
Tucked stools under an overhang take up almost no floor space, which is exactly the kind of trade-off a small kitchen needs.
Best layouts for this idea
Seating overhangs work best when one side of the island faces open space or a dining area rather than another counter run. Strong matches include:
- L-shaped kitchens where one end of the island opens toward the living or dining zone
- One-wall kitchens where the island sits parallel to the main counter with open space behind it
- Open-plan layouts where the island acts as a natural boundary between cooking and living areas
Must-know sizing and clearance rules
Build the overhang 12 to 15 inches deep for comfortable knee clearance. Keep stool height matched to the counter: 24-inch stools for a 36-inch counter, 28 to 30-inch stools for a raised 42-inch bar top.
| Spec | Recommended Range |
|---|---|
| Overhang depth | 12 to 15 inches |
| Clearance behind seated stools | 36 to 44 inches |
Typical cost range in the US
Adding an integrated seating overhang to a custom island typically adds $500 to $1,500 to the build cost, depending on the counter material and overhang length. A fully custom island with built-in seating ranges from $3,500 to $9,000 in most US markets.
8. Pick rounded corners or a curved end to prevent bottlenecks
Sharp corners on a kitchen island are a genuine problem in tight spaces. They catch hips, slow down traffic, and make narrow walkways feel even more confined. Rounding one or both ends of your island is one of the simplest kitchen island ideas for small kitchens that makes a real difference in how the space flows daily.
How this saves space
A curved or radiused corner removes the hard 90-degree angle that tends to create a pinch point in busy kitchens. The rounded profile guides traffic naturally around the island rather than forcing people to dodge a sharp edge. You don’t gain physical square footage, but the kitchen feels and functions more open because movement through it becomes easier.
Rounding a corner doesn’t change the island’s footprint, but it changes how your kitchen feels to move through every single day.
Best layouts for this idea
This approach works well in any layout where at least one corner of the island sits in a traffic path. Strong candidates include L-shaped kitchens with a high-traffic zone near the island’s end, one-wall kitchens where people walk around the island to reach other areas, and open-plan layouts where guests and cooks regularly share the same floor space.
Must-know sizing and clearance rules
A radius of 3 to 6 inches on each curved corner is enough to eliminate the pinch-point effect without significantly changing your counter dimensions. Keep the standard 42-inch clearance on all walkable sides regardless of corner shape.
Typical cost range in the US
Adding rounded or curved ends to a custom island typically adds $200 to $800 to the build cost depending on the counter material and how many corners get shaped.
9. Max out storage with the right island base setup
Storage is often the real reason homeowners explore kitchen island ideas for small kitchens in the first place. The base configuration you choose determines how much function you actually get out of the island, and getting it right means your island works harder than any cabinet along the perimeter.
How this saves space
A well-planned island base consolidates storage that would otherwise require multiple pieces of furniture spread across your kitchen. Deep drawers on one side, pull-out shelves on another, and a built-in trash cabinet underneath can eliminate standalone storage units entirely. Fewer separate pieces means more open floor area and a cleaner layout overall.
The right base setup turns your island into the hardest-working storage unit in your kitchen.
Best layouts for this idea
Storage-focused island bases work best in kitchens where counter cabinet space is genuinely limited. L-shaped and one-wall kitchens benefit most because the island compensates for what the perimeter cabinetry can’t hold. Open-plan kitchens also gain from this setup since the island can store items you’d otherwise scatter across multiple rooms.
Must-know sizing and clearance rules
Keep the island at least 24 inches deep to accommodate full-size drawer boxes and pull-out shelving. Anything shallower and the storage becomes awkward to use. Maintain 42 inches of clearance on all walkable sides as usual.
| Feature | Recommended Spec |
|---|---|
| Minimum base depth | 24 inches |
| Drawer box depth | 18 to 21 inches |
| Walkway clearance | 42 inches minimum |
Typical cost range in the US
A custom island with a fully optimized storage base typically runs $4,000 to $9,000 depending on the hardware, drawer count, and specialty inserts included.
10. Add one high-impact feature to a compact island
When your island is small, every square inch has to earn its place. One of the smartest kitchen island ideas for small kitchens is to pick a single high-impact feature that solves a specific problem in your kitchen rather than loading a small island with too many competing elements. A built-in prep sink, a drawer microwave, or a dedicated charging station can transform a modest island into the most useful spot in the room.
How this saves space
Consolidating one key function into the island means you remove that same function from somewhere else in your kitchen. A prep sink in the island frees up counter space at the main sink for drying and staging. A drawer-style microwave tucked into the island base clears the counter entirely and eliminates the need for a separate appliance cabinet.
One well-chosen feature does more for a small kitchen than five half-considered ones packed into the same footprint.
Best layouts for this idea
This approach works across most compact layouts, including [L-shaped kitchens](https://sumancustomcarpentry.com/kitchen-renovation-before-and-after/) where the island fills a defined open zone and one-wall kitchens where counter real estate is genuinely scarce. Any kitchen where one appliance or task consistently creates a bottleneck is a good candidate for moving that function into a purpose-built island feature.
Must-know sizing and clearance rules
Size the island around the feature, not the other way around. A prep sink typically needs an island at least 24 inches wide. A drawer microwave requires a minimum 15-inch cabinet opening height. Maintain 42-inch clearances on all sides regardless of which feature you choose.
Typical cost range in the US
Adding a single specialty feature to a custom island typically adds $500 to $2,500 to the overall project cost depending on the feature type, plumbing requirements, and electrical work involved.
Quick recap and next step
These 10 kitchen island ideas for small kitchens cover everything from rolling carts to custom-built islands with integrated sinks, and every idea on this list comes back to the same principle: match the island to the kitchen, not the other way around. Whether you need a slim island for a galley layout, a fold-down leaf for extra dining space, or a storage-optimized base that replaces three separate pieces of furniture, the right fit is always the one designed around your actual floor plan and daily habits.
If you’re ready to stop working around a kitchen that doesn’t quite function the way you need it to, a custom-built island is the most reliable path to a result you’ll use well for years. At Suman Custom Carpentry, we build every island by hand at our shop in Hyannis, Cape Cod, from design through final installation. Contact us to start your custom kitchen project and we’ll figure out exactly what your space needs.