
10 Walk-In Closet Design Ideas to Maximize Storage & Style
Most walk-in closets waste space. You’ve got a rod, a shelf, and a pile of shoes on the floor because nobody planned the layout before the drywall went up. If you’re staring at an empty closet or a cluttered one, you’re probably searching for walk in closet design ideas that actually work for how you dress, not just a Pinterest photo that looks nice for five minutes.
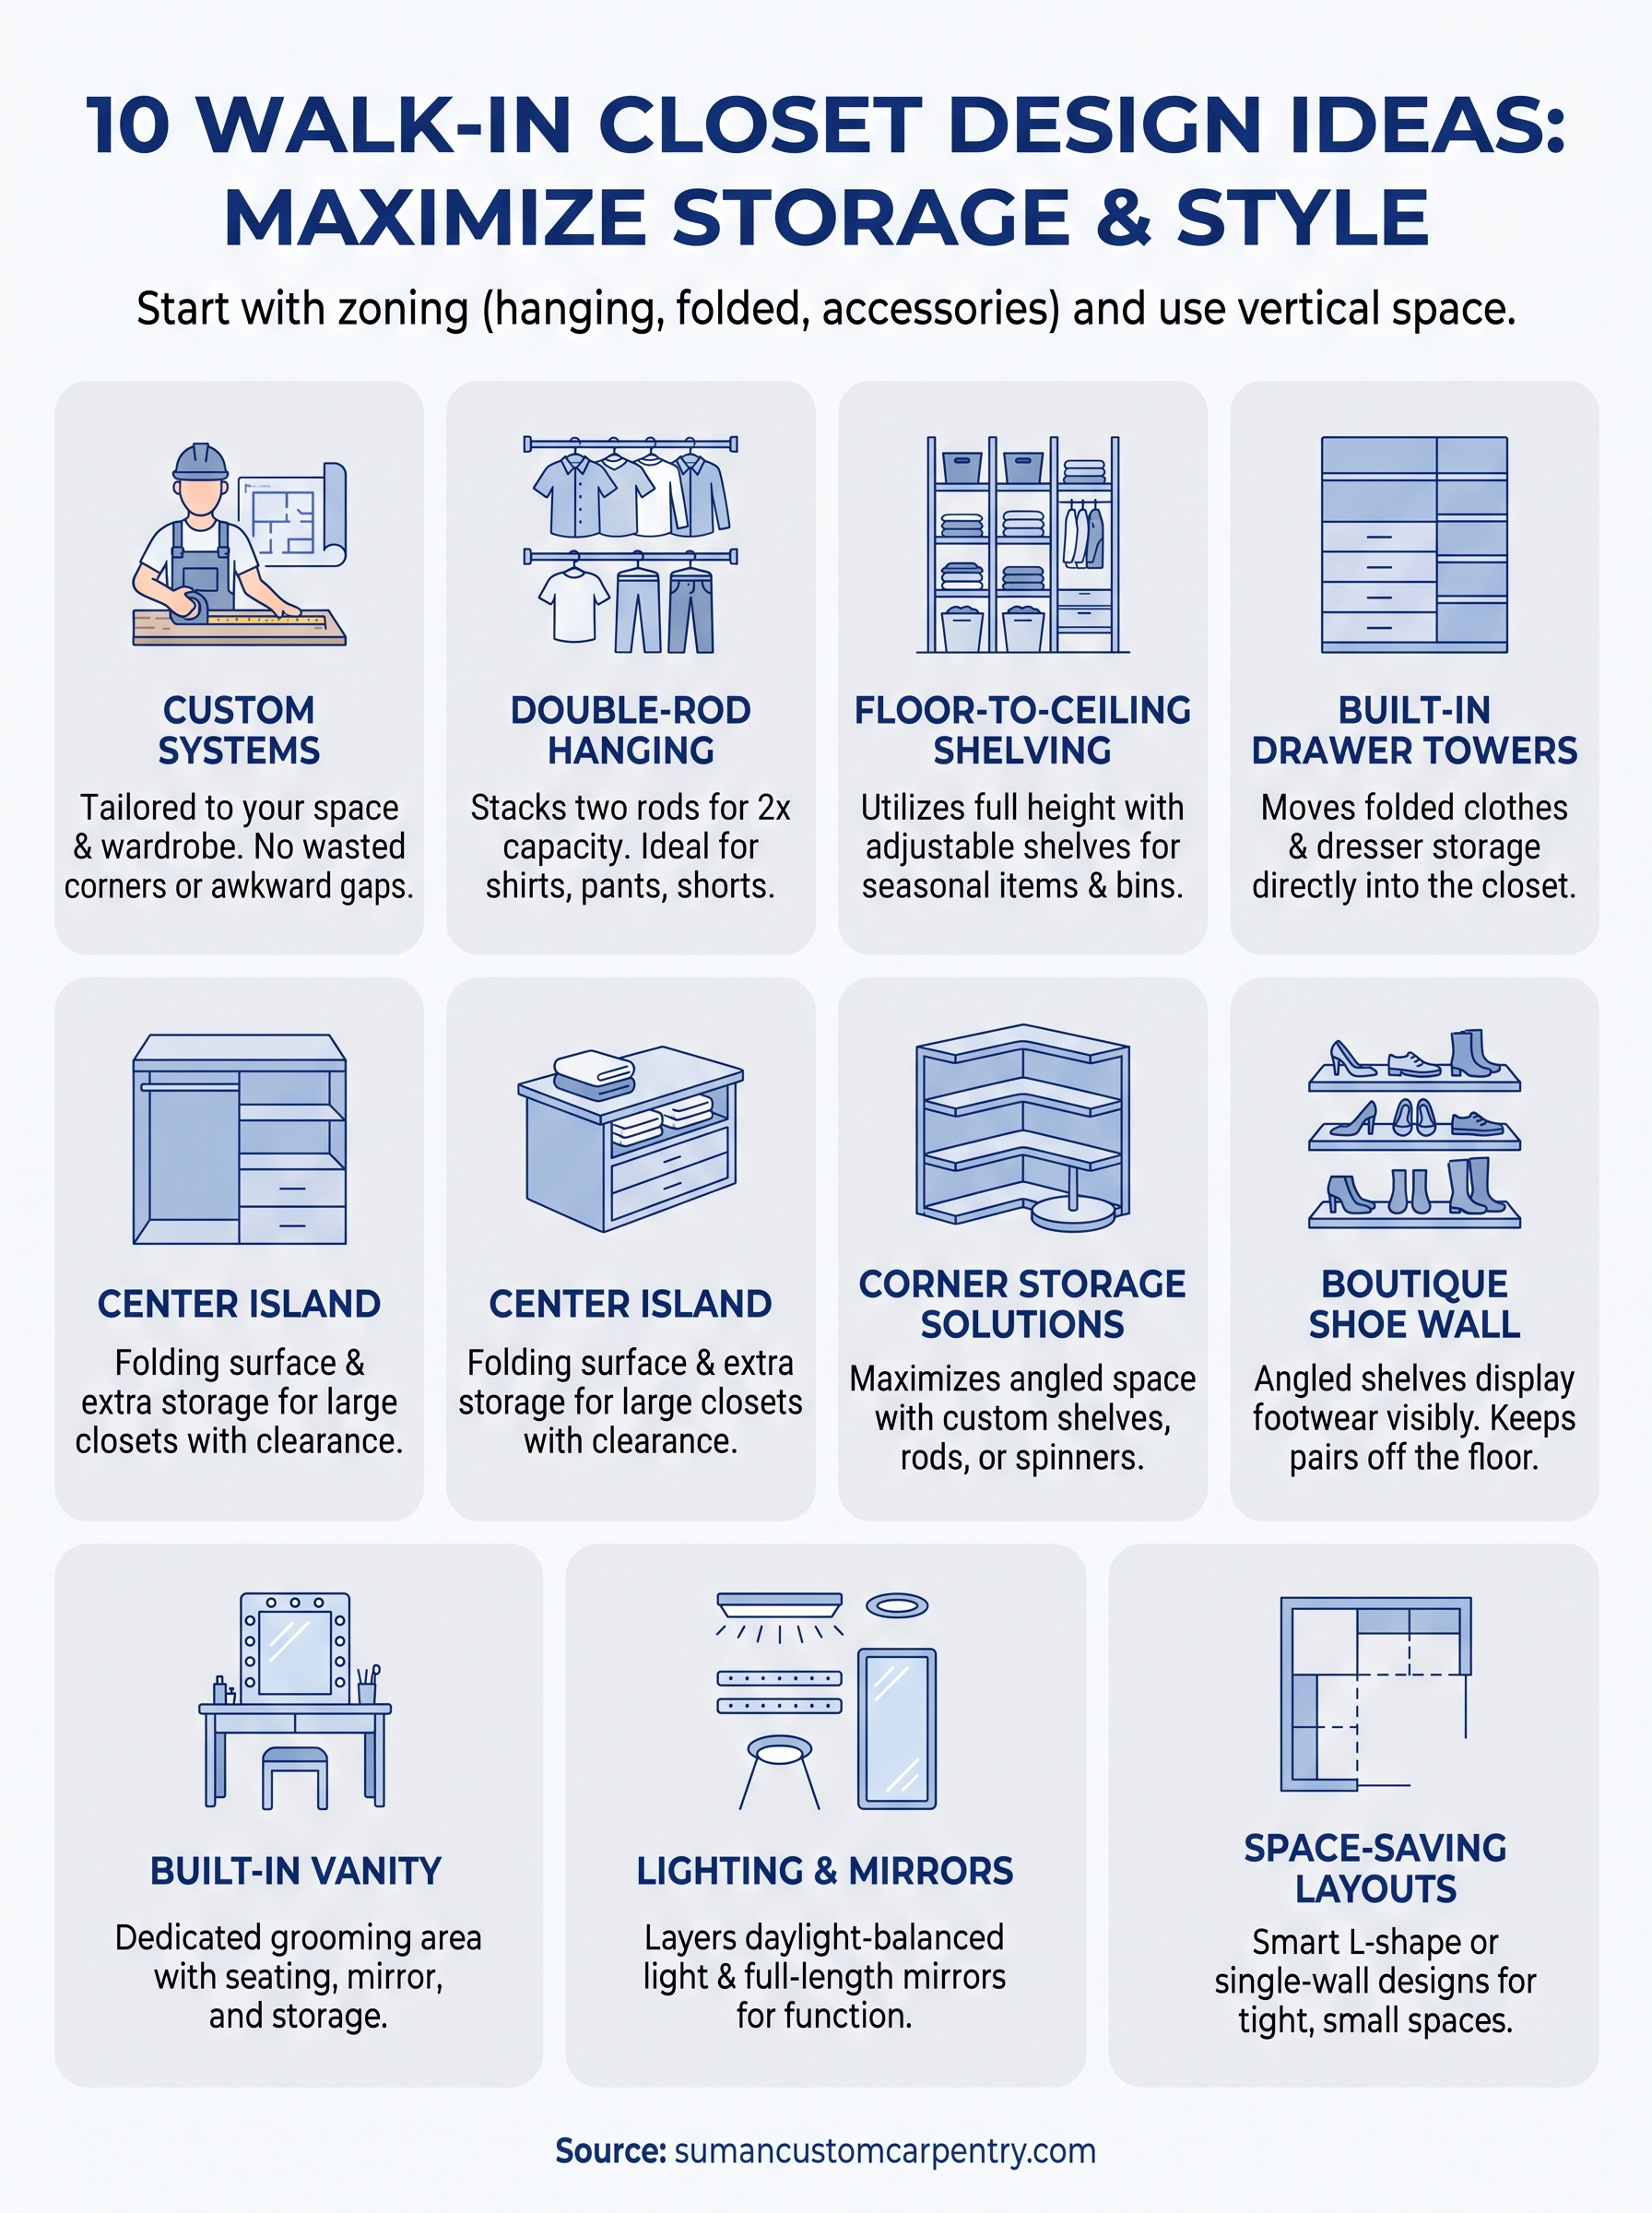
The short answer: good closet design starts with zoning by category (hanging, folded, accessories) and uses vertical space most people ignore above eye level. From there, the details like island storage, lighting, and drawer organization separate a closet that just holds clothes from one that makes getting dressed easier every single day.
Below you’ll find ten ideas we’ve built into real closets across Cape Cod homes, covering layout options, material choices, and storage tricks for small and large spaces alike. Whether you’re planning a full custom build or just rethinking what’s already there, these ideas give you a real starting point before you call a carpenter or pick up a tape measure.
1. Custom-built closet systems designed for your space
A custom-built closet system is exactly what it sounds like: shelving, rods, and drawers built to the specific dimensions of your room and the specific way you actually dress. No stock unit from a big box store bends around an HVAC vent or works with a sloped ceiling. Custom carpentry means every inch gets used, including the awkward corners and the space above the door that most closets leave empty.
How it works
The process starts with a walkthrough of your current closet or the framed-out room if you’re building new. A carpenter measures the space, asks about your wardrobe (how many hanging items, how much folded storage, whether you need a shoe wall), and sketches a layout before anything gets cut. At Suman Custom Carpentry, this happens with a design consultation where you talk through the plan with the owner directly, not a call center rep reading from a script. Once the layout is approved, everything is hand-built in a shop, finished, and installed as a complete unit rather than assembled piece by piece in your house.
A closet built to your actual wardrobe will always beat a generic kit, no matter how many add-on parts the kit includes.
Best for
This approach suits homeowners who’ve outgrown wire shelving or a builder-grade closet kit and want something that matches the rest of their home’s finish level. It’s also the right call for irregular rooms, walk-ins with angled ceilings, offset doors, or shared closets that need to split space evenly between two people with different storage needs. If you’ve measured your closet three times and still can’t make a prefab system fit without gaps, custom is the answer.
Design and cost considerations
Custom systems cost more upfront than a wire shelving kit from a hardware store, but the math changes once you count wasted space and how often cheap laminate sags or delaminates. Expect a build timeline of a few weeks depending on scope, since everything is constructed off-site before installation.
- Material choice drives most of the price difference. Plywood boxes with hardwood veneer outlast MDF, especially in humid coastal climates common on Cape Cod.
- Finish level matters too. Painted finishes typically carry shorter warranties than natural wood, which is why a company offering a lifetime guarantee on cabinet boxes and doors, with a separate warranty on paint, is worth asking about.
- Hardware like soft-close drawers and adjustable rod brackets adds cost but reduces long-term repairs.
Ask any carpenter for a written breakdown of materials, hardware, and labor before signing off, so you know exactly what you’re paying for and what’s covered if something fails down the road.
2. Double-rod hanging systems for maximum capacity
A double-rod system stacks two hanging rods, one above the other, in the same section of closet where a single rod would normally hang. Instead of one long run of shirts and dresses using six feet of vertical space, you split that space into two shorter hanging zones and roughly double how many items fit in the same footprint.
How it works
The top rod sits around 40 inches from the floor and holds folded-over pants, shorts, or short-sleeve shirts. The bottom rod sits about 40 inches below that, leaving enough clearance for items to hang without dragging on the floor. A carpenter builds this into the shelving layout during installation, spacing the rods based on your actual clothes rather than a generic measurement, since someone with a lot of blazers needs different spacing than someone with mostly folded-length shirts.
Two shorter rods almost always beat one long rod for everyday closet capacity.
Best for
Double-rod setups work best for shorter garments: shirts, folded slacks, skirts, and jackets. They’re a strong fit for anyone with a large short-hang wardrobe and limited square footage, including secondary closets, kids’ rooms, or one side of a shared his-and-hers layout. Skip this section for long dresses, robes, or full-length coats, which need a single tall rod elsewhere in the closet.
Design and cost considerations
Double-rod sections are one of the cheapest upgrades in a custom cabinetry build since they use the same materials as a single-rod section, just arranged differently. Rod height should be adjustable during planning, not fixed, because a rod set two inches too low leaves clothes brushing the shelf below. Ask your carpenter to mock up the spacing with a few real garments before final installation.
3. Floor-to-ceiling adjustable shelving
Most closets stop shelving at eye level, then leave three or four feet of dead air above it. Floor-to-ceiling shelving pushes storage all the way up, turning that wasted zone into space for bins, out-of-season clothes, or luggage you only need twice a year. It’s one of the simplest ways to add real capacity without touching the footprint of the room.
How it works
A carpenter builds a run of shelves from the floor to within a few inches of the ceiling, with adjustable pins or tracks instead of fixed brackets so you can move shelf heights as your storage needs change. Lower shelves stay at reachable heights for everyday folded items, while upper shelves hold bins, hat boxes, or seasonal gear that doesn’t need daily access. Some clients add a small rolling step stool that tucks into a corner when not in use, which keeps the top shelves functional instead of decorative.
Shelving that stops at eye level is leaving free storage on the table.
Best for
This works well for anyone with a lot of folded clothing, bins, or accessories that don’t need to hang, and it’s especially useful in smaller walk-in closets where floor space is tight but ceiling height isn’t. It also suits collectors, people with seasonal wardrobes, or anyone storing suitcases and extra linens who wants that stuff out of the main living areas.
Design and cost considerations
Adjustable shelving costs a bit more than fixed shelves because of the track hardware, but it pays off when your storage needs shift over time. Depth matters here: 12 to 16 inches works for most folded items, while anything deeper starts wasting space and hiding items behind other items.
4. Built-in drawer towers and dressers
A built-in drawer tower replaces the freestanding dresser most people keep in their bedroom, moving folded clothing storage directly into the closet where it belongs. Instead of walking between two rooms to get dressed, everything lives in one spot: hanging clothes on one wall, folded items in drawers a few feet away. It’s one of the changes clients notice fastest once they’ve lived with it.
How it works
A carpenter builds a stack of drawers, usually four to seven depending on ceiling height, directly into the closet’s cabinetry run. Deeper drawers near the bottom hold bulkier items like sweaters, while shallower drawers up top suit socks, underwear, and accessories. Soft-close hardware keeps drawers from slamming, and full-extension slides let you see everything in the back without digging. Some builds add velvet-lined jewelry trays or divided inserts for smaller items, all sized to the drawer during the shop build rather than dropped in afterward.
Moving your dresser into the closet frees up an entire wall in your bedroom.
Best for
Drawer towers suit anyone tired of a bulky dresser eating up bedroom floor space, or anyone who wants one central spot for getting dressed instead of two. They work particularly well in primary suite closets and shared his-and-hers layouts, where each side can get its own drawer stack sized to that person’s folded wardrobe.
Design and cost considerations
Drawer boxes cost more than open shelving because of the added hardware and joinery, but they hold up better under daily use if built with dovetail joints and solid-wood boxes rather than stapled particleboard. Ask about drawer depth before finalizing the layout since standard depths waste space on smaller items like folded t-shirts.
5. A center island for folding and extra storage
A center island turns the middle of a large walk-in closet into usable furniture instead of dead floor space. Think of it as a smaller version of a kitchen island, built with a flat top for folding laundry and drawers or cubbies underneath for extra storage. It’s a feature most closets skip entirely, mainly because it only makes sense once a room has enough square footage to spare.
How it works
Builders typically frame the island as a freestanding cabinet base topped with a durable surface like painted wood, laminate, or occasionally stone if the budget allows. Drawers on one or both sides hold folded clothes, accessories, or linens, and some designs leave open cubbies for baskets or shoe storage. Height usually lands around waist level, matched to whoever uses the closet most, so folding a stack of towels doesn’t mean hunching over.
A center island only earns its keep if the room has enough clearance to walk fully around it without bumping a drawer.
Best for
Islands work best in larger primary suite closets, generally 80 square feet or more, where there’s enough clearance on all sides to open drawers comfortably. Couples sharing a closet benefit most, since the island gives a neutral folding zone that doesn’t belong to either side. Skip this idea in smaller closets where an island would block walkways or force awkward angles around the door.
Design and cost considerations
Islands add meaningful cost since they require a full cabinet build rather than wall-mounted shelving, plus a finished top surface that can handle daily use. Measure clearance carefully before committing, leaving at least 36 inches on every side for comfortable movement. Adding a drawer or two on the far side, rather than leaving it solid, squeezes more value from the added footprint.
6. Corner storage solutions that use every inch
Corners are the part of a closet most people write off as dead space, but they hold real storage potential once you build for the angle instead of ignoring it. A square shelf or straight rod run leaves a triangle of unused air in every corner, and over the life of a closet that adds up to several cubic feet of wasted room. Good walk in closet design ideas always account for these gaps instead of letting them become a junk pile for stray shoes and overflow hangers.
How it works
Carpenters solve corner waste with a few specific builds: angled shelving cut to fit the exact corner geometry, a diagonal hanging rod that runs across the corner rather than parallel to either wall, or a small lazy Susan-style unit for accessories that need to spin into reach. Each solution gets measured on-site since no two corners in an older Cape Cod home are perfectly square. The goal is a build that follows the actual angle of the walls rather than a generic 90-degree assumption.
A corner left unplanned is storage you’re paying for and never using.
Best for
This idea suits L-shaped closets and any layout where two walls meet at an angle that would otherwise sit empty. It’s especially useful in smaller closets where every square foot matters, and in shared closets where a corner unit can hold accessories without eating into either person’s main hanging space.
Design and cost considerations
Angled builds cost more in labor than straight shelving because of the custom cuts involved, but the material cost stays similar. Ask your carpenter to mock up the corner angle with cardboard or scrap wood before final installation, since a half-inch error in an angled cut is far more noticeable than the same error on a flat wall.
7. A boutique-style shoe display wall
A shoe display wall takes footwear off the floor and turns it into something closer to a retail display, with each pair angled and visible instead of piled in a bin or shoved into a shared cubby. It’s the feature clients photograph most once installed, and it solves the actual problem most closets have: shoes end up on the floor because there’s no dedicated spot for them at all.
How it works
A carpenter builds a run of angled shelving cut at roughly 15 to 20 degrees, deep enough to hold a shoe heel-first with the toe pointing slightly upward for visibility. Shelf spacing typically runs 6 to 8 inches apart for flats and sneakers, with taller gaps built in separately for boots. Some builds add a small lip or clear acrylic strip at the shelf edge to keep pairs from sliding forward, and a few clients ask for LED strip lighting tucked under each shelf to mimic a store display.
A shoe wall only works if every pair has an assigned spot, otherwise it turns back into a pile within a month.
Best for
This idea suits anyone with a sizable shoe collection who wants it visible rather than boxed away, and it works especially well for primary suite closets with a full wall to dedicate to the feature. It’s also a strong fit for households where shoes are the main clutter culprit, since a dedicated wall removes the excuse to leave pairs on the floor.
Design and cost considerations
Angled shoe shelving costs more per linear foot than flat shelving because of the extra cuts and support needed at an angle, and boot storage needs deeper, taller sections than sneaker or flat storage. Measure your actual shoe collection, including height and width, before finalizing shelf counts, since guessing usually leaves either wasted space or too few slots.
8. A built-in vanity or dressing area
A built-in vanity turns a corner of your walk-in closet into a real dressing station, with a seated spot for makeup, jewelry, or just tying your shoes without balancing on one foot. It’s a feature that pulls double duty, since it handles grooming tasks that would otherwise happen at a bathroom counter or a bedroom dresser. For anyone building out walk in closet design ideas around daily routine, this is often the piece that gets used every single morning.
How it works
A carpenter builds a countertop section, usually 24 to 30 inches wide, set at seated height with knee clearance underneath for a stool or chair. Drawers flank the seating area on one or both sides, sized for makeup trays, jewelry, or hair tools, and a mirror mounts directly above, often flanked by sconces or a lighted mirror frame. Some builds tuck an outlet into the cabinetry itself so hair dryers and straighteners plug in without a cord running across the floor.
A dressing area only earns its spot if it replaces a trip to another room, not just adds another surface to clutter.
Best for
This feature suits anyone who currently gets ready at a bathroom counter shared with other family members, or anyone with enough jewelry and makeup to warrant dedicated storage separate from hanging clothes. It works especially well in primary suite closets with room to spare, and it’s a strong addition for couples where one person wants a dedicated seated space while the other sticks to hanging and folded storage.
Design and cost considerations
Vanity builds cost more than standard cabinetry because of the countertop material, electrical work for outlets and lighting, and the seating clearance that eats into usable square footage. Stone or solid-surface tops hold up better than laminate under daily makeup spills. Confirm outlet placement with your carpenter before the walls close up, since adding one later means opening drywall again.
9. Lighting, mirrors, and finishing touches
Good lighting and a full-length mirror change how a closet functions, not just how it looks. A closet lit by a single overhead bulb hides the true color of clothes and makes it nearly impossible to check an outfit before you walk out the door. These finishing touches sit at the bottom of most walk in closet design ideas lists, but they’re often the difference between a closet that works and one that just holds clothes.
How it works
Carpenters typically layer three light sources: recessed ceiling fixtures for overall brightness, LED strips tucked under shelves or inside drawers for task lighting, and a dedicated light near any mirror to avoid shadows on your face. Fixtures should land close to 4000K color temperature, which reads as neutral daylight rather than the yellow cast of older bulbs or the blue tint of cheap LEDs. A full-length mirror mounts on a door or a dedicated wall, ideally with light on both sides rather than overhead only.
A closet without daylight-balanced lighting means you’re guessing at colors until you get outside.
Best for
This upgrade suits every closet, regardless of size, since lighting problems show up whether you’re working with 30 square feet or 300. It matters most for closets with no natural light, which describes the vast majority of interior walk-ins built inside a home.
Design and cost considerations
LED strip lighting adds modest cost compared to a full fixture rewire, and many builds run on motion sensors so lights switch on when you open the door. Confirm wiring plans with your carpenter before drywall closes, since retrofitting outlets or hardwired fixtures later costs more than planning them into the original build.
10. Space-saving layouts for small walk-in closets
A small walk-in closet, anything under roughly 25 square feet, still beats a standard reach-in if you plan the layout instead of copying a design meant for a bigger room. The trick isn’t cramming more in, it’s picking the right shape and skipping features that only work with extra square footage. A well-planned small closet can outperform a poorly planned large one, since every inch actually gets used.
How it works
Carpenters typically default to an L-shaped or single-wall layout for tight closets, since a U-shape or center island needs clearance that small rooms don’t have. Hanging rods go on the longer wall, shelving or a narrow drawer stack fills the shorter run, and the door swing gets measured first so nothing blocks it once installed. Sliding or pocket doors free up floor space that a swinging door would otherwise claim, and mirrors mounted on the door face add visual depth without using any extra room.
In a small closet, the layout you choose matters more than any single feature you add to it.
Best for
This approach suits secondary bedroom closets, older Cape Cod homes with tighter original footprints, and any walk-in under about 25 square feet where an island or double-rod section would block the door or a walkway. It also fits budget-conscious renovations where a full custom build isn’t in scope but smarter organization still is.
Design and cost considerations
Small closets cost less overall simply because there’s less material and labor involved, but per-square-foot pricing can run higher since every shelf and rod needs precise measuring to avoid wasted gaps. Light-colored finishes and a single mirror make the space read larger without adding square footage. Skip deep shelving here, 12 inches max keeps walkways clear.
Turning your closet into a favorite room
None of these ten ideas need to happen all at once. Pick the two or three that solve your actual problem, maybe a double-rod section and better lighting, and build from there as budget allows. The closets that work best over time usually started small and grew once the owner saw what was possible with zoned storage and real vertical planning.
What separates a closet you tolerate from one you actually enjoy using every morning comes down to fit. A custom-built layout matched to your wardrobe, your ceiling height, and your daily routine will always outperform a generic kit, no matter how many accessories you bolt onto it.
If you’re ready to stop guessing and start building something that fits your space and your life, get in touch with Suman Custom Carpentry for a design consultation and see what your closet could actually look like.